Deploying on Google Cloud VM
Deploying your API on Cloud VM allows you to:
- Run your scrapers 24/7
- Access your scrapers from anywhere via HTTP Endpoints
- Scale to multiple instances based on your scraping needs
This guide walks you through deploying your Botasaurus Desktop API on a Google Cloud VM instance.
Prerequisites
This guide uses Google Cloud VM, but the steps apply to any cloud provider (AWS, Azure, DigitalOcean, etc.) as long as the VM runs a Debian or Ubuntu-based OS.
Step-by-Step Deployment Guide
1. Reserve a Static IP Address
First, we'll reserve a static IP address. A static IP ensures your VM is always reachable at the same IP address.
-
Create a Google Cloud Account if you don't already have one.
-
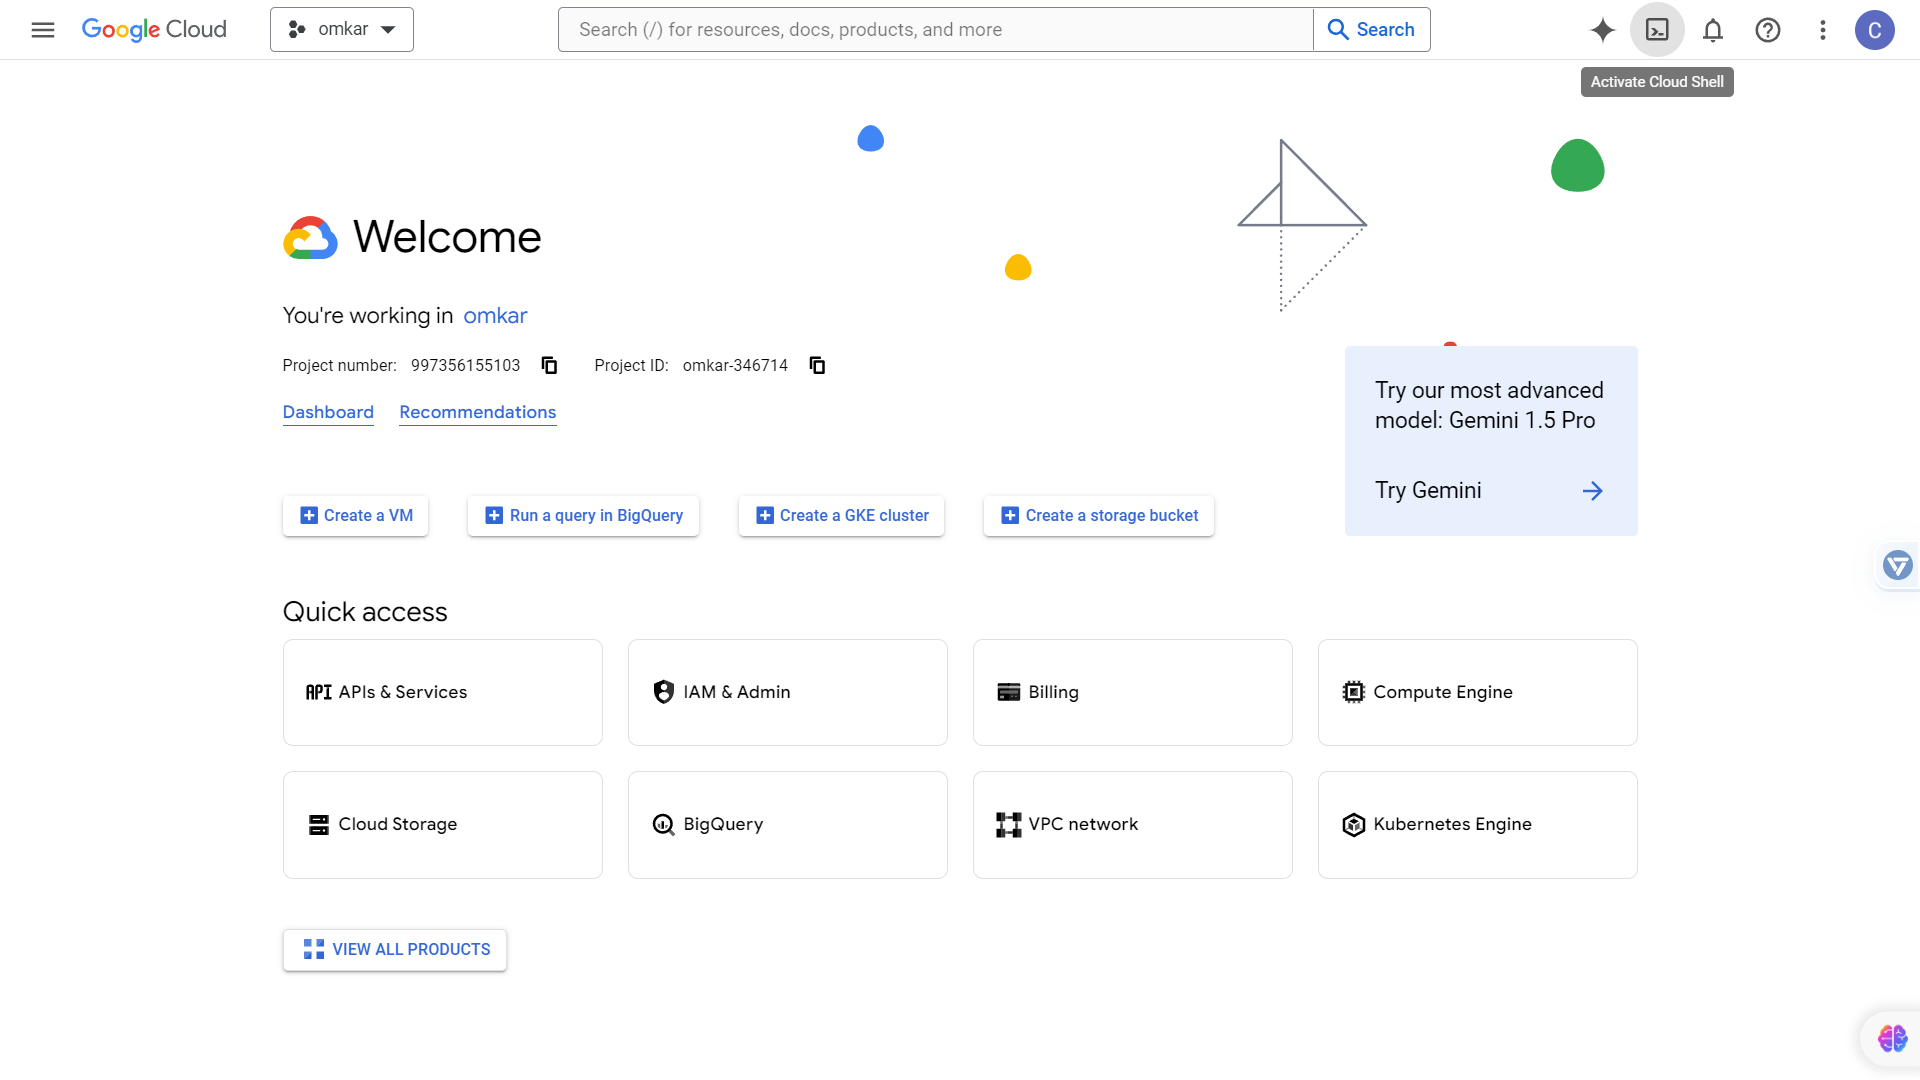
Visit the Google Cloud Console and click the Cloud Shell button. A terminal will open up.
-
Install the Botasaurus CLI and create a static IP address by running the following commands:
python -m pip install bota --upgrade
python -m bota create-ip # Create a static IP address for your VM
The CLI will prompt you for a name for your VM. Use a relevant name like your app name, such as
yahoo-finance.Name: yahoo-finance
Next, it will ask for a region. Press Enter to accept the default (
us-central1), which offers the lowest-cost VMs.Region: Default
This creates a static IP address that you'll use to access your app. You will assign this IP to your VM in the next step.
2. Create a Google Cloud VM
-
Go to VM Instances and create a VM with these specifications. You may change the Machine Type and Boot Disk Size based on your scraping needs:
Section Setting Value Notes Machine configuration Name yahoo-finance Use your app name as the instance name Machine configuration Region us-central1 Must match the region you selected for the static IP. Machine configuration Zone Any Leave it any zone within selected region Machine configuration Series E2 Cost-effective choice Machine configuration Machine Type e2-medium 2 vCPU, 4 GB memory. Change based on your needs OS and storage Boot Disk Type Standard persistent disk Cheapest disk, suitable for scraping OS and storage Boot Disk Size 20 GB Change based on your storage needs Data protection Back up your data No backups No backups needed for scraping, as the data can be easily regenerated. Networking Firewall/Allow HTTP traffic ✓ Required for accessing API via HTTP Networking Firewall/Allow HTTPS traffic ✓ Required for accessing API via HTTPS Networking Firewall/Allow Load Balancer Health Checks ✓ - Networking Network Interfaces/External IPv4 address yahoo-finance-ip Select the static IP you created in the previous step. Observability Ops Agent Uncheck Install Ops Agent for Monitoring and Logging Helps reduce logging costs 
-
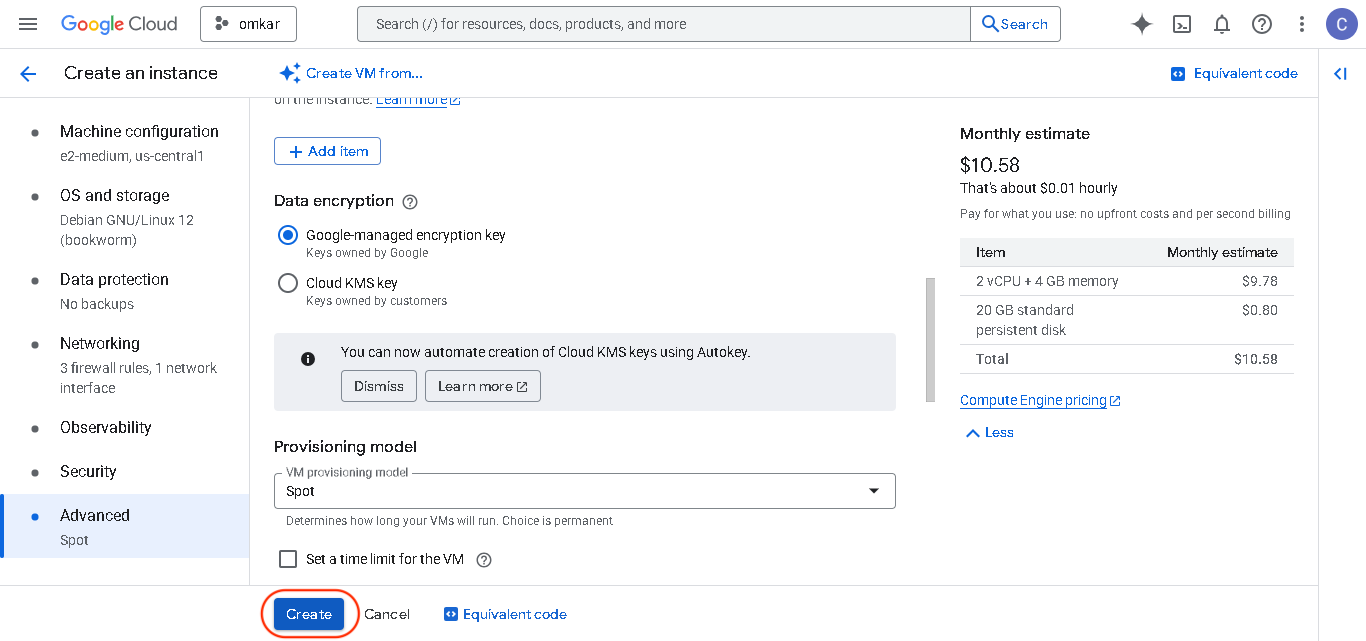
Optionally, if you're scraping data for your own needs, enable Spot VMs as they are 60-91% cheaper than standard VMs. Enable them by going to Advanced > Provisioning model and selecting Spot.
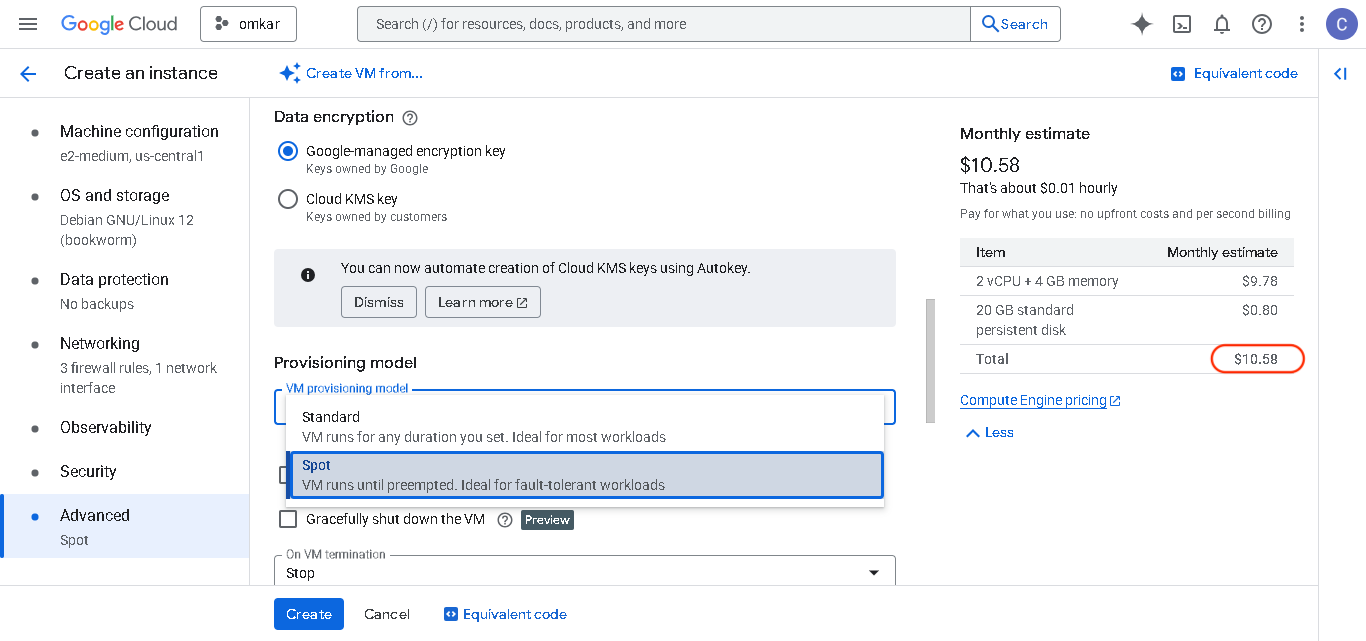 warning
Don't use Spot VMs for customer-facing APIs or mission-critical applications, as they can be stopped by Google at any time if the resources are needed elsewhere.
-
Click the Create button. The VM will be provisioned in a few minutes.
-
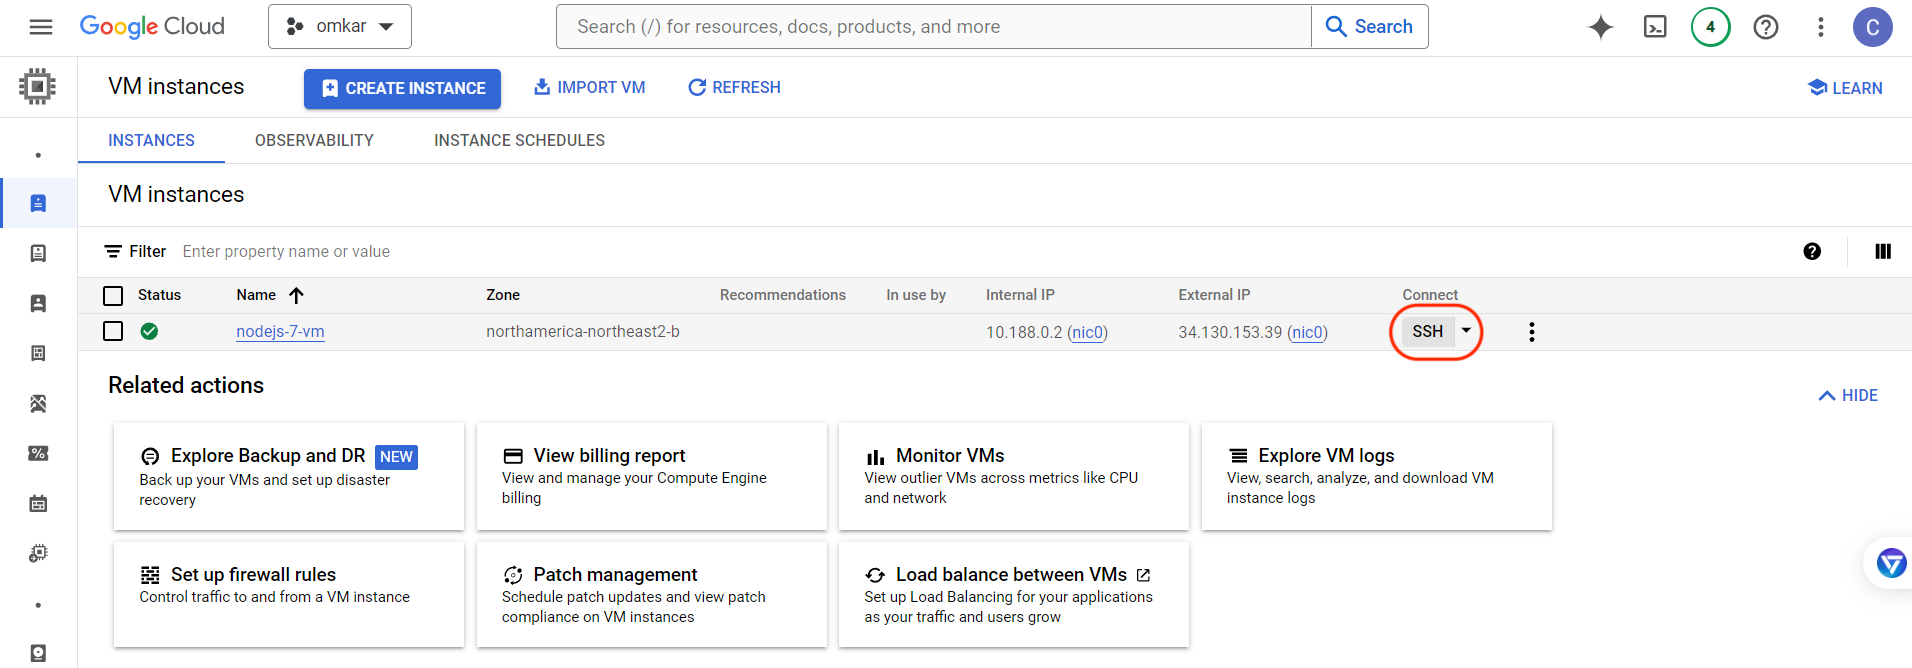
Once the VM is running, connect to it by clicking the SSH button on the VM Instances page.
3. Installing Your Desktop App
Now that your VM is ready, let's install your Botasaurus Desktop API.
-
First, install the necessary packages on your VM by running the command below. This script installs Botasaurus CLI and the Apache web server to manage requests to your app.
curl -sL https://raw.githubusercontent.com/omkarcloud/botasaurus/master/vm-scripts/install-bota-desktop.sh | bash
-
Upload your app to S3 following the packaging and publishing guide. A Debian installer will be saved in the S3 bucket, which we will use in the next step. It looks like this:
https://your-bucket.s3.amazonaws.com/Your-App-amd64.deb -
Next, install the desktop application on the VM.
- If you have already uploaded your app to S3, replace the link in the command below with your own Debian installer URL.
- If you only want to test the installation, keep the sample URL as is.
python3 -m bota install-desktop-app --debian-installer-url https://yahoo-finance-extractor.s3.us-east-1.amazonaws.com/Yahoo+Finance+Extractor-amd64.deb Configuration Options
The
install-desktop-appcommand supports these options:--port: Sets the port for the app (e.g.,8001). An alternative toApiConfig.setApiPort.--api-base-path: Adds a prefix to all API routes (e.g.,/yahoo-finance). An alternative toApiConfig.setApiBasePath.--skip-apache-request-routing: Disables automatic Apache configuration for the API. Use it if you want to manually configure other load balancers like Nginx.
When the installation completes, you'll see a link to your API documentation. Visit it see the api.
 highlight
To host additional applications on the same VM, you must use the --port and --api-base-path flags to prevent conflicts:
--portwith different ports (e.g.,--port 8001)--api-base-pathwith unique paths (e.g.,--api-base-path /amazon-invoices)
For example, run this command to add an Amazon Invoice extractor alongside the Yahoo Finance extractor:
python3 -m bota install-desktop-app \
  --debian-installer-url https://amazon-invoice-extractor.s3.us-east-1.amazonaws.com/Amazon+Invoice+Extractor-amd64.deb \
  --port 8001 \
  --api-base-path /amazon-invoices
The Amazon Invoice API will now be available at: http://<your-vm-ip>/amazon-invoices.
How to Uninstall the Desktop App?
Before uninstalling, download any important data. This action is irreversible and will result in permanent data loss.
To uninstall the application from the VM, use one of the following methods:
Method 1: Using Debian Installer URL
Replace https://yahoo-finance-extractor.s3.us-east-1.amazonaws.com/Yahoo+Finance+Extractor-amd64.deb with your app's Debian installer URL:
python3 -m bota uninstall-desktop-app --debian-installer-url https://yahoo-finance-extractor.s3.us-east-1.amazonaws.com/Yahoo+Finance+Extractor-amd64.deb
Method 2: Using Package Name
-
Find your package name in
package.json:
-
Uninstall using the package name:
python3 -m bota uninstall-desktop-app --package-name yahoo-finance-extractor
How to Delete the VM and Avoid Incurring Further Charges?
Before deleting VM, download any important data to avoid permanent loss.
To prevent ongoing costs, you must delete both the VM instance and its static IP address as follows:
-
Delete the static IP by running the following command:
python -m bota delete-ipThe CLI will prompt you for the name of the VM you created in the first step. Enter the name and press Enter.

-
Go to VM Instances and delete your VM.
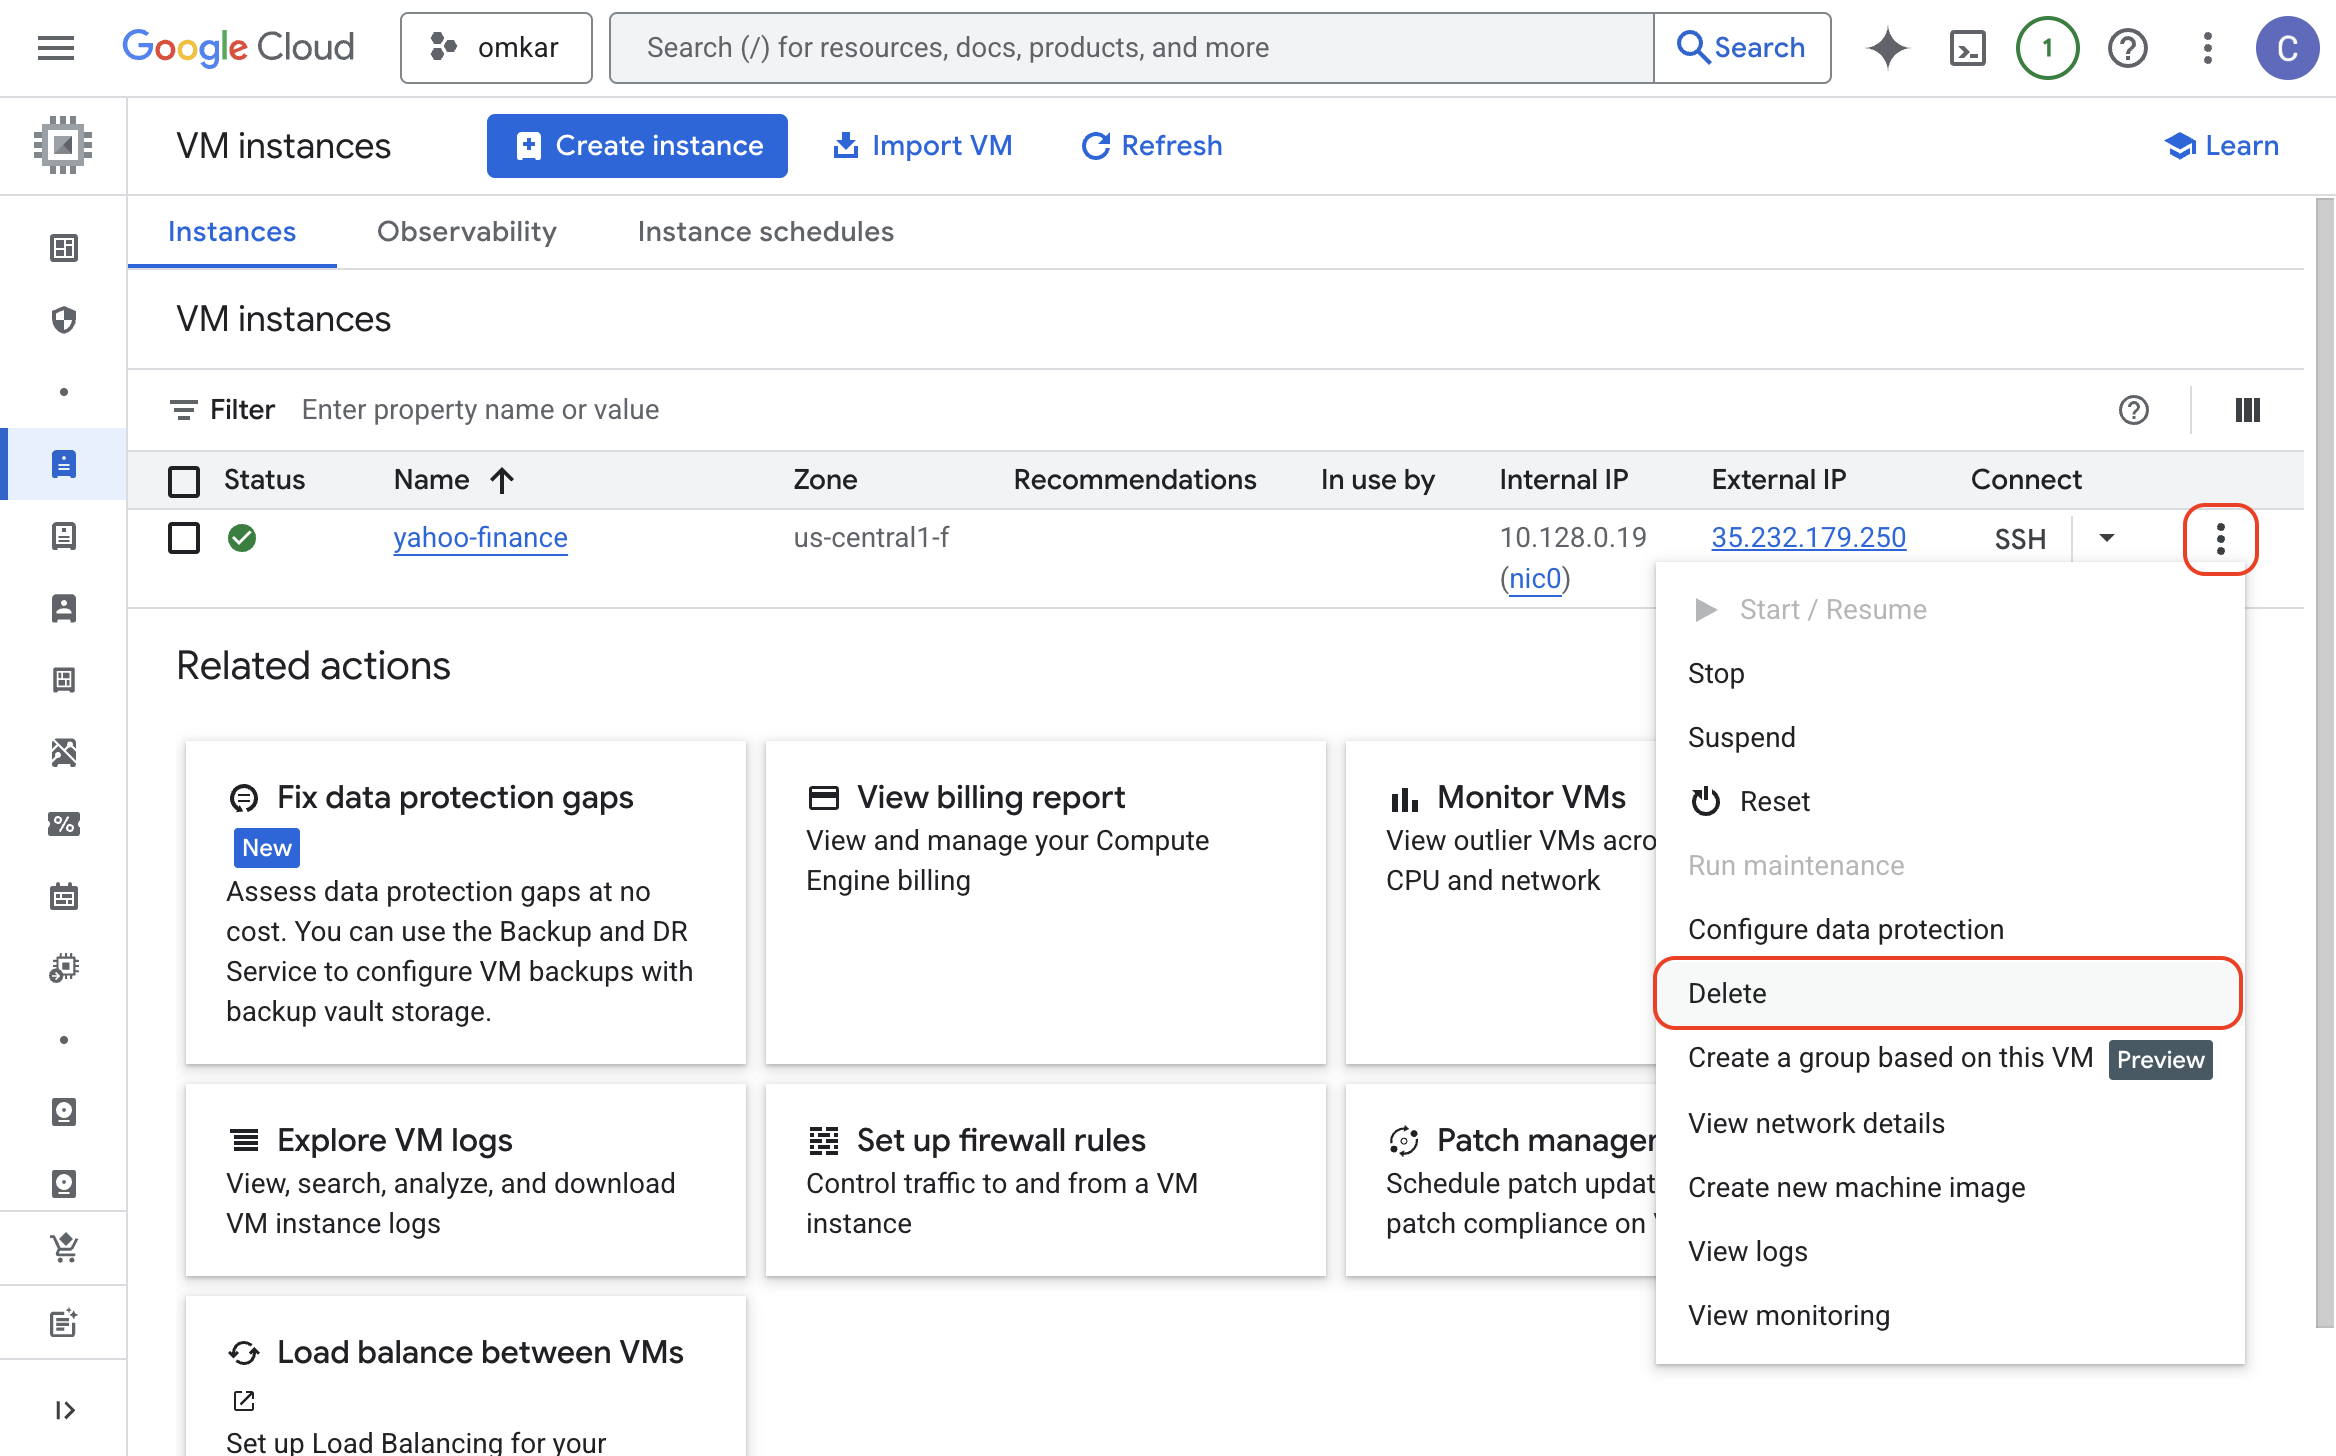
That's it! You have successfully deleted the VM and the IP. You will not incur any further charges.
How to Reduce Compute Costs?
Running VMs is expensive, but there are a few decent ways to reduce costs:
-
Choose the right machine type. Avoid overprovisioning CPU and memory. Start with a smaller instance like
e2-mediumfor browser-based scrapers ande2-smallfor requests/task-based scrapers.Then, check the CPU and memory usage on the VM Instance Observability Page.
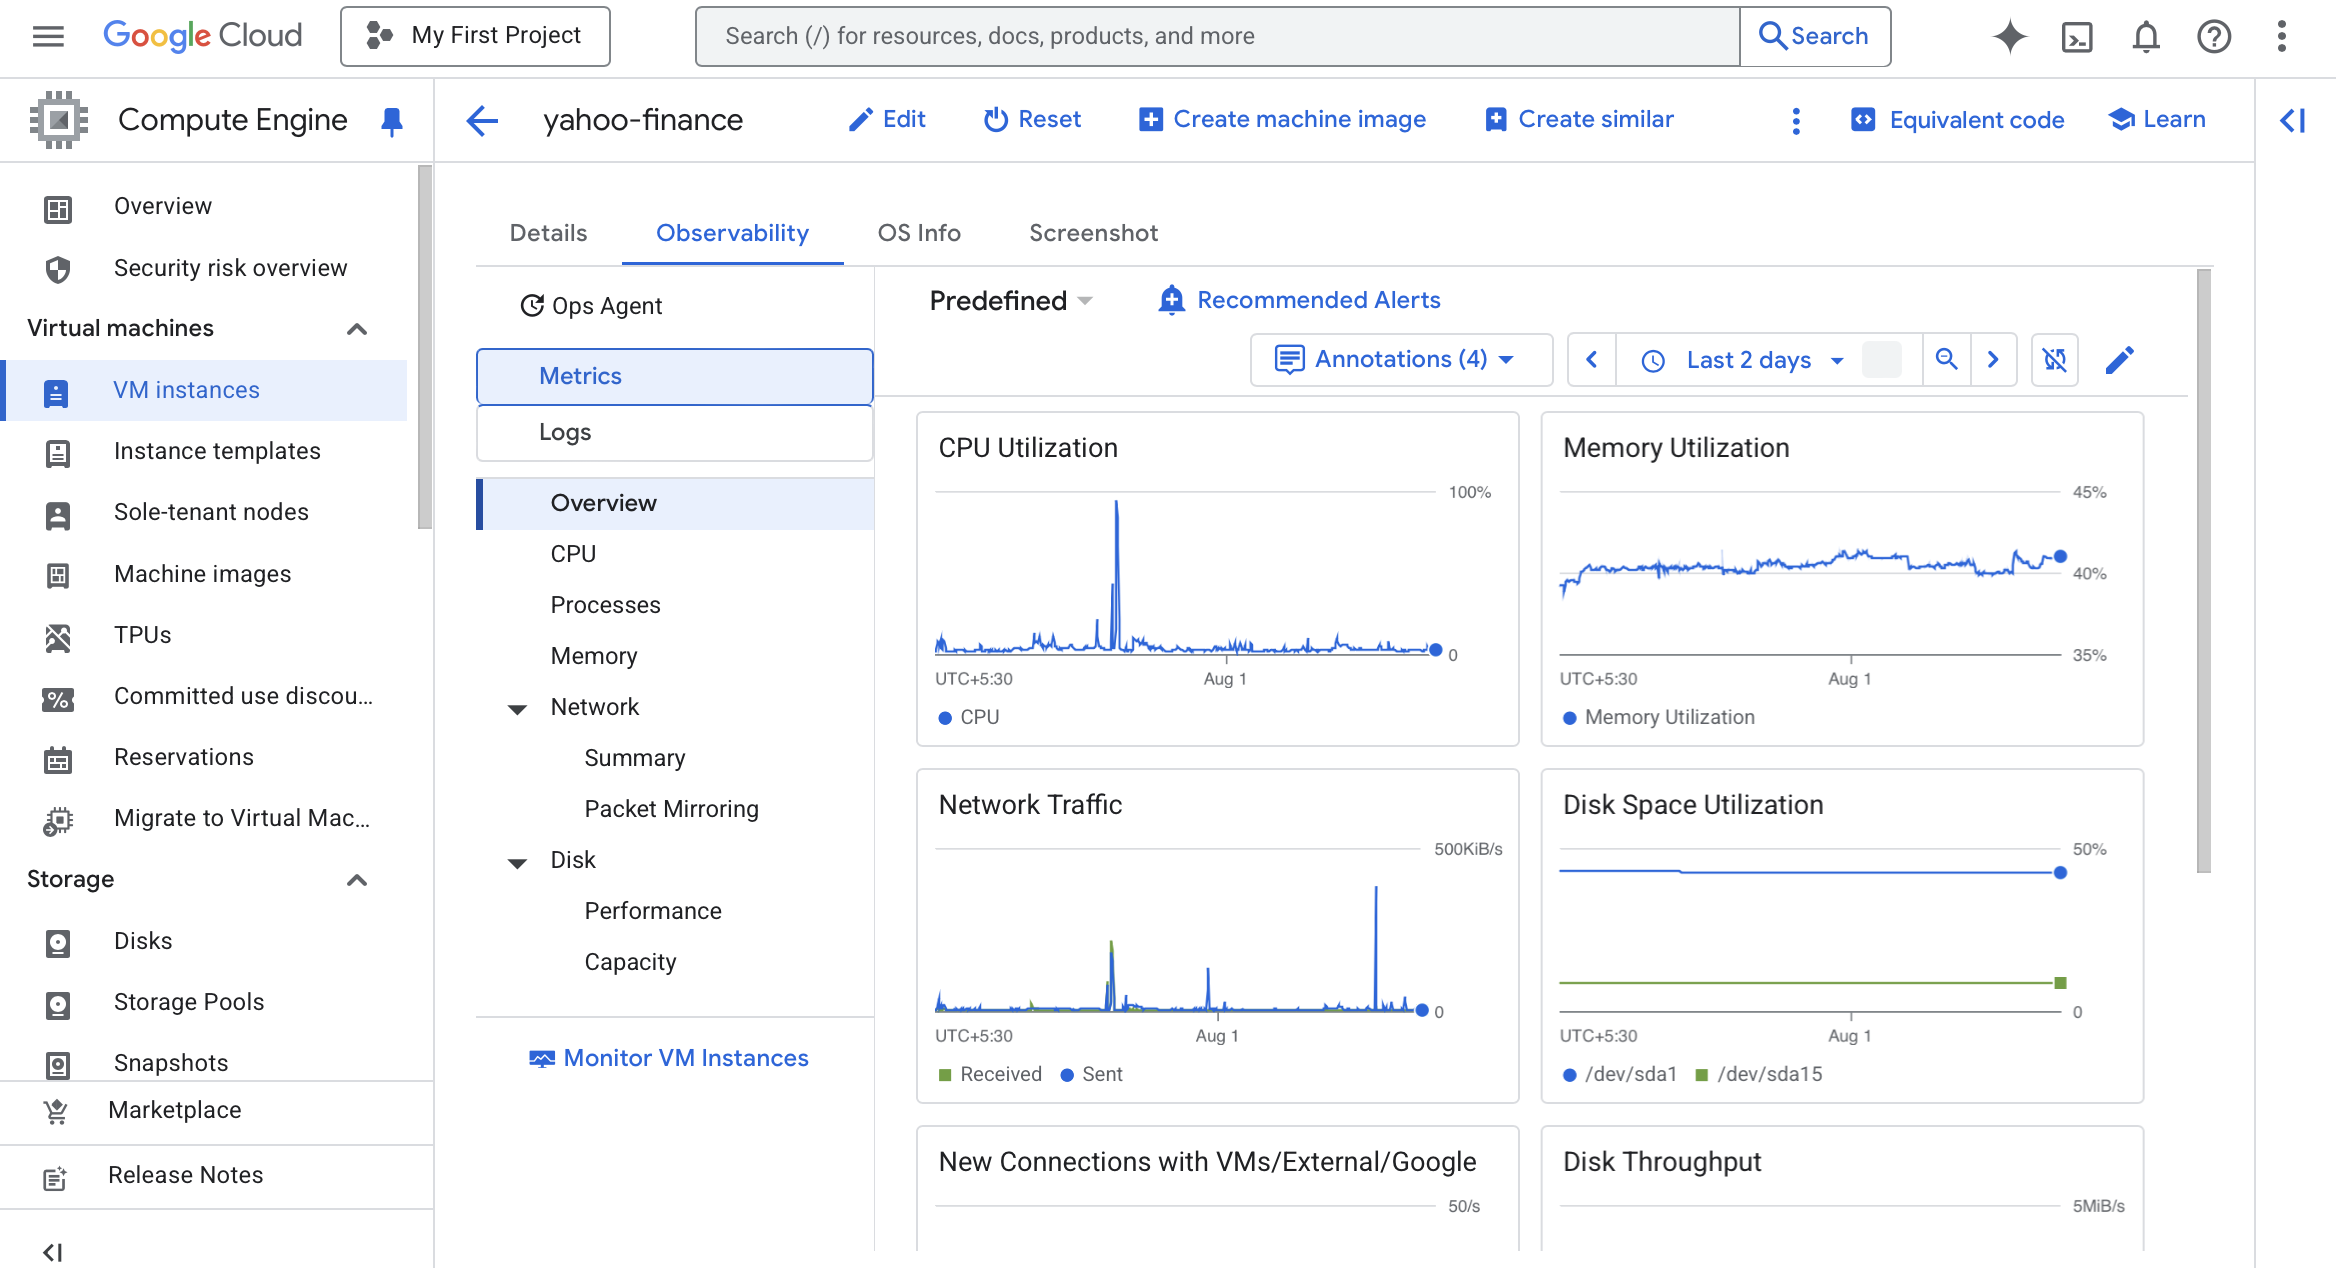
If you find your VM's CPU and memory are underutilized, you can downgrade to a smaller machine type. If they're overutilized, you can upgrade to a larger machine type.
-
Use Spot VMs for personal/non-critical workloads. Spot VMs are up to 60-91% cheaper than standard VMs, but they can be stopped by Google at any time if the resources are needed elsewhere.
The Botasaurus task management system is fault-tolerant, making it well-suited for Spot VMs.
Spot VMs are perfect for:
- Personal scraping
- Batch jobs where you can check the results later
Avoid Spot VMs when:
- Running customer-facing APIs that require high availability
- Running mission-critical applications that cannot tolerate downtime
To use a Spot VM, when creating VM, go to Advanced > Provisioning model and select Spot.
-
If you have a stable, long-term workload, you can achieve significant savings by committing to 1-year (37% discount) or 3-year terms (55-70% discount).
CUDs: Pros and ConsPro: Significant discounts for predictable workloads. Con: You are locked into paying for the committed resources for the entire term, even if you stop using the VM. We recommend running a VM with on-demand pricing for 2 months to confirm your needs before committing.
Should I Choose On-Demand, 1-Year CUD, or 3-Year CUD?
Excellent question. Choosing the right GCP pricing model can save you thousands of dollars in compute costs, so read this carefully.
Let's simplify the decision by calculating the "break-even" point—the moment when a longer commitment becomes the cheaper option.
Step 1: Find Your Monthly Costs
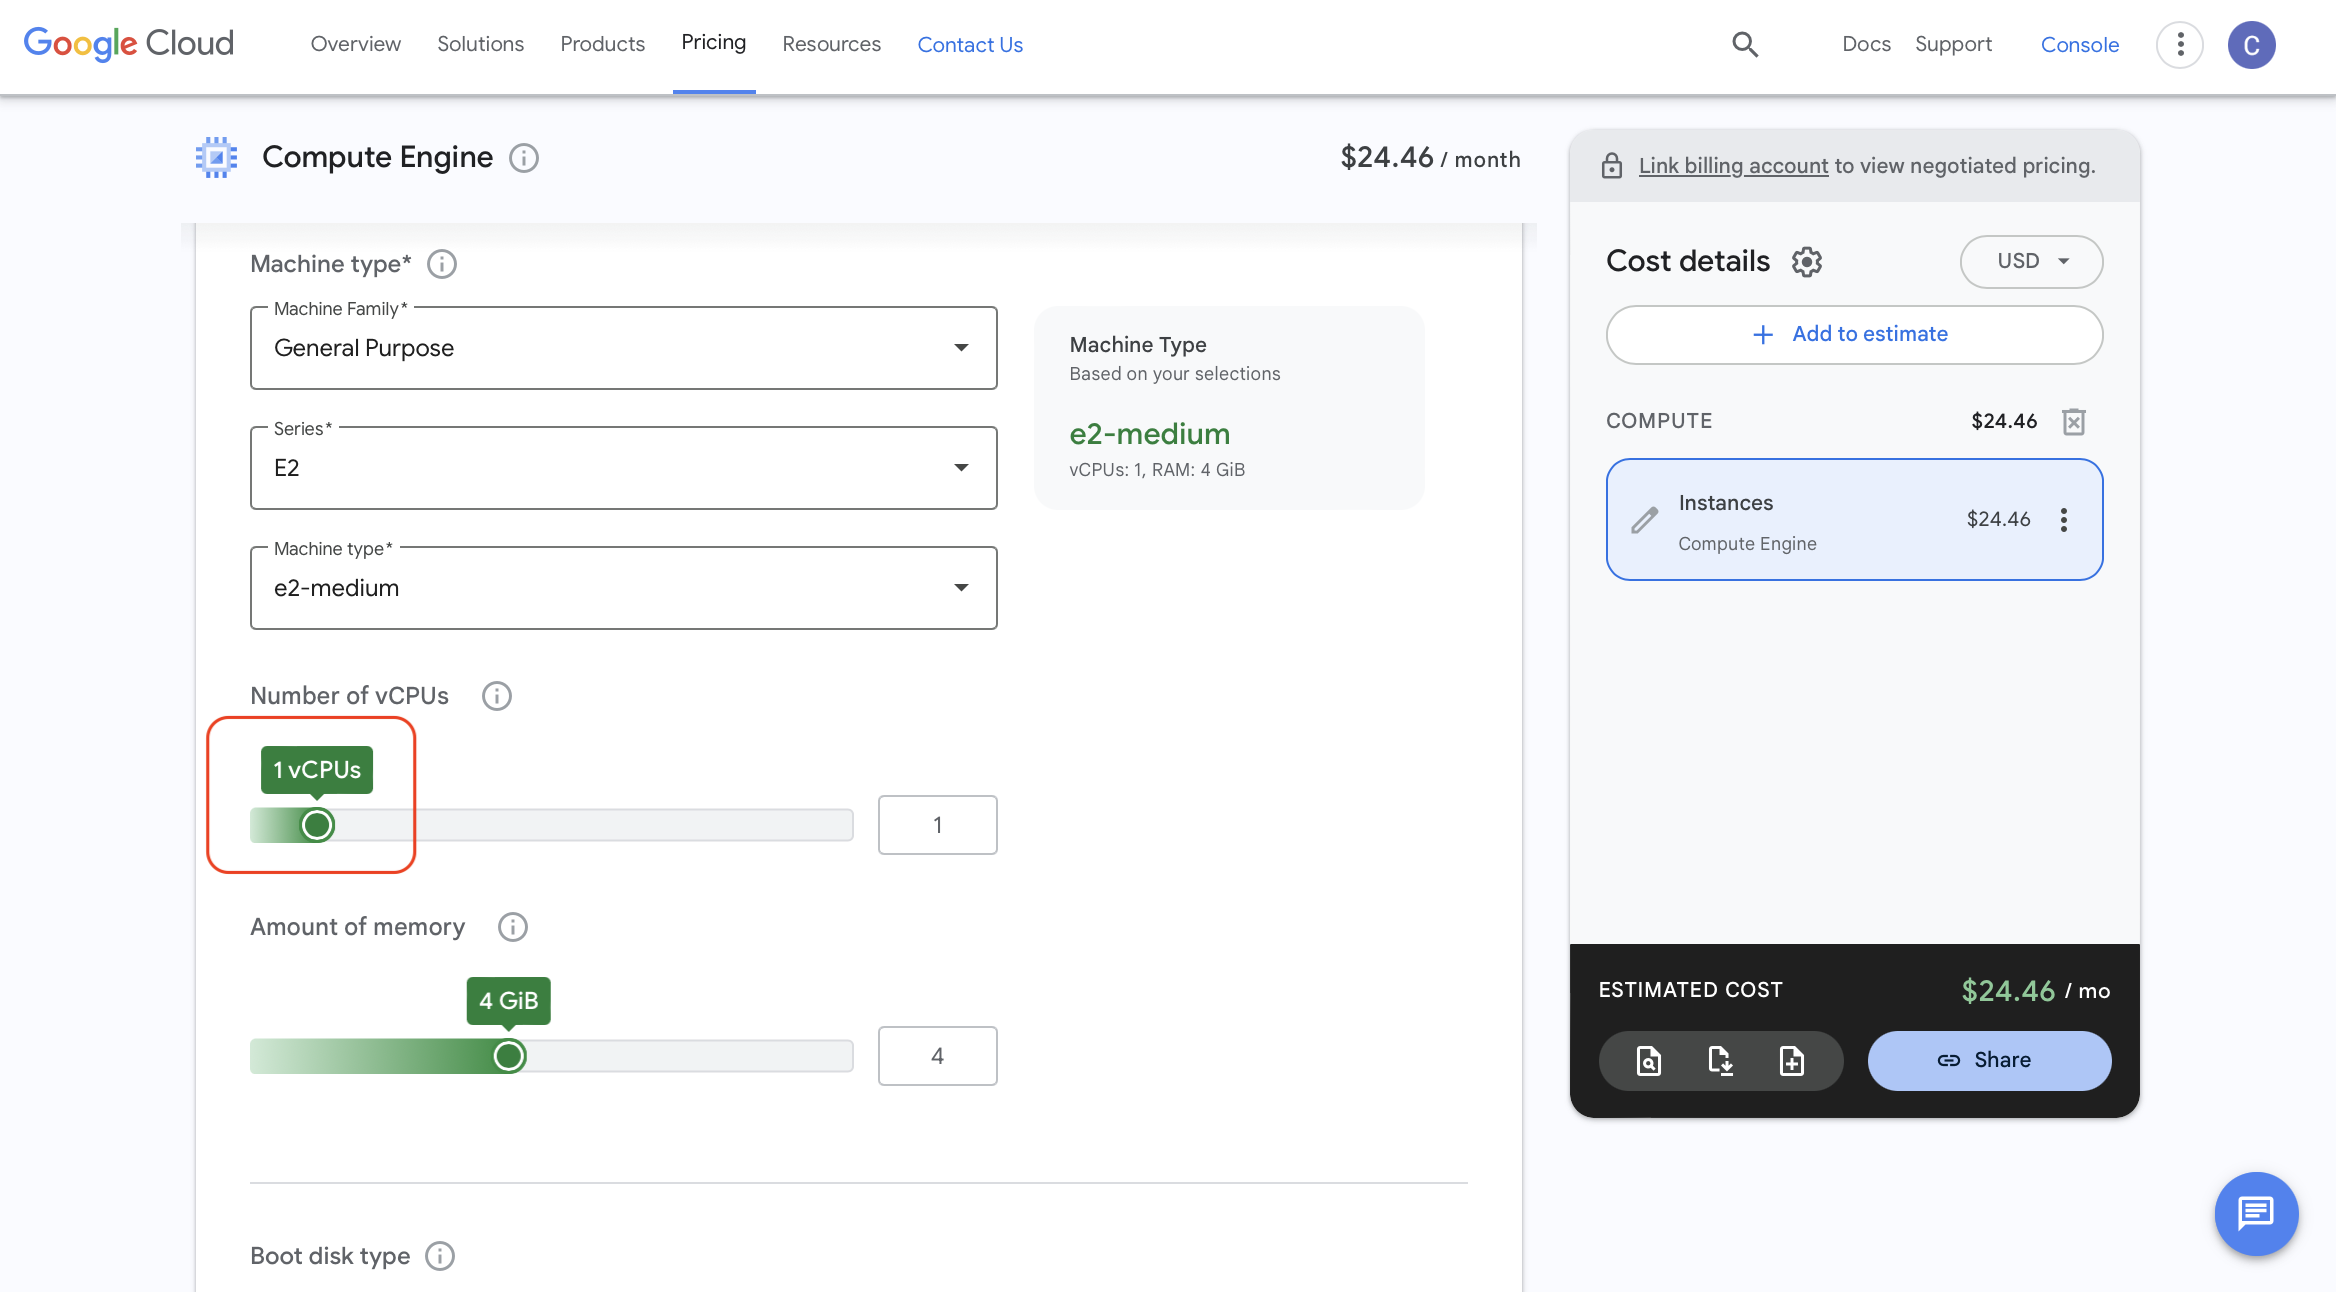
First, you need the numbers. Go to the GCP Pricing Calculator and find the monthly costs for your machine type across all three pricing models.
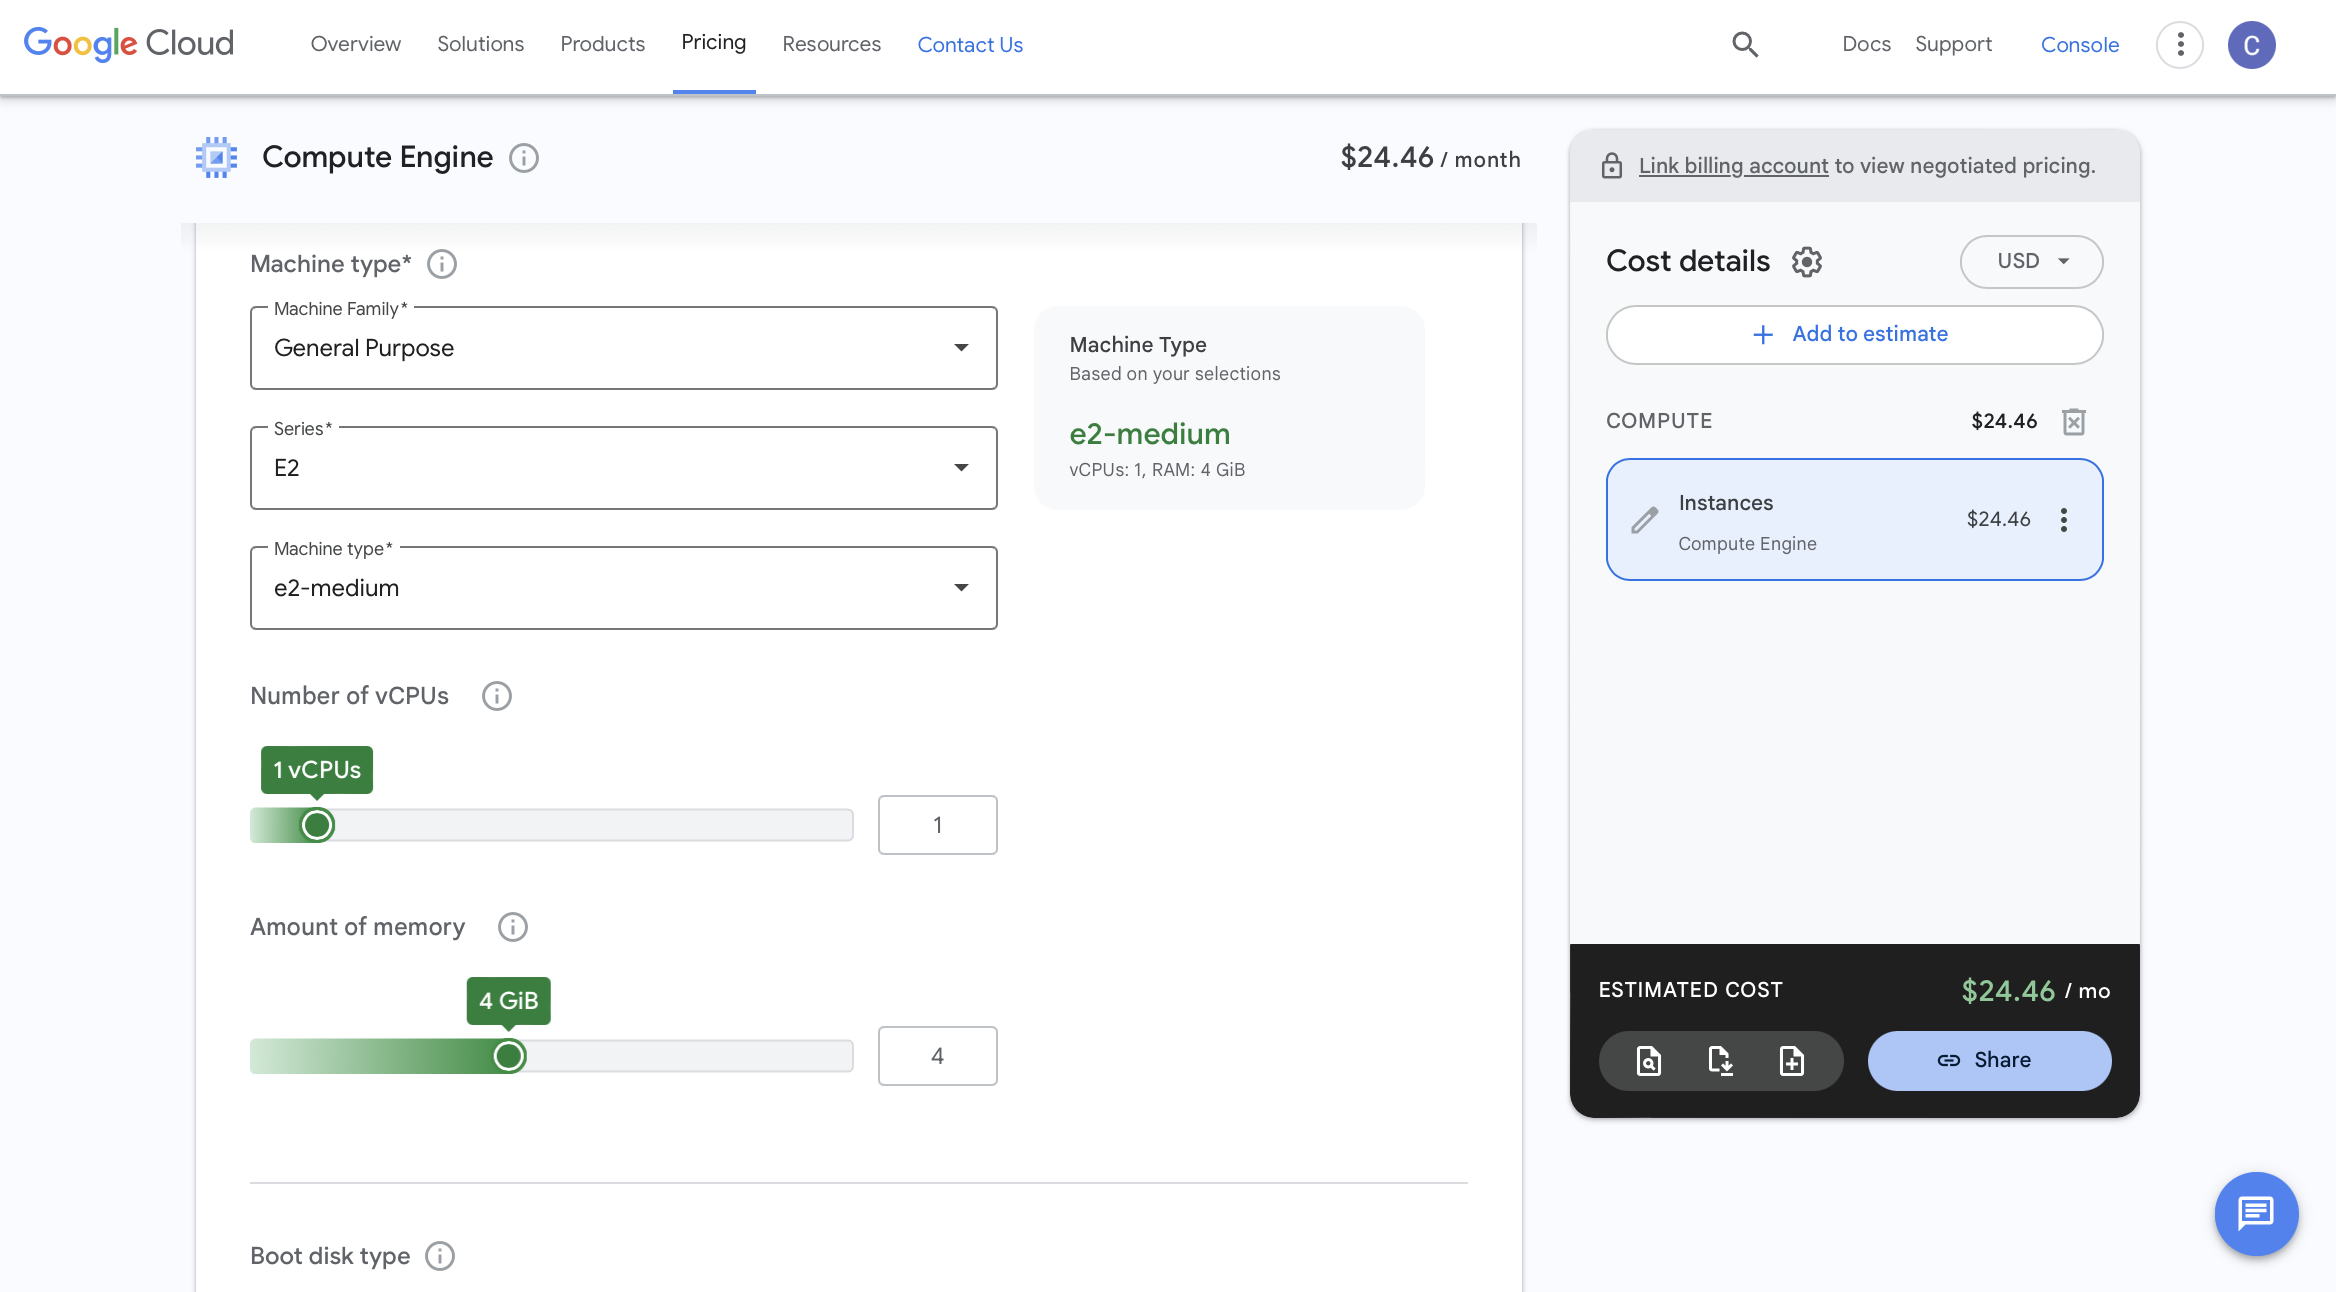
For this example, we'll use an e2-medium instance with a 20GB Standard Persistent Disk:
- On-Demand Price: $24.46/month
- 1-Year CUD Price: $15.41/month
- 3-Year CUD Price: $11.01/month
Step 2: Calculate the Break-Even Points
With these prices, we can answer two key questions by setting up simple equations.
When does a 1-Year CUD beat On-Demand pricing?
When you choose a CUD, you're committed to paying for the full term, regardless of usage. The break-even point is the number of months it would take for your on-demand spending to equal the total fixed cost of the 1-year commitment.
- Total cost of a 1-Year Commitment: 12 months × $15.41/month = $184.92
Let's find the break-even point in months (X):
X months × On-Demand Price = Total 1-Year CostX × $24.46 = $184.92X = $184.92 / $24.46X = 7.5 months
Conclusion: If you expect to need the virtual machine for 8 months or more, the 1-Year CUD is the wise choice.
When does a 3-Year CUD beat consecutive 1-Year CUDs?
This is the most important decision for long-term projects. We want to find when locking in for 3 years becomes more profitable than renewing 1-year CUD commitments.
- Total cost of a 3-Year Commitment: 36 months × $11.01/month = $396.36
Let's find how many months (X) of the 1-year plan this total 3-year cost would cover:
X months × 1-Year CUD Price = Total 3-Year CostX × $15.41 = $396.36X = $396.36 / $15.41X = 25.7 months
Conclusion: The financial break-even point is approximately 2 years and 2 months. If you're confident your resource will be needed for 26 months or longer, the 3-Year CUD is the more financially sound choice from day one.
Step 3: Ask the Critical Question
Now, look at your project and your business, then ask one simple question:
"How long will my app need to be online?"
Step 4: Choose Your Scenario
Based on your answer, choose the most appropriate pricing model:
-
Choose On-Demand Pricing if: You're just starting out, have no customers, or expect the server to run for less than 8 months. This offers maximum flexibility with no commitment.
-
Choose a 1-Year CUD if: You expect your app to run for at least 8 months but are unsure about a 2+year timeframe. This provides significant savings over on-demand pricing without a multi-year lock-in. Recommended scenarios include:
- A new B2B service with 10-50 paying customers
-
Choose a 3-Year CUD if: You're confident your application will run for at least 2 years and 2 months. This is the best choice for stable, long-term workloads. Recommended scenarios include:
- A business website that you're sure will be online for the foreseeable future (e.g., for omkar.cloud, I chose a 3-year CUD)
- A popular scraping API with 100+ paying customers
Summary Table
| Plan | Best For | Risk | Savings |
|---|---|---|---|
| On-Demand | < 8 months usage, uncertain projects | None | 0% |
| 1-Year CUD | 8-26 months usage, moderate certainty | Low | ~37% |
| 3-Year CUD | 26+ months usage, high certainty | Medium | ~55% |
Break-Even Table
Here's a table showing the approximate break-even months for different E2 machine types (with a 20GB persistent disk). Note that the break even months are the same across all E2 types:
| Machine Type | Break-even: On-Demand vs 1-Year CUD | Break-even: 1-Year CUD vs 3-Year CUD |
|---|---|---|
| e2-small | ~8 months (7.5) | ~2 years, 2 months (25.7) |
| e2-medium | ~8 months (7.5) | ~2 years, 2 months (25.7) |
| e2-standard-2 | ~8 months (7.5) | ~2 years, 2 months (25.7) |
How to Calculate for Any Machine Type
For any other machine type, simply plug the prices from the GCP Pricing Calculator into these formulas:
Break-even months for On-Demand vs 1-Year CUD:
= (1-Year CUD Monthly Cost × 12) / On-Demand Monthly Cost
Break-even months for 1-Year CUD vs 3-Year CUD:
= (3-Year CUD Monthly Cost × 36) / 1-Year CUD Monthly Cost
Maths is awesome, isn't it? Use this knowledge to choose the right CUDs, and save significant money on compute costs.
How to Apply Committed Use Discounts?
Step 1: Find your CUD Requirements
Before purchasing CUDs, carefully analyze your resource needs:
-
Monitor your VM's Observability Page for at least 1 month to identify underutilized resources. If your VM consistently uses less than 50% of its RAM/CPU, consider downgrading to a smaller machine type first.
-
Visit the CUD Analysis Page to see your current memory and vCPU usage.
-
Next, find your instance's vCPU count using the Pricing Calculator.
For quick reference, here are the vCPU counts for common E2 machine types:
Machine Type vCPUs e2-micro 0.25 e2-small 0.5 e2-medium 1 e2-standard-2 2 e2-standard-4 4 Use Pricing Calculator vCPU ValuesThe vCPU count displayed when creating an instance is incorrect:
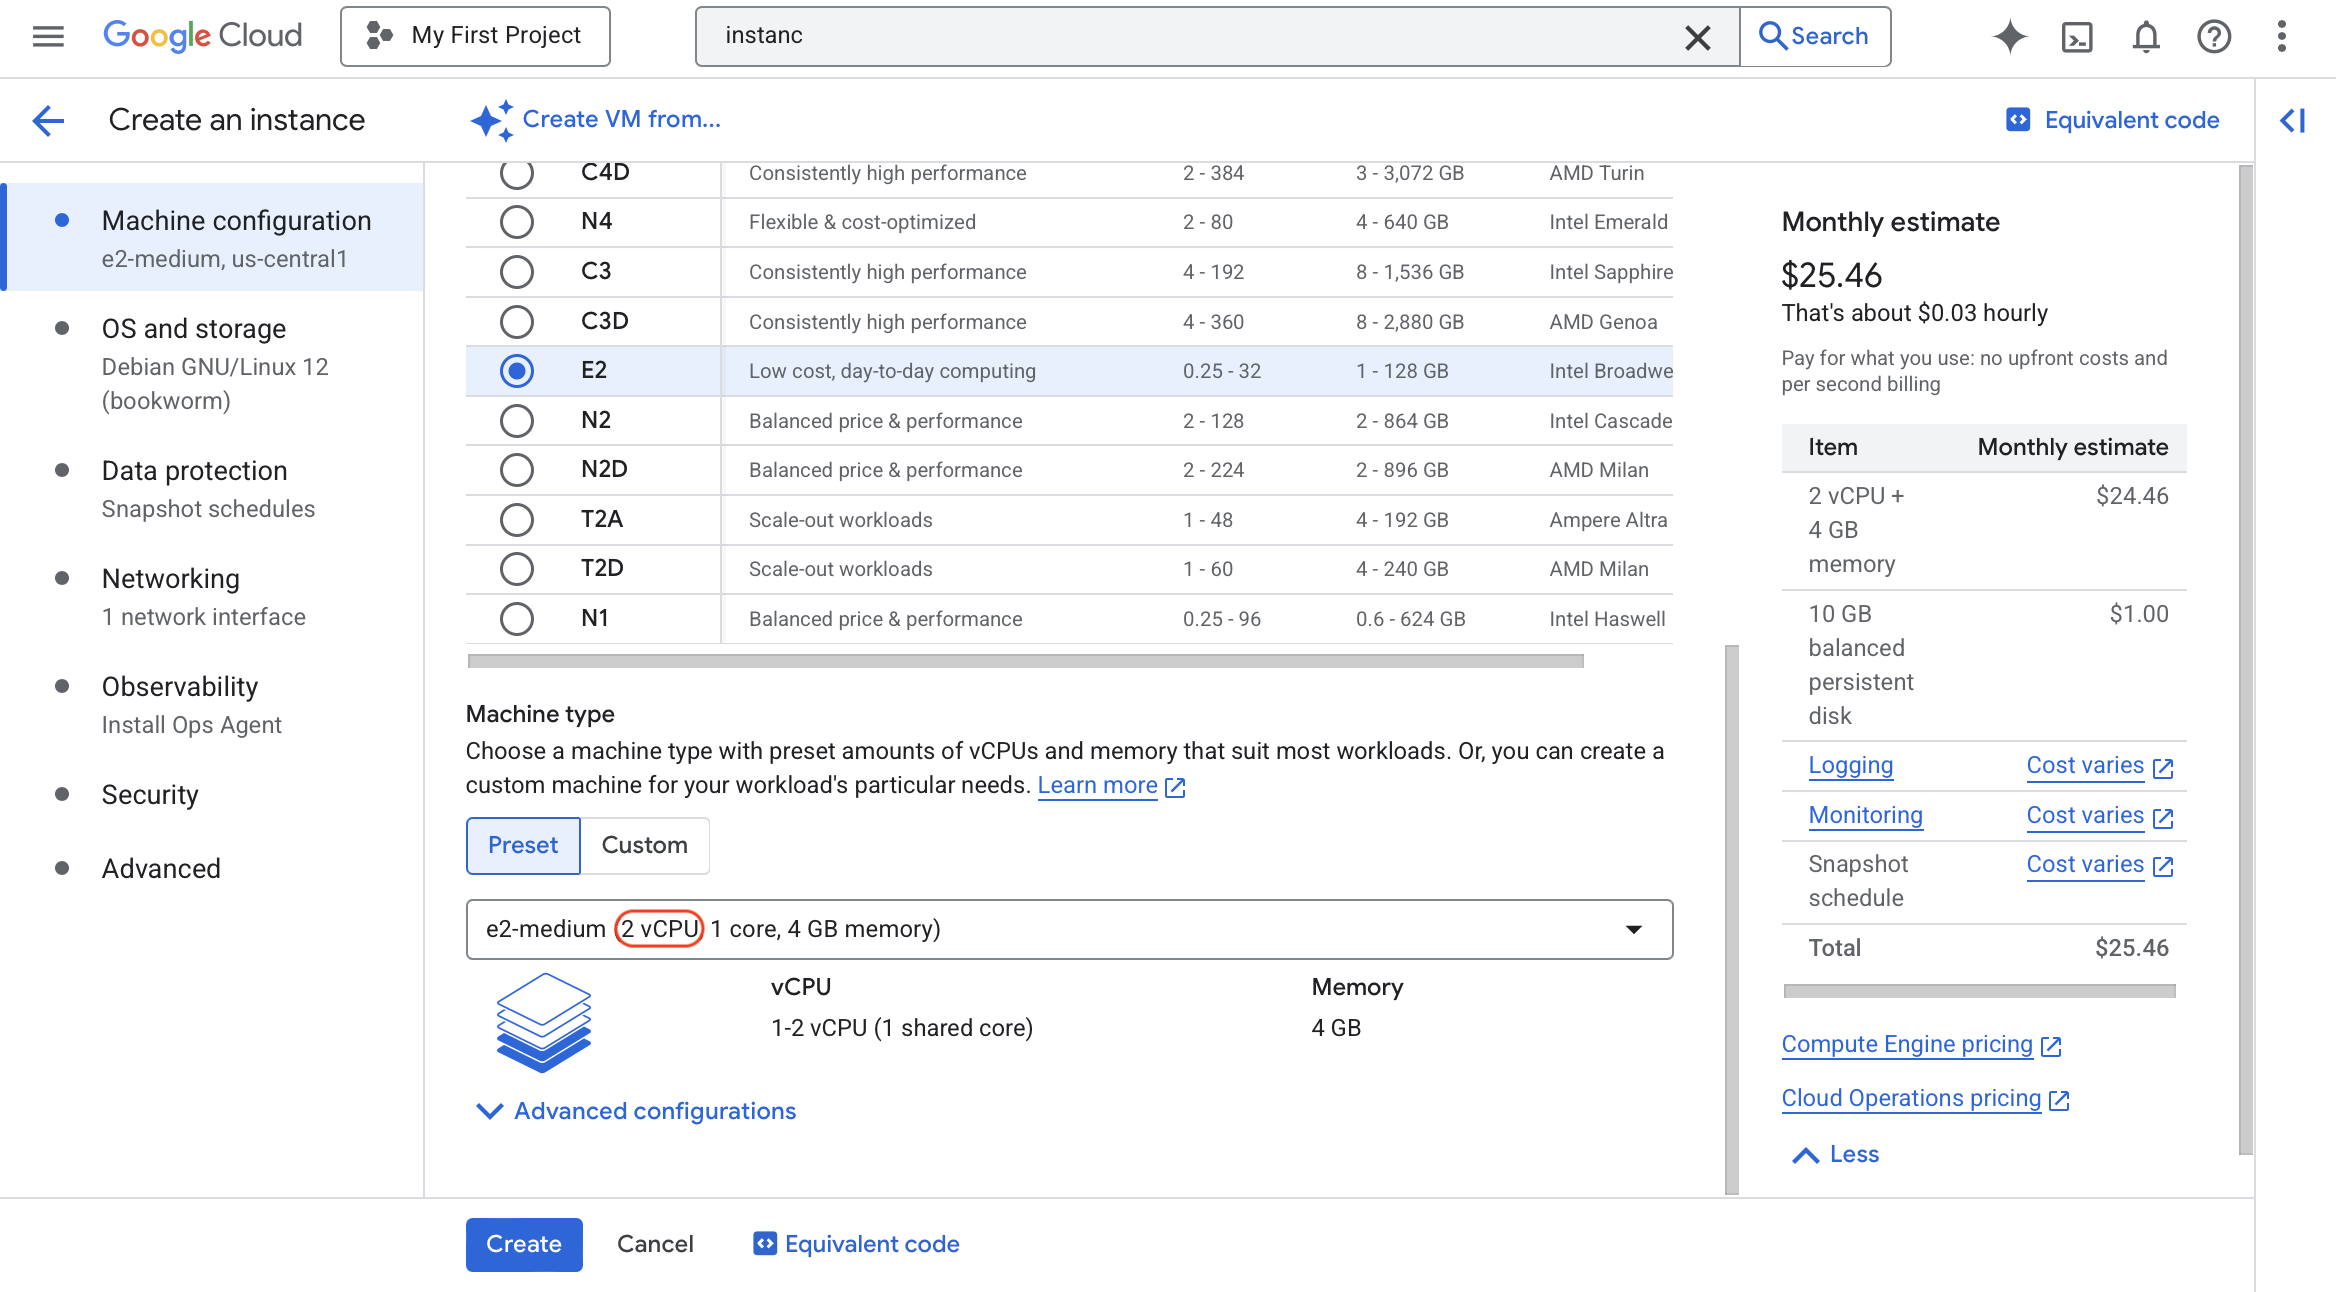
Always use the vCPU count from the Pricing Calculator when purchasing CUDs:
-
Next, find your instance's memory size in GB using the same Pricing Calculator.
-
Calculate your total resource needs by multiplying the per-instance resources by the number of instances you plan to run.
For example, if you need 2
e2-mediuminstances (1 vCPU, 4GB memory each):- Total Memory Needed: 2 × 4 GB = 8 GB
- Total vCPUs Needed: 2 × 1 vCPU = 2 vCPUs
-
Finally, choose your commitment duration:
- 1 Year – Ideal for workloads running at least 8 months
- 3 Years – Ideal for long-term projects running over 2 years and 2 months
-
CUDs are non-refundable commitments. So, take at least 2 days to consider:
- Have you right-sized your instances?
- Is the commitment duration right for your project?
- Will your resource needs change during the commitment period?
There's a good chance you might reconsider the commitment duration or instance types after 2 days.
Don't skip this step — it's a crucial pause that could save you from a costly mistake.
Step 2: Create Your CUDs
-
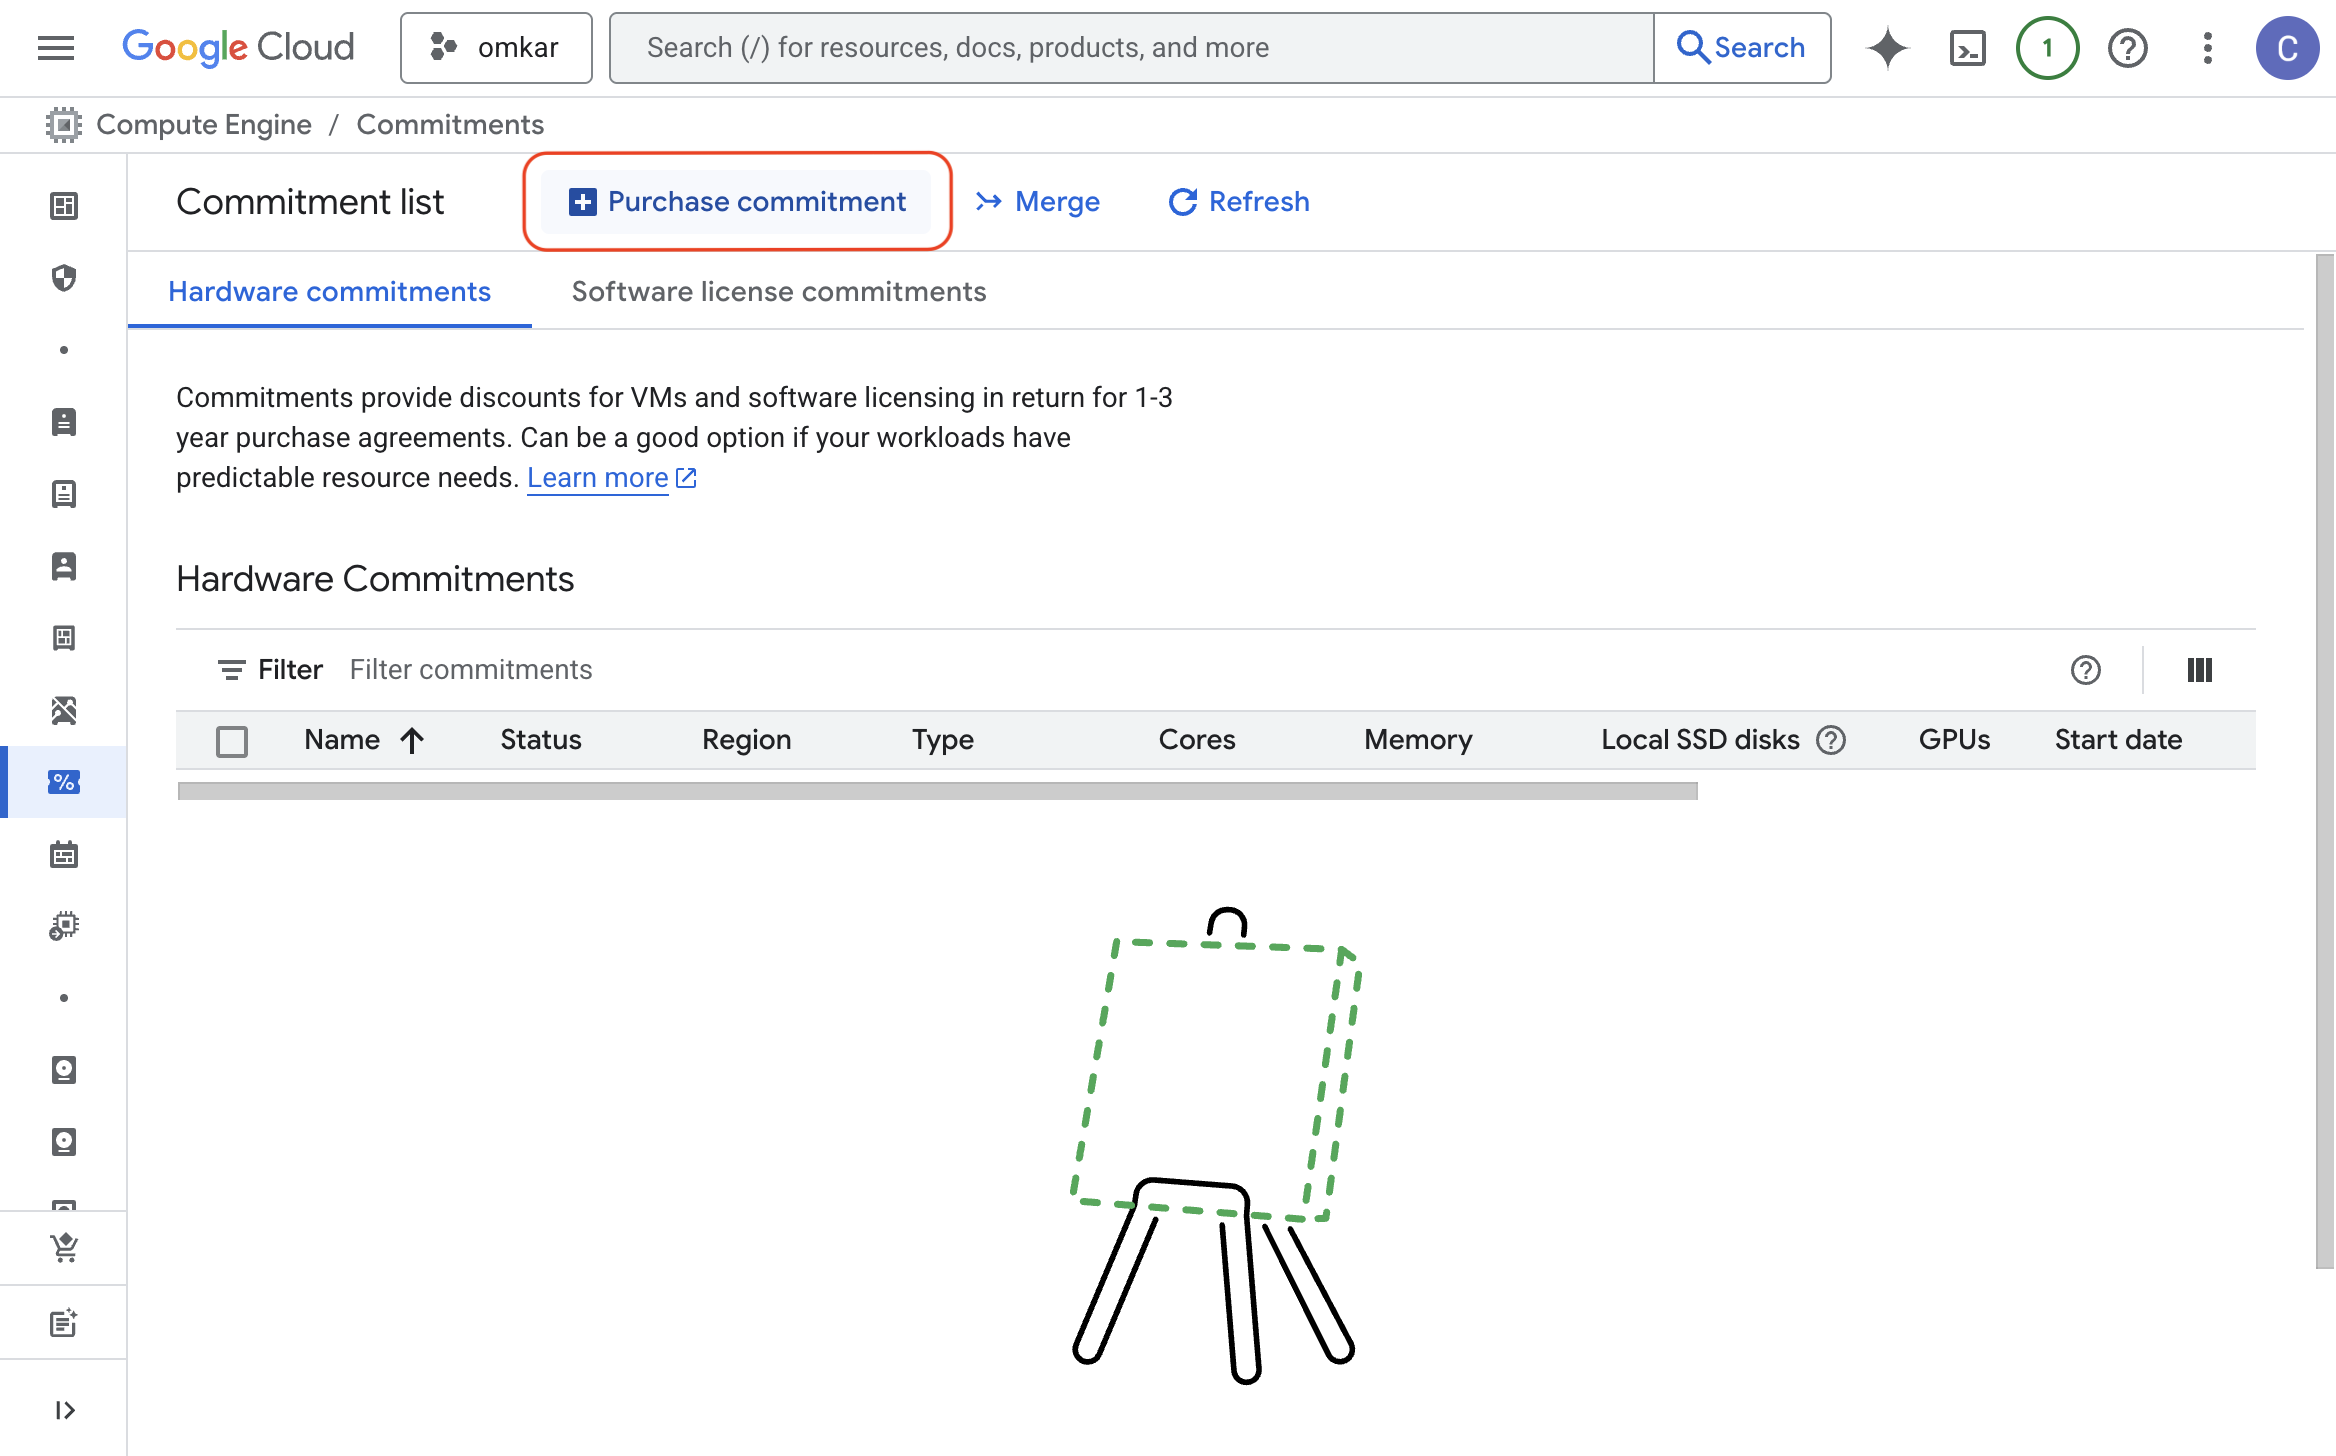
Go to the Compute Commitments page.
-
Click Purchase Commitments.
-
Create a memory CUD with these settings:
Field Value Name your-app-memory-cud (use a descriptive name) Region us-central1 (must match your VM's region) Commitment Type General-purpose E2 (must match your VM series) Duration 1 year or 3 years Memory Total GB calculated in Step 1 Reservations Don't attach reservations 
-
Create a vCPU CUD with these settings:
Field Value Name your-app-vcpu-cud (use a descriptive name) Region us-central1 (must match your VM's region) Commitment Type General-purpose E2 (must match your VM series) Duration 1 year or 3 years vCPUs Total vCPUs calculated in Step 1 Reservations Don't attach reservations 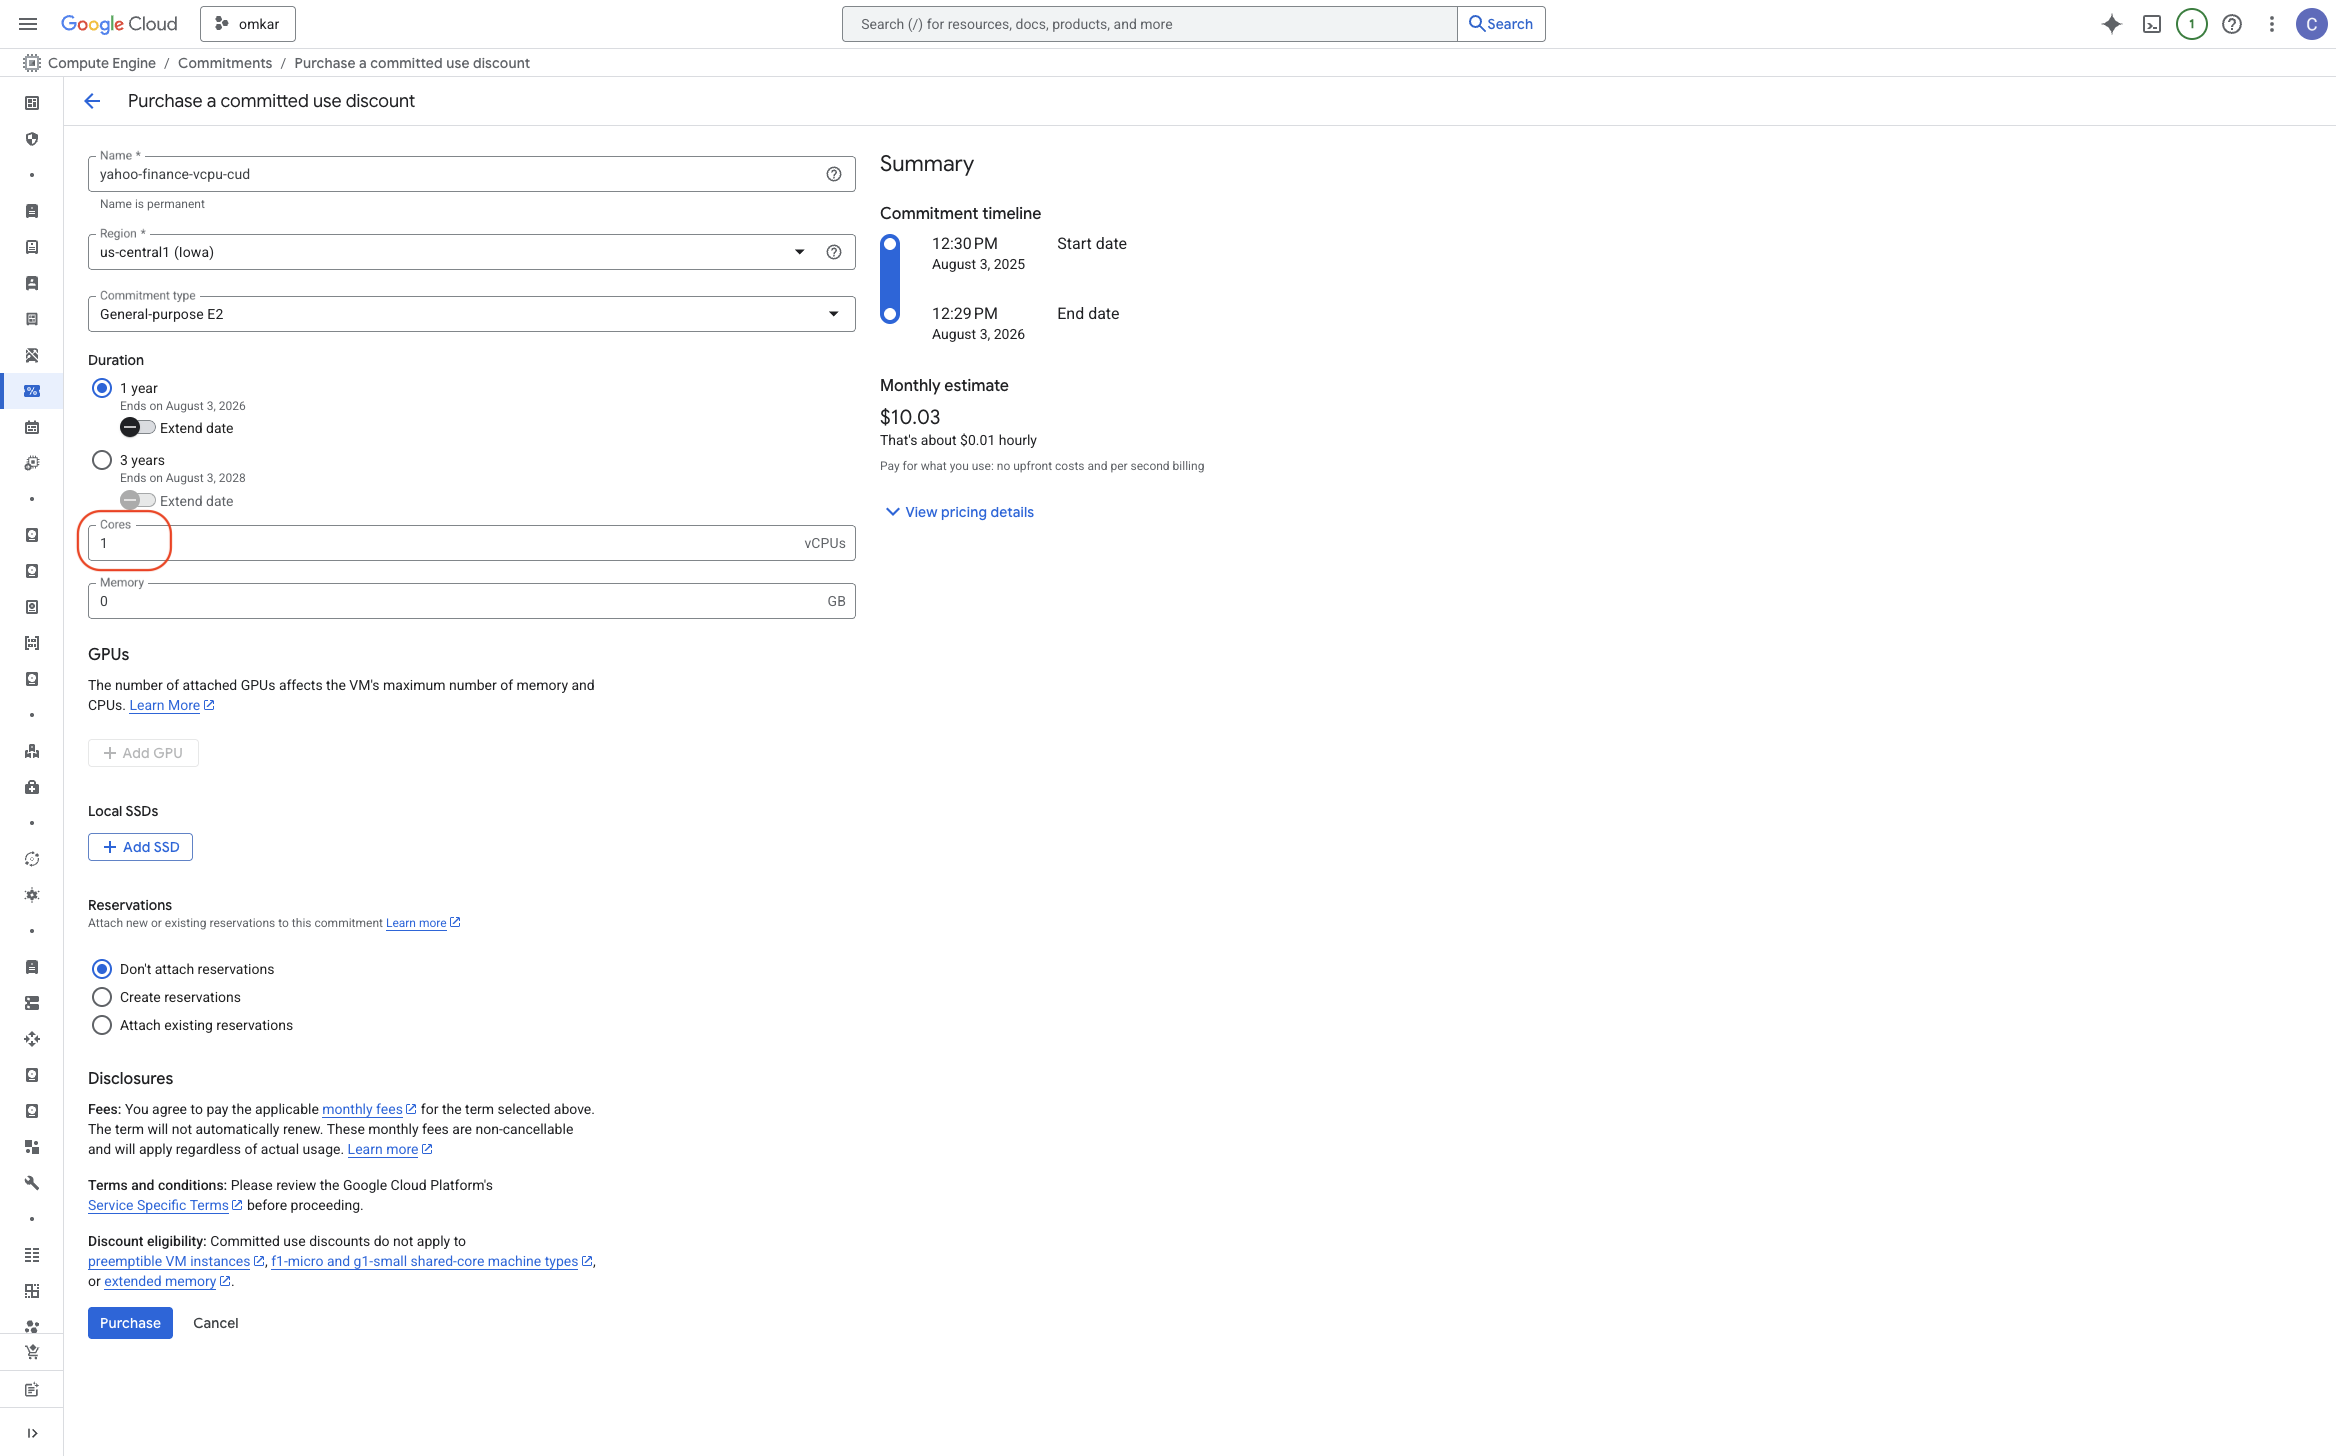
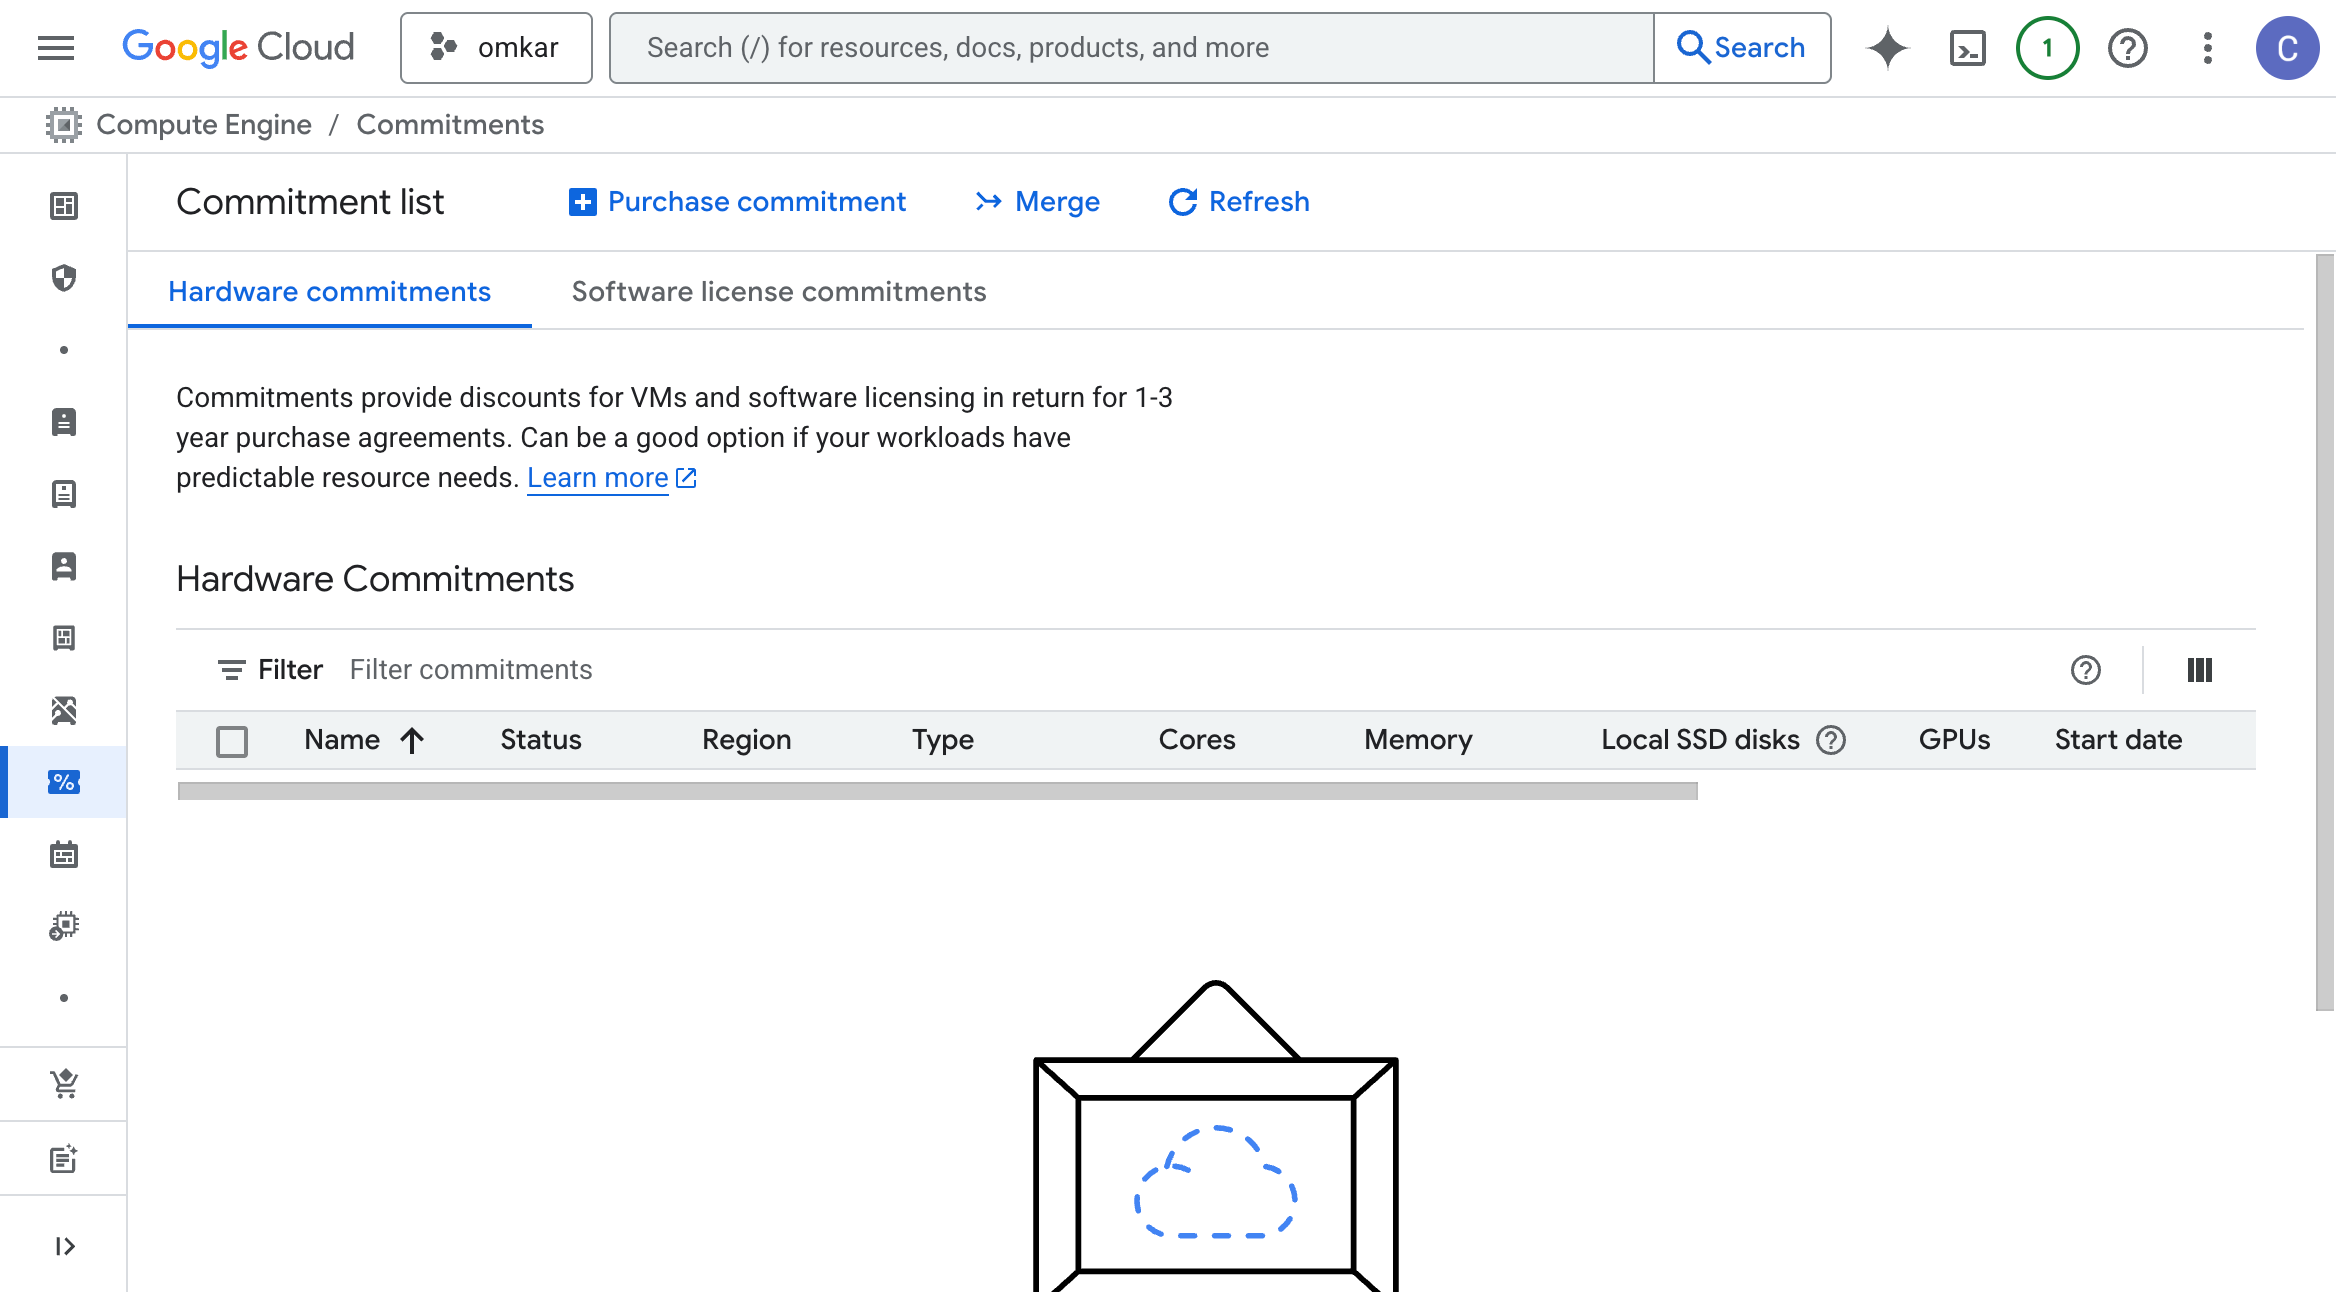
After creation, both CUDs will appear on the Commitments page:

You can see your CUD utilization and savings on the CUD Analysis Page.
When creating a CUD, I get "The COMMITMENTS-per-project-region quota maximum in region us-central1 has been exceeded." error. How do I fix it?
If you encounter an error like Creating commitment "commitment-20250727-141128" failed. Error: The COMMITMENTS-per-project-region quota maximum in region us-central1 has been exceeded.:
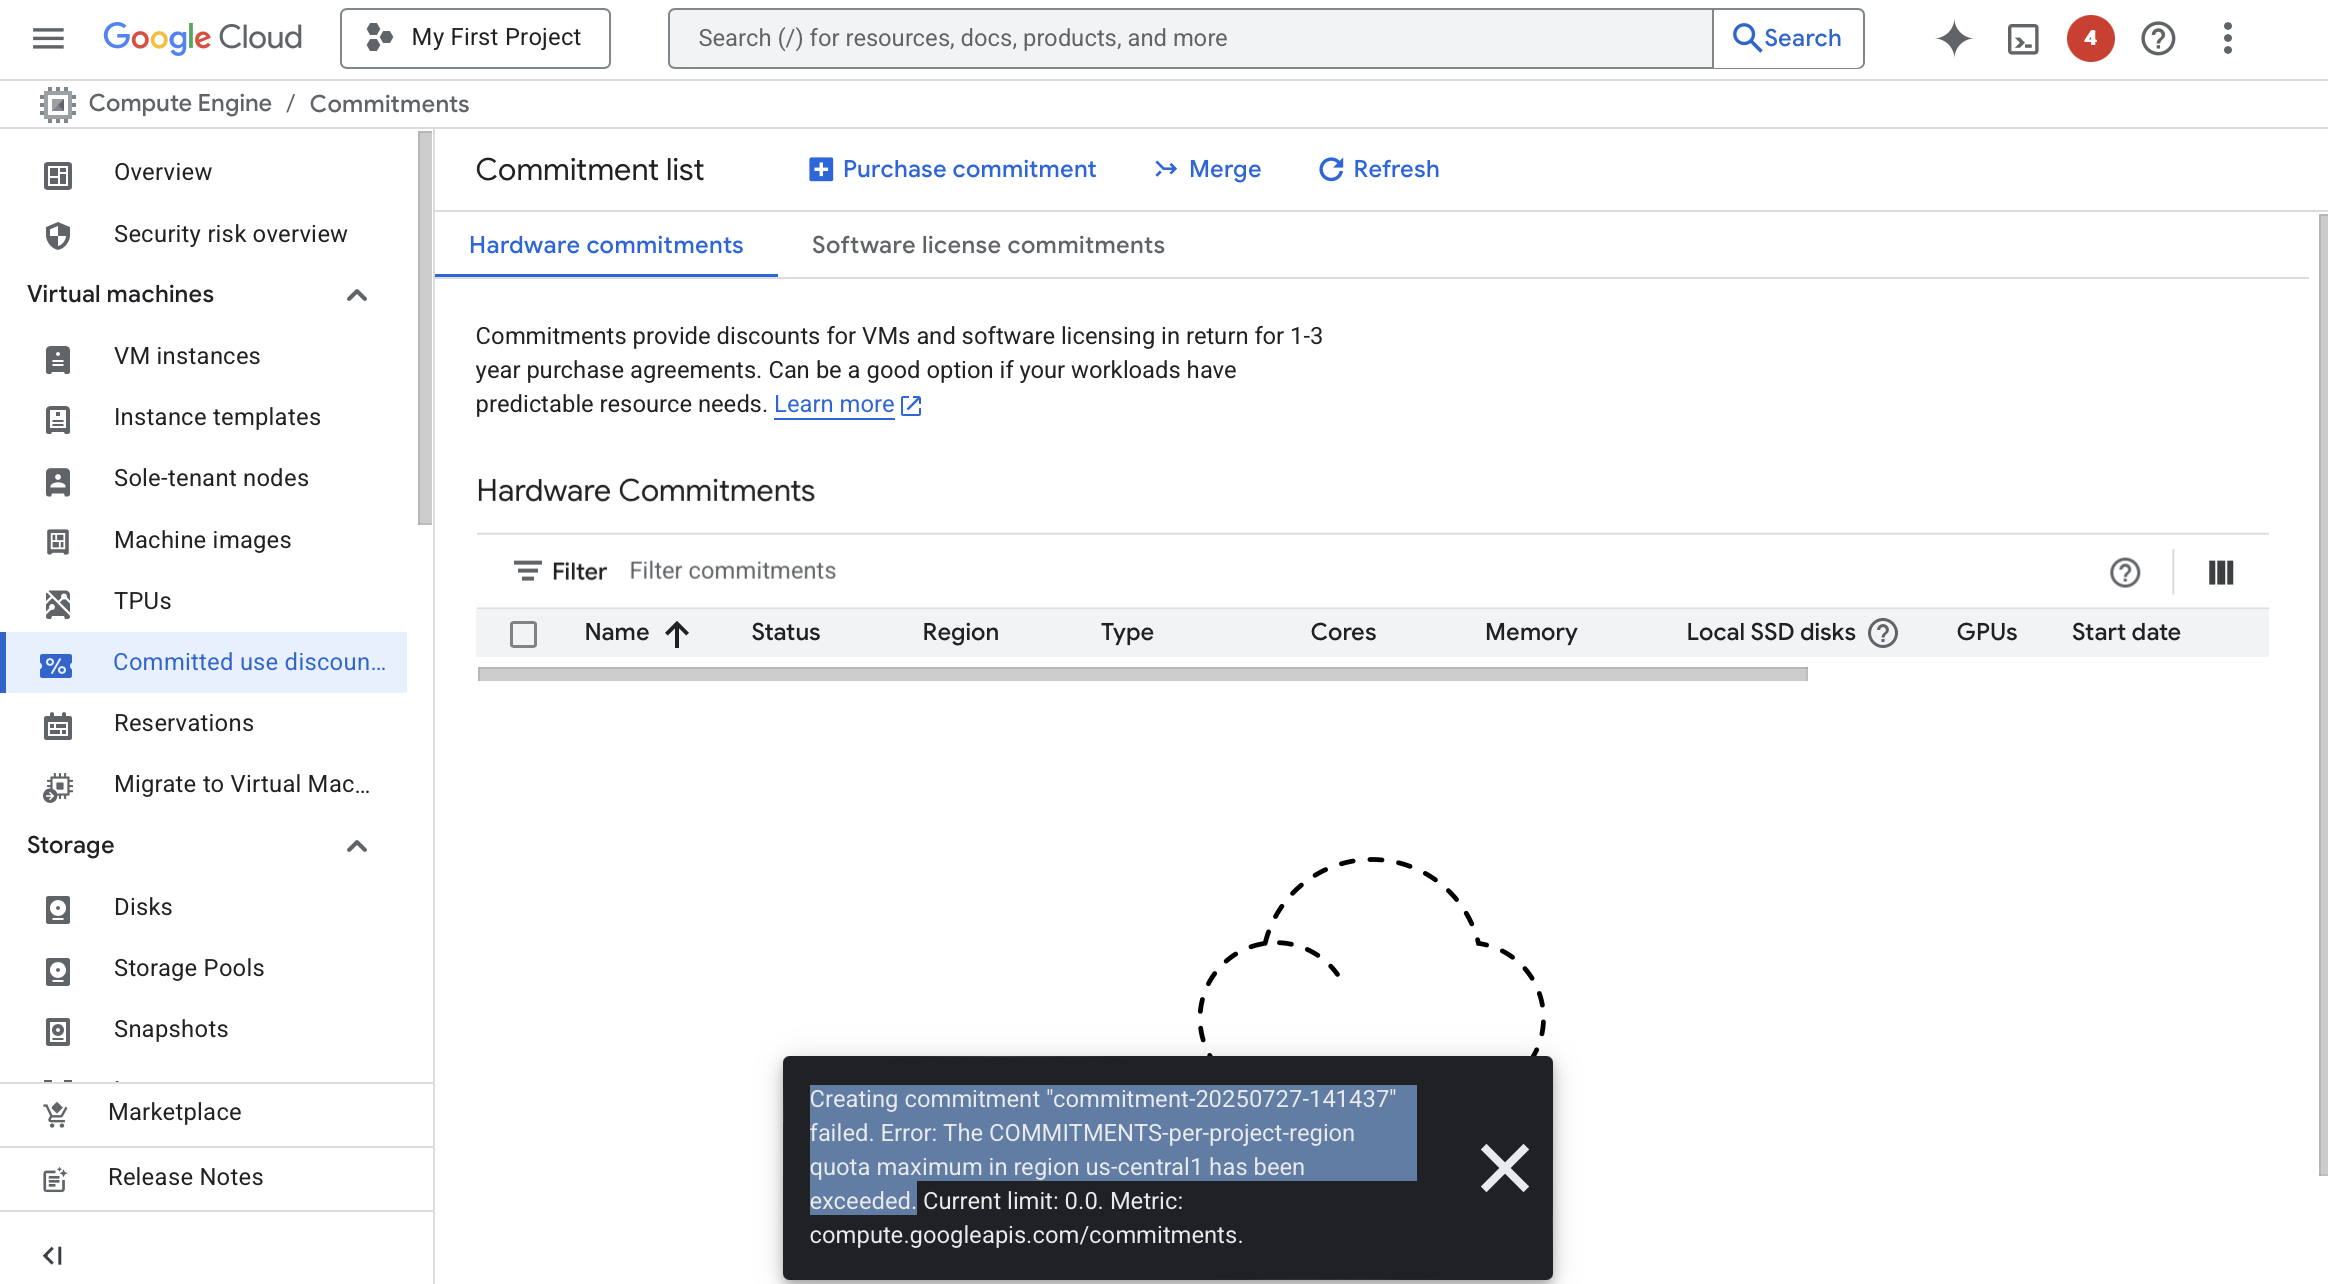
This occurs because your maximum number of CUDs allowed in a region is 0. To resolve this:
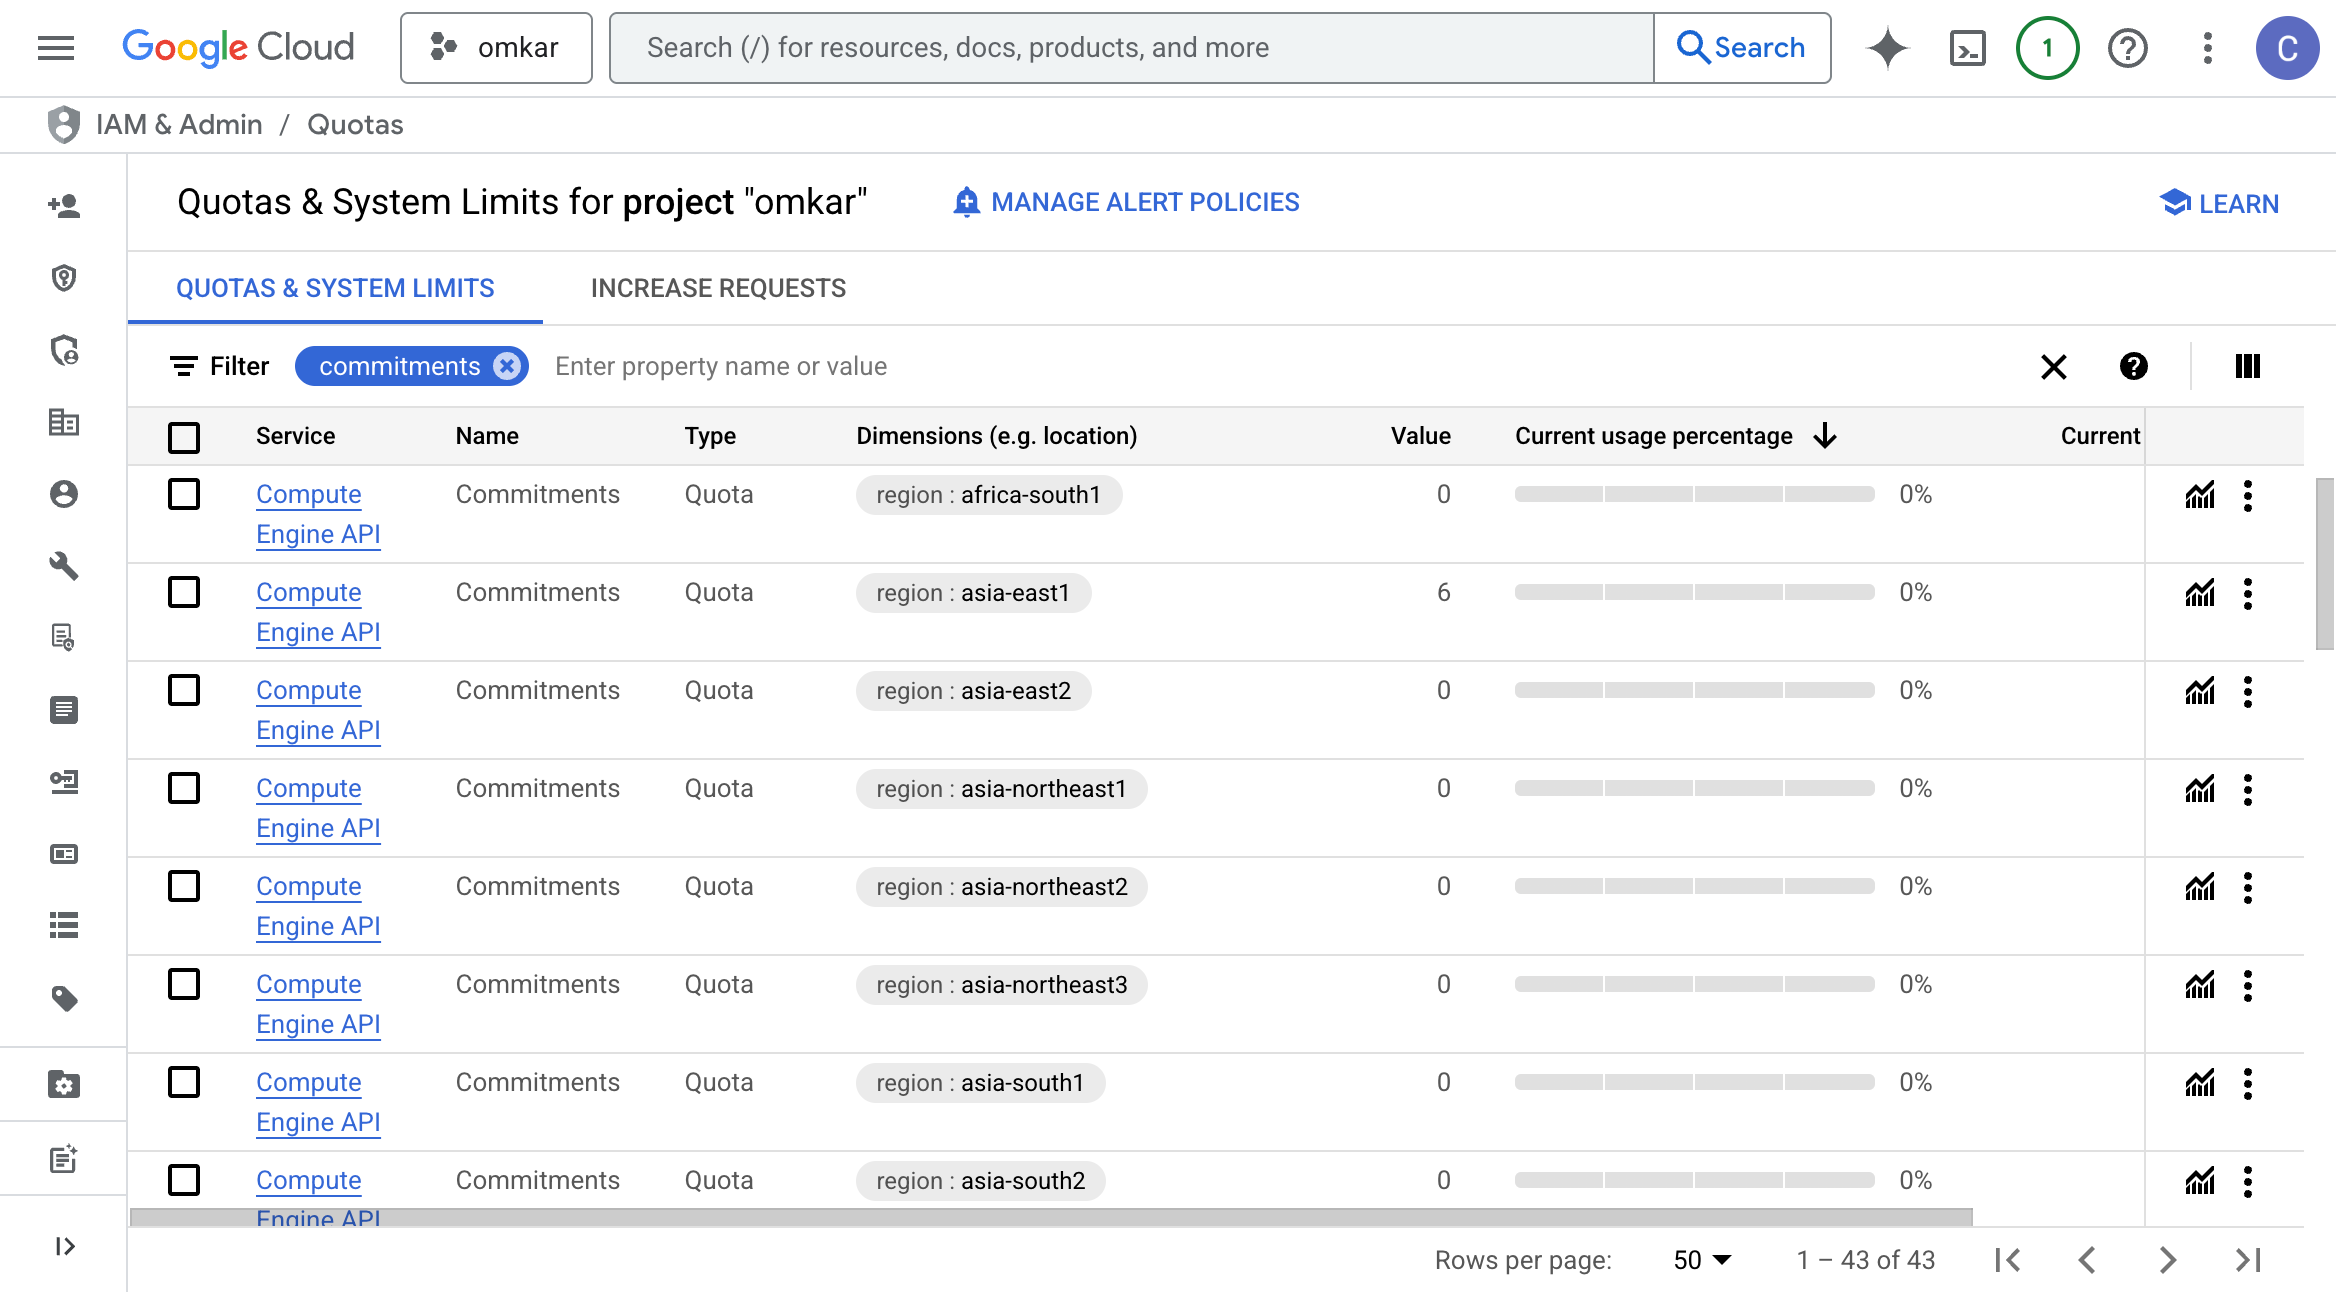
-
Visit the Quotas page and in search enter commitments.
-
Scroll down to your region (e.g., 6us-central1`) and click the Edit Quotas button.
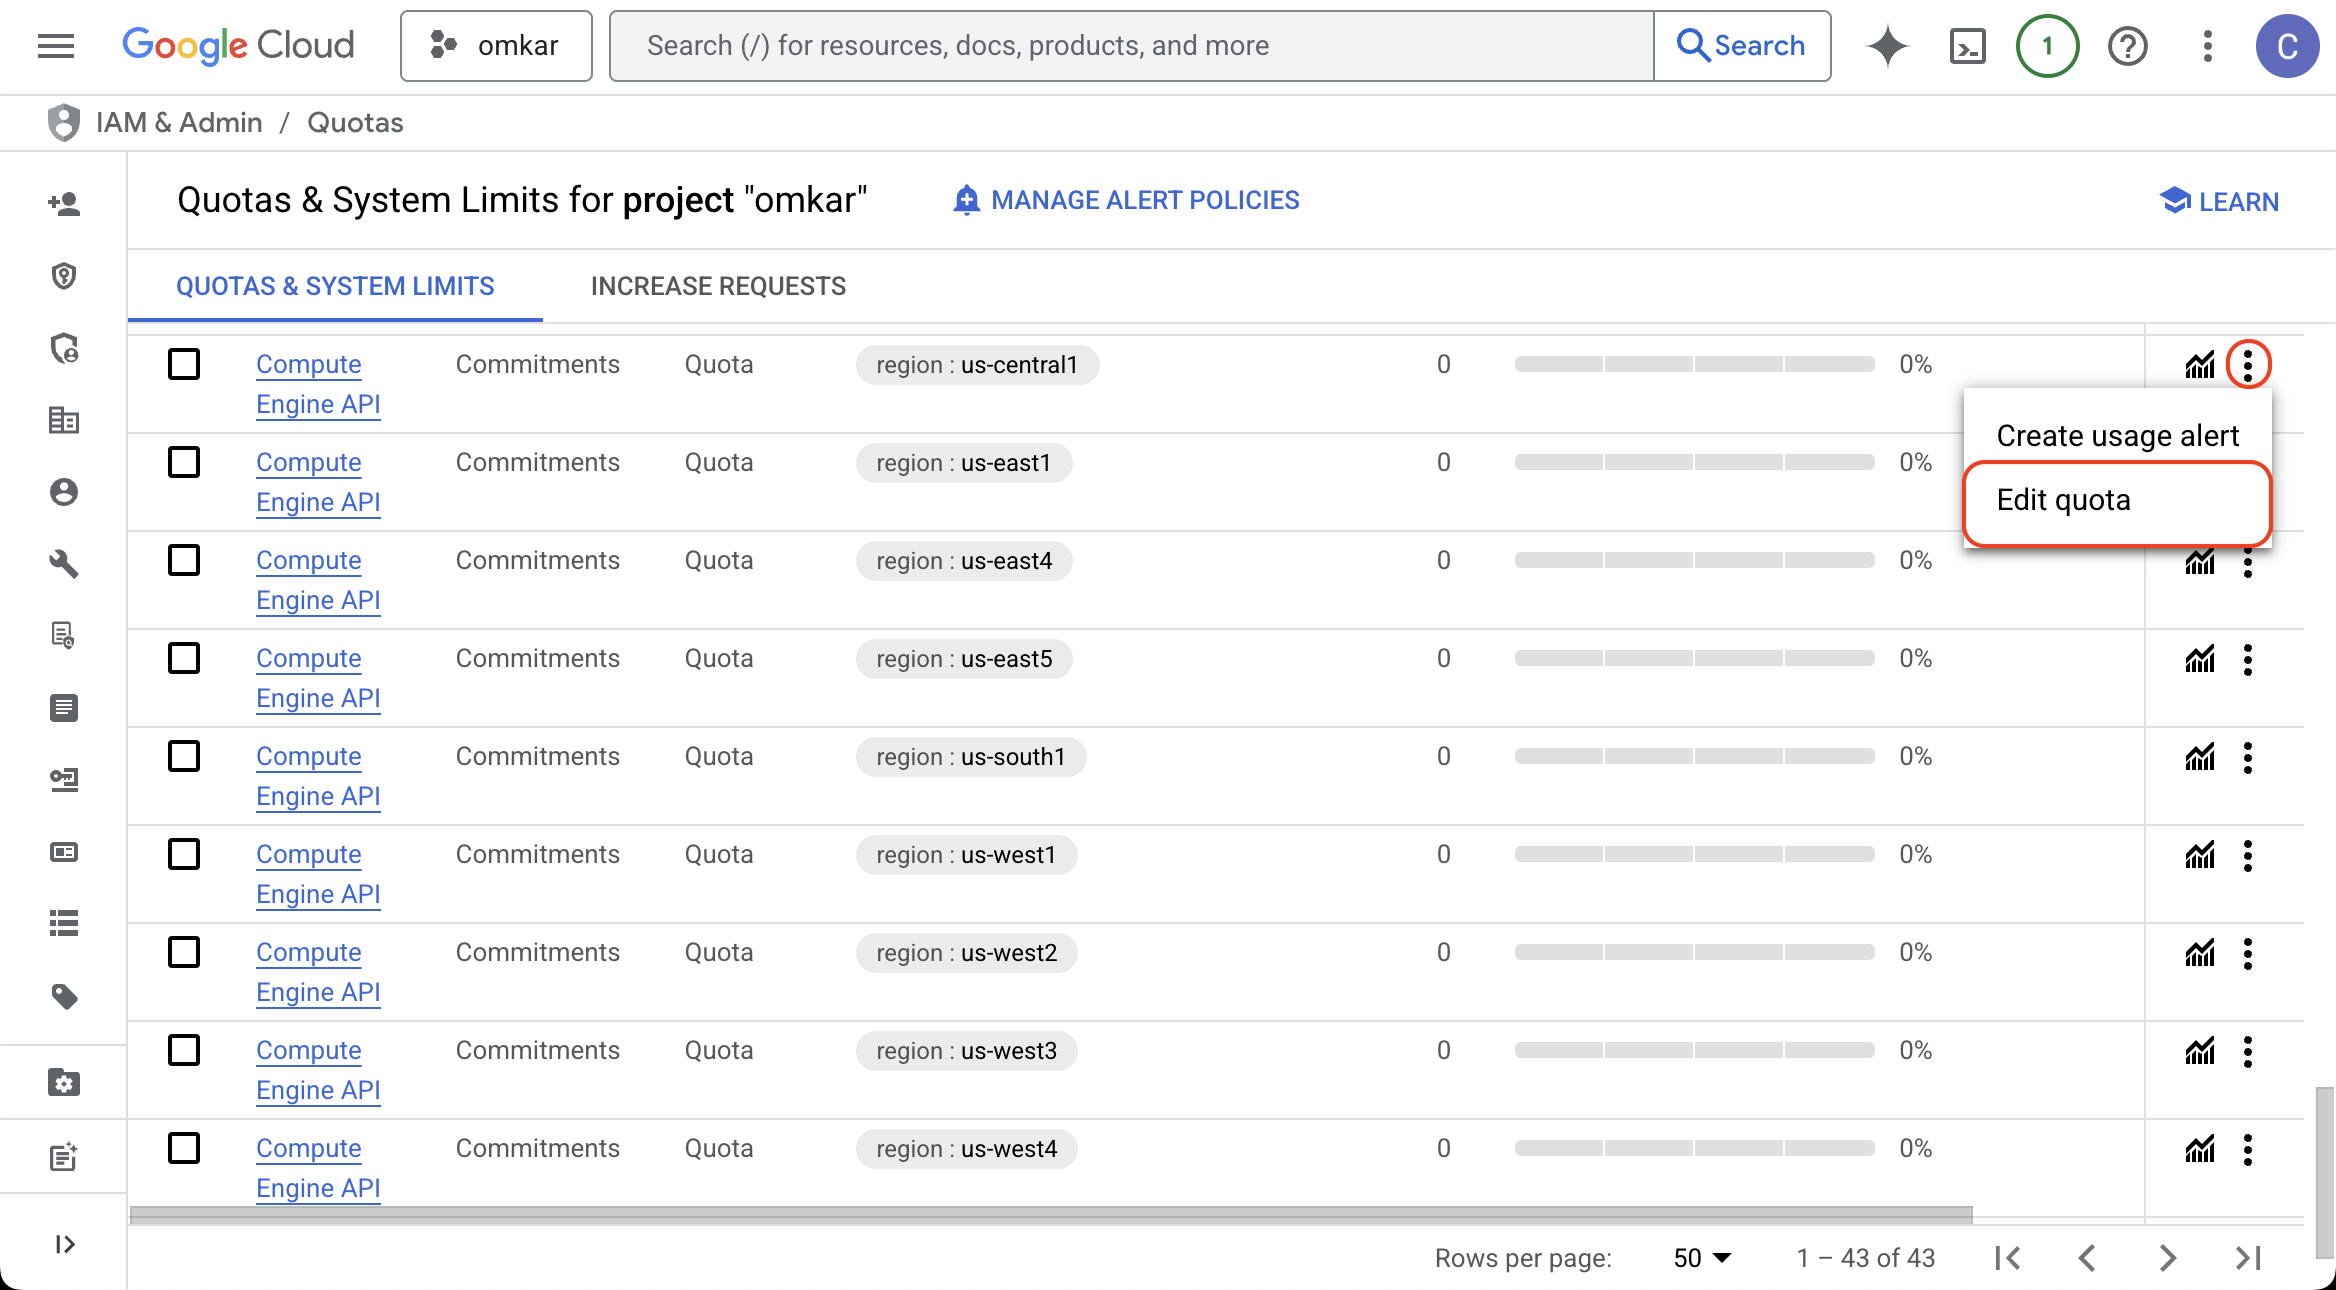
-
Enter a higher quota, such as 6.
-
For Request Description, enter:
We have reached the commitment quota limit in us-central1. An increase is required to purchase a new commitment for a production workload.
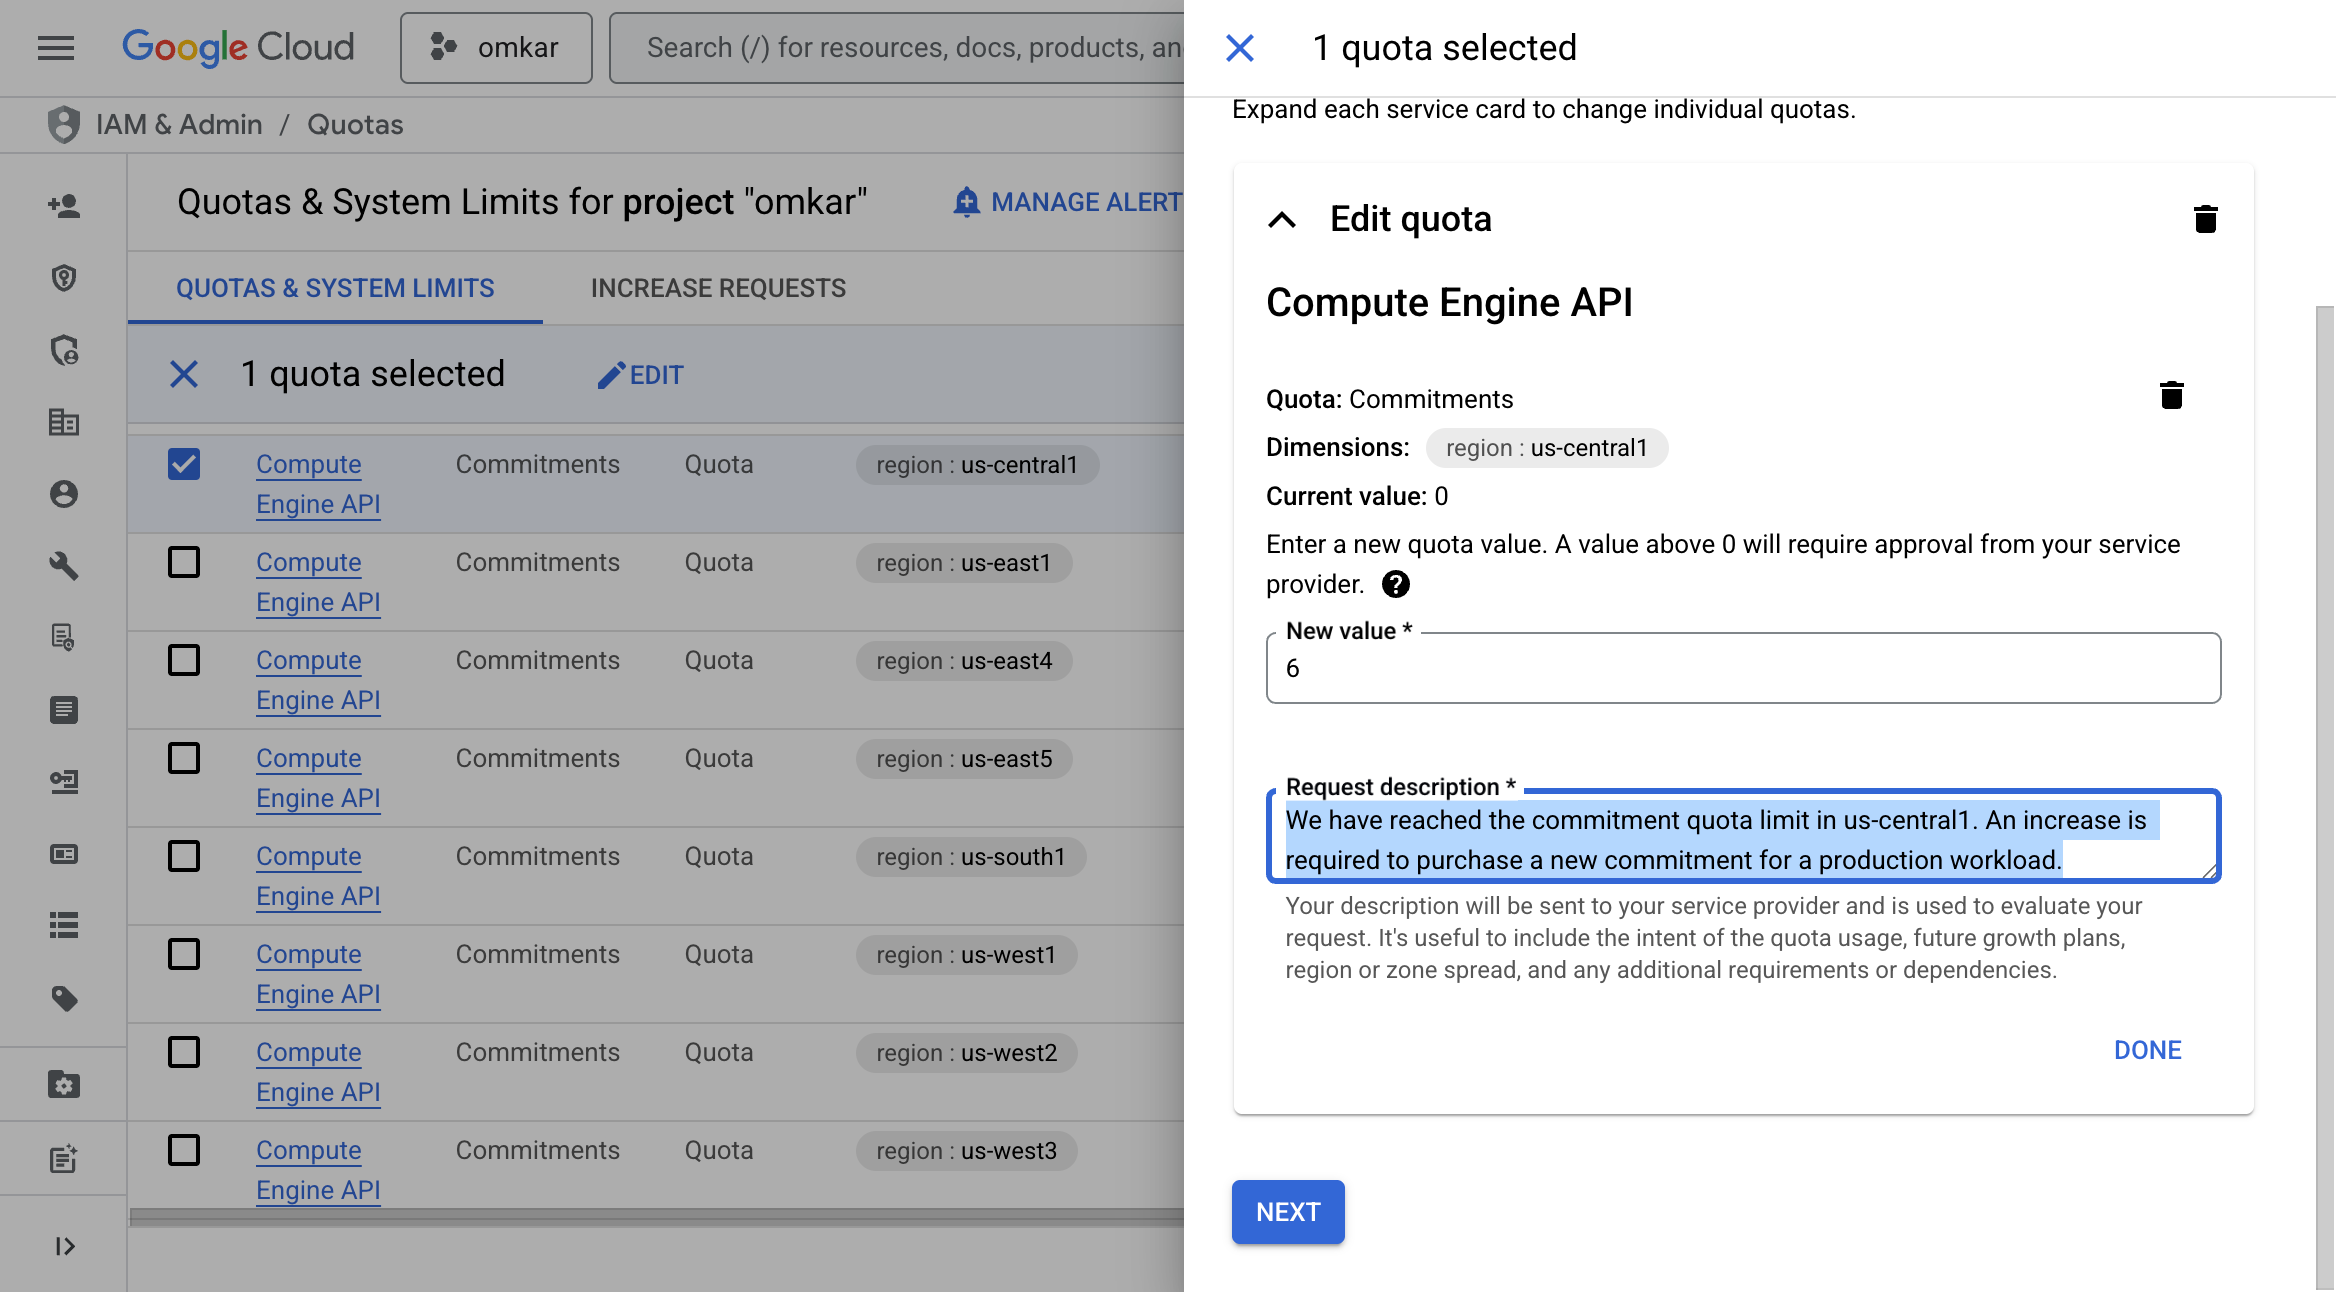
- Click Next, then Submit Request.
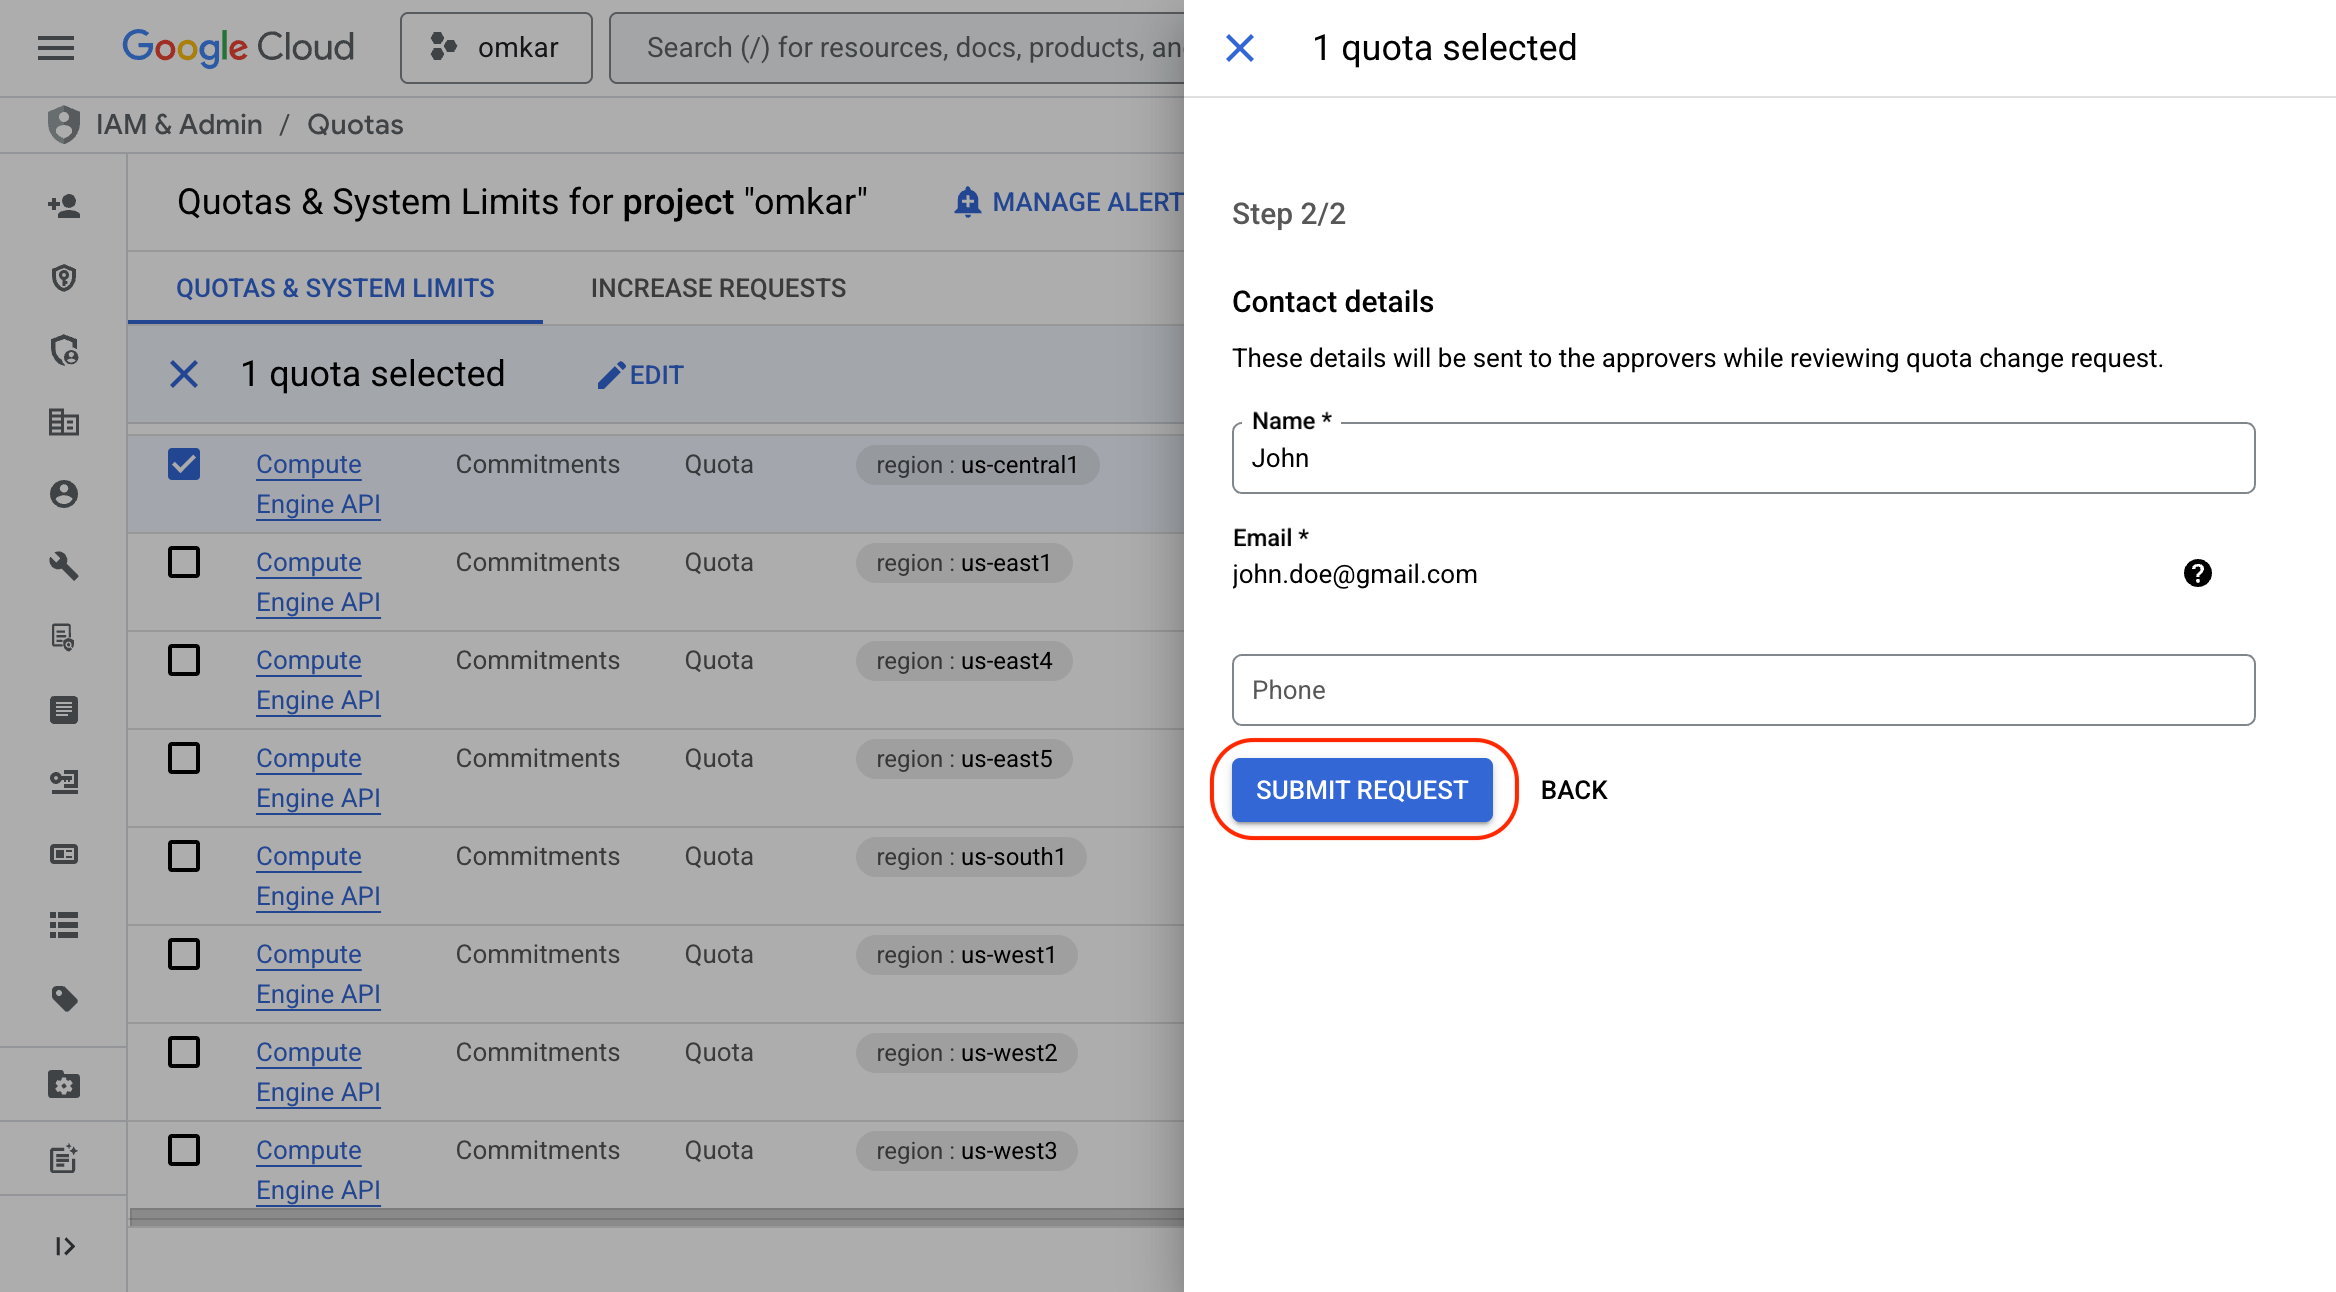
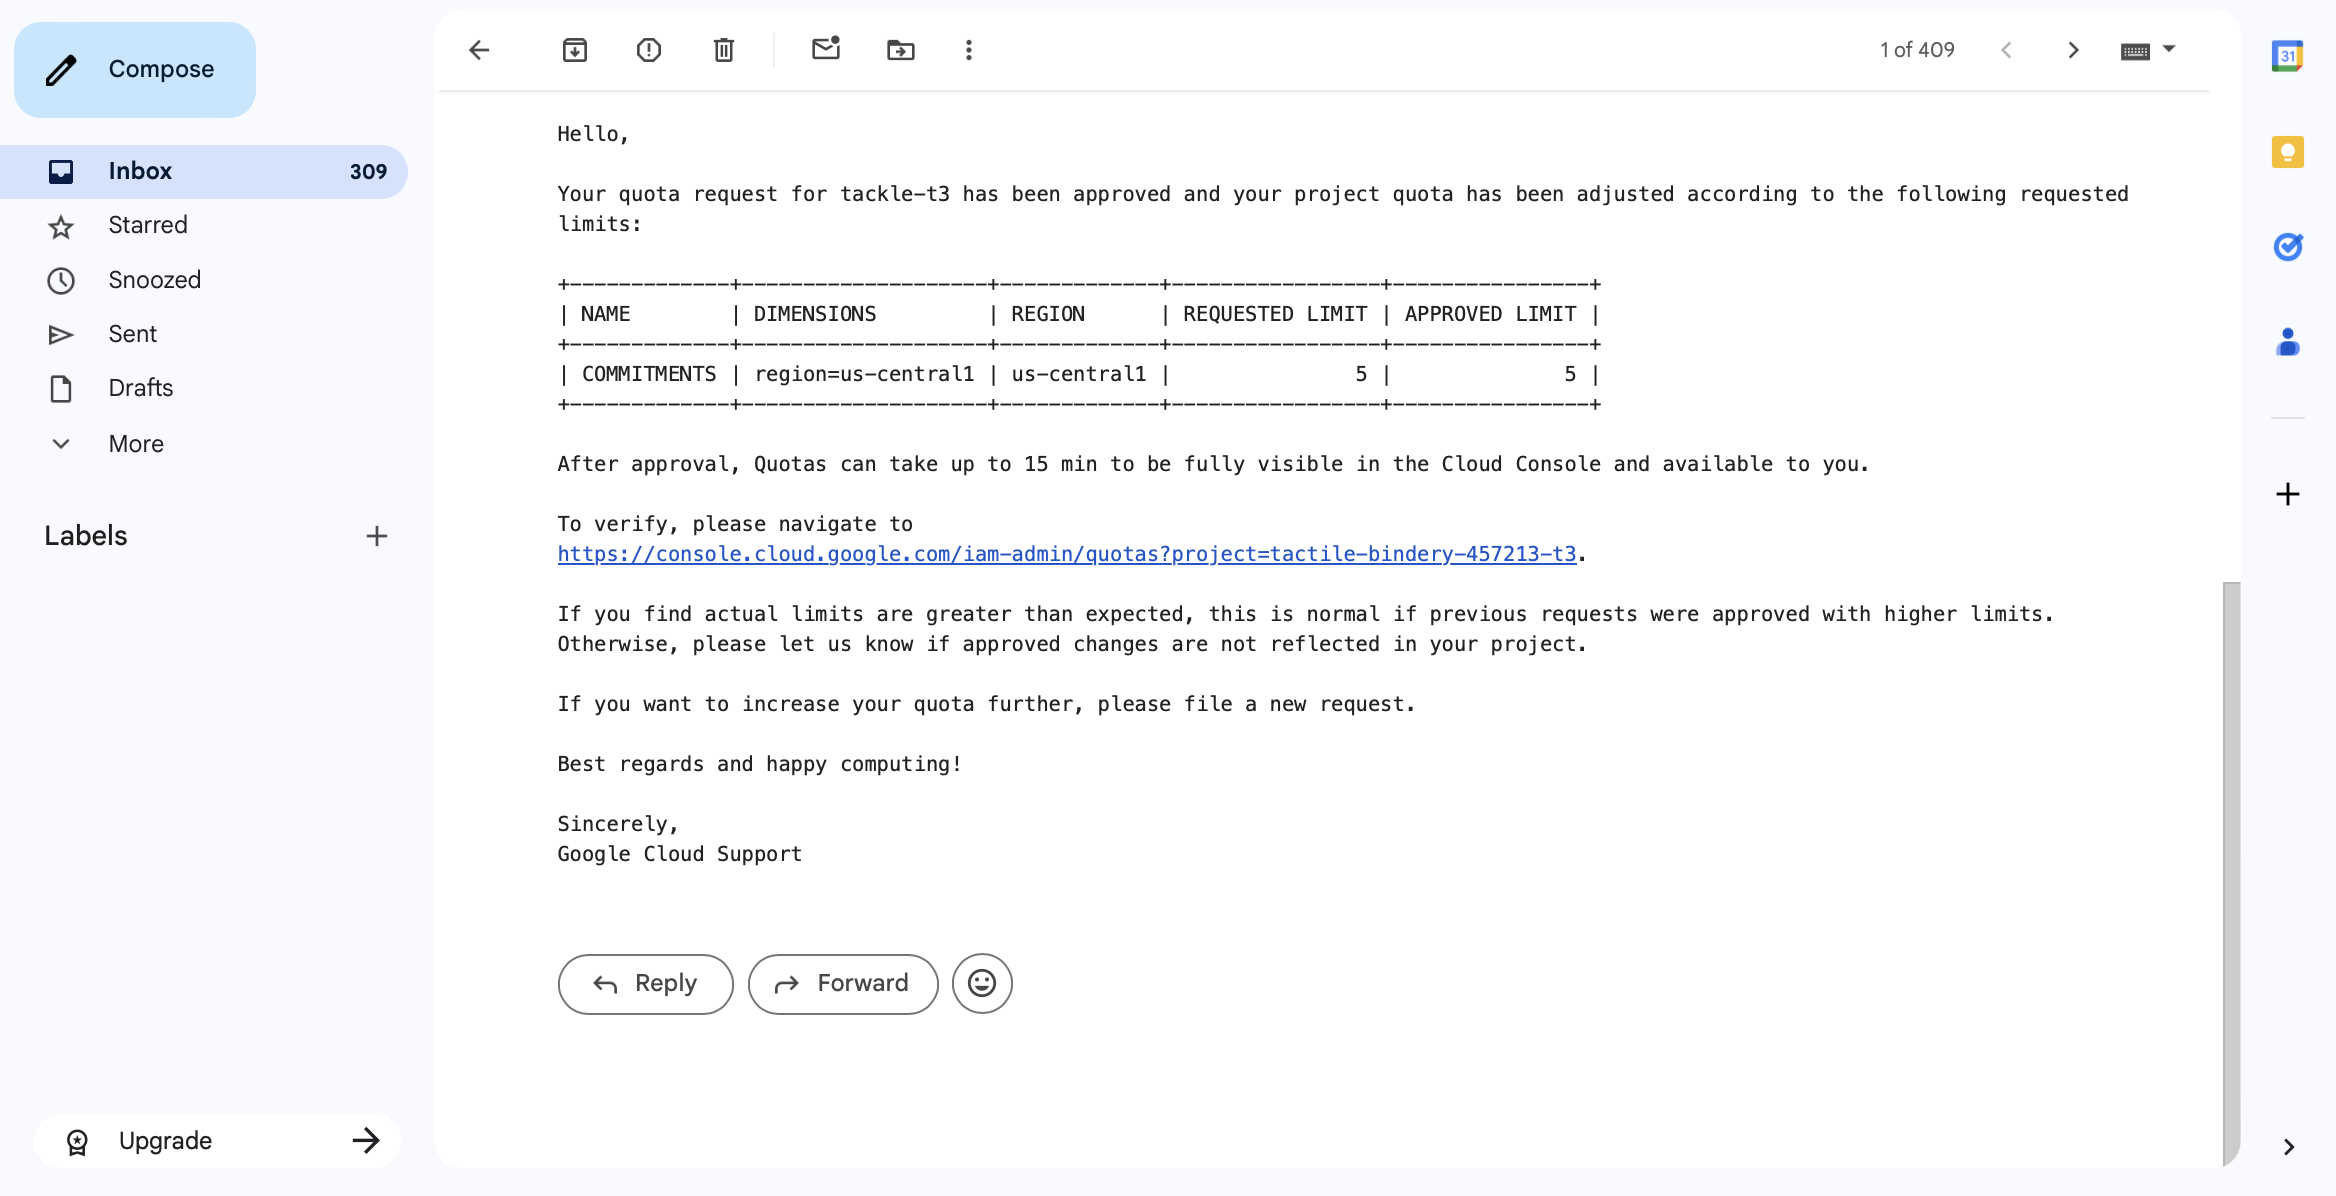
- Within a minute, you'll receive a confirmation email. Wait ~15 minutes more, and then you will be able to create the CUD.
Can I apply Committed-Use Discounts (CUDs) to Spot VMs?
No—Committed Use Discounts (CUDs) apply only to standard VMs. Spot VMs are charged separately.
If you have an active CUD and also run Spot VMs, you will essentially be billed twice:
- For the Spot VM usage at its current (low) price
- For the resources you committed to via the CUD, whether you use them or not
Therefore, do not mix Spot VMs with CUDs for the same resource types.