
Google Maps Extractor API
Disclaimer for Google Maps Extractor API
This Google Maps Extractor API is provided for educational and research purposes only. By using this API, you agree to comply with local and international laws regarding data scraping and privacy. The authors and contributors are not responsible for any misuse of this software. This tool should not be used to violate the rights of others, or for unethical purposes.
We take concerns about the Google Maps Extractor API Project very seriously. For any concerns, please contact Chetan Jain at chetan@omkar.cloud. We will promptly reply to your emails.
Google Maps Extractor API helps you programmatically extract Business Profiles from Google Maps through a simple REST API and App. It's a great tool with 2400+ stars on GitHub, trusted by thousands in the community to complete their academic research projects or find customers.
⚡ Benefits
- REST API Access — Integrate seamlessly into your applications and workflows.
- 200 searches free every month — More than enough for most use cases.
- 50+ data points — Extracted in real-time.
- Enrichment included — Get emails, social profiles, and decision-maker contacts for outreach.
In the next few minutes, you'll extract 200+ Search Results from Google Maps.
📦 Requirements
To use this tool, ensure you have:
- Google Chrome Browser
Then get started by following these steps:
1️⃣ Download and Install:
1. For Mac:
- Download the Mac Version
- We are a verified publisher with Apple, so you can install it without facing any issues.
2. For Windows:
- Download the Windows Version
- You'll see a blue popup saying Windows Defender blocked an app from an unknown publisher.
We're verified with Apple, but not yet with Windows (requires company incorporation—coming this year).
The app is safe and trusted:
- Made by Omkar Cloud, creators of Botasaurus (3.7K+ GitHub stars)
- 2,300+ stars on GitHub
- 1,000+ customers via GitHub Sponsors
- 100+ discussion threads, 150+ solved issues
You may also see a Windows Firewall popup—click Allow Access to continue.
3. For Ubuntu/Debian:
- For Most Desktop Users: Download .deb
- For Raspberry Pi and Some Cloud Servers: Download .deb for arm64
On Ubuntu 24.04 and later, you can run the app only from the terminal using the following command:
google-maps-extractor-api --no-sandbox 4. For Fedora/CentOS/Red Hat:
- For Most Desktop Users: Download .rpm
- For Raspberry Pi and Some Cloud Servers: Download .rpm for arm64
2️⃣ Press the Run button to get 200+ search results.
Note:
We respond within 1 working day.
⚡ Enlightening Questions
❓ How to Get Results for My Queries?
- Enter your search queries.
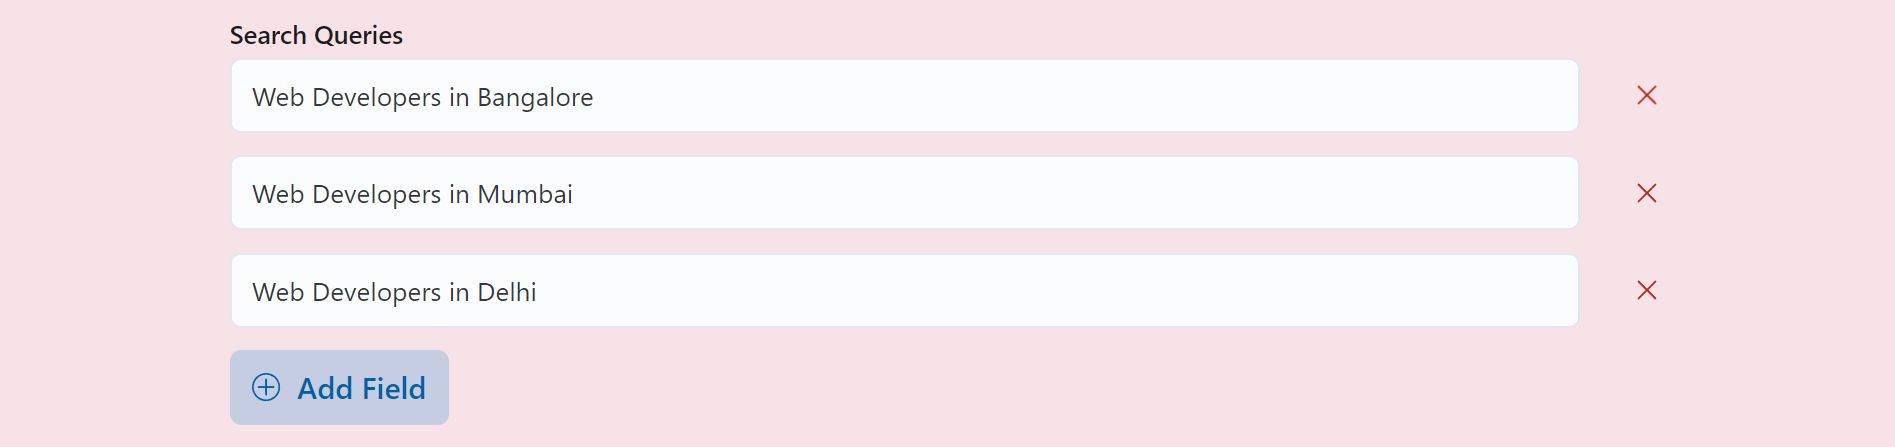
- Now, simply press the Run button.

- Get the results in about 2 minutes.
Where is API Docs?
To find the API docs, install the app and visit the API Integration Tab — you'll find api docs there.
Only a Node.js API Library is provided.
Also, if you're running on a VPS like AWS EC2, you'll need to pass the IP address of your instance like this to Node.js library:
const api = new Api({ apiUrl: 'http://44.198.71.83' })Whatsapp us here if you need help.
How to deploy on AWS EC2?
We will be using aws, although you can use VM from any cloud provider like Google Cloud, Azure, or DigitalOcean. Just Ensure the VM has Debian/Ubuntu-based OS.
1. Reserve a Static IP Address
First, we'll reserve an Elastic IP address. An Elastic IP ensures your EC2 instance is always reachable at the same IP address.
-
Create an AWS Account if you don't already have one.
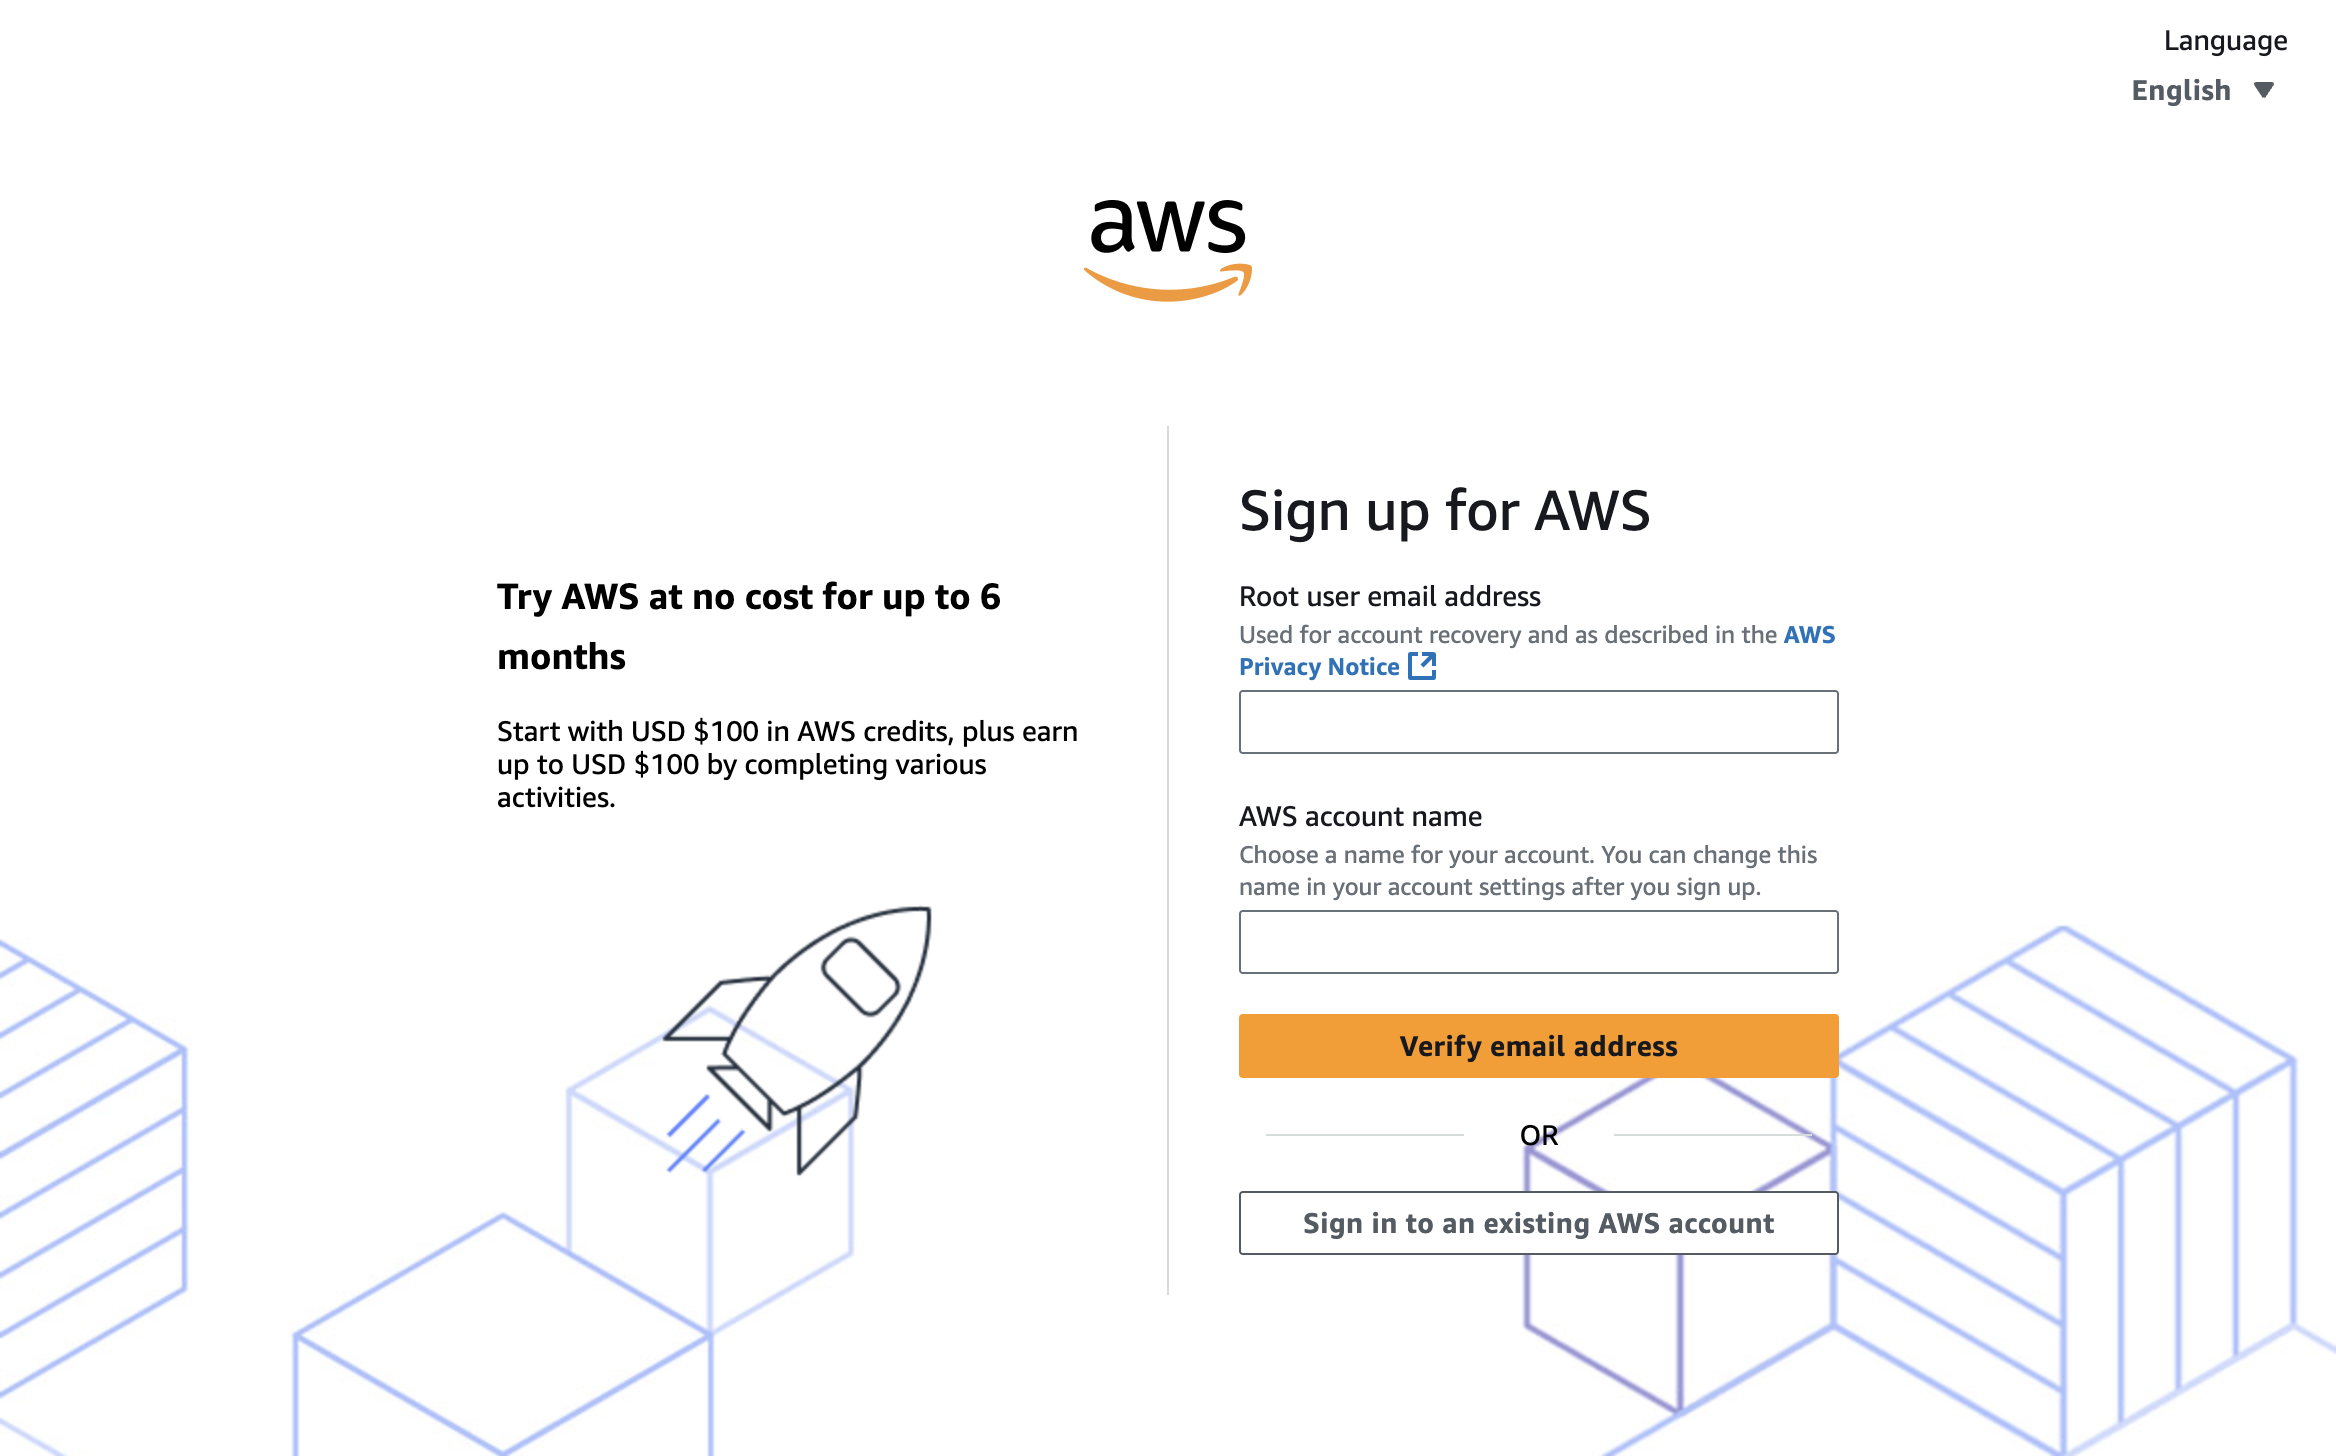
-
Go to the Elastic IP addresses page.
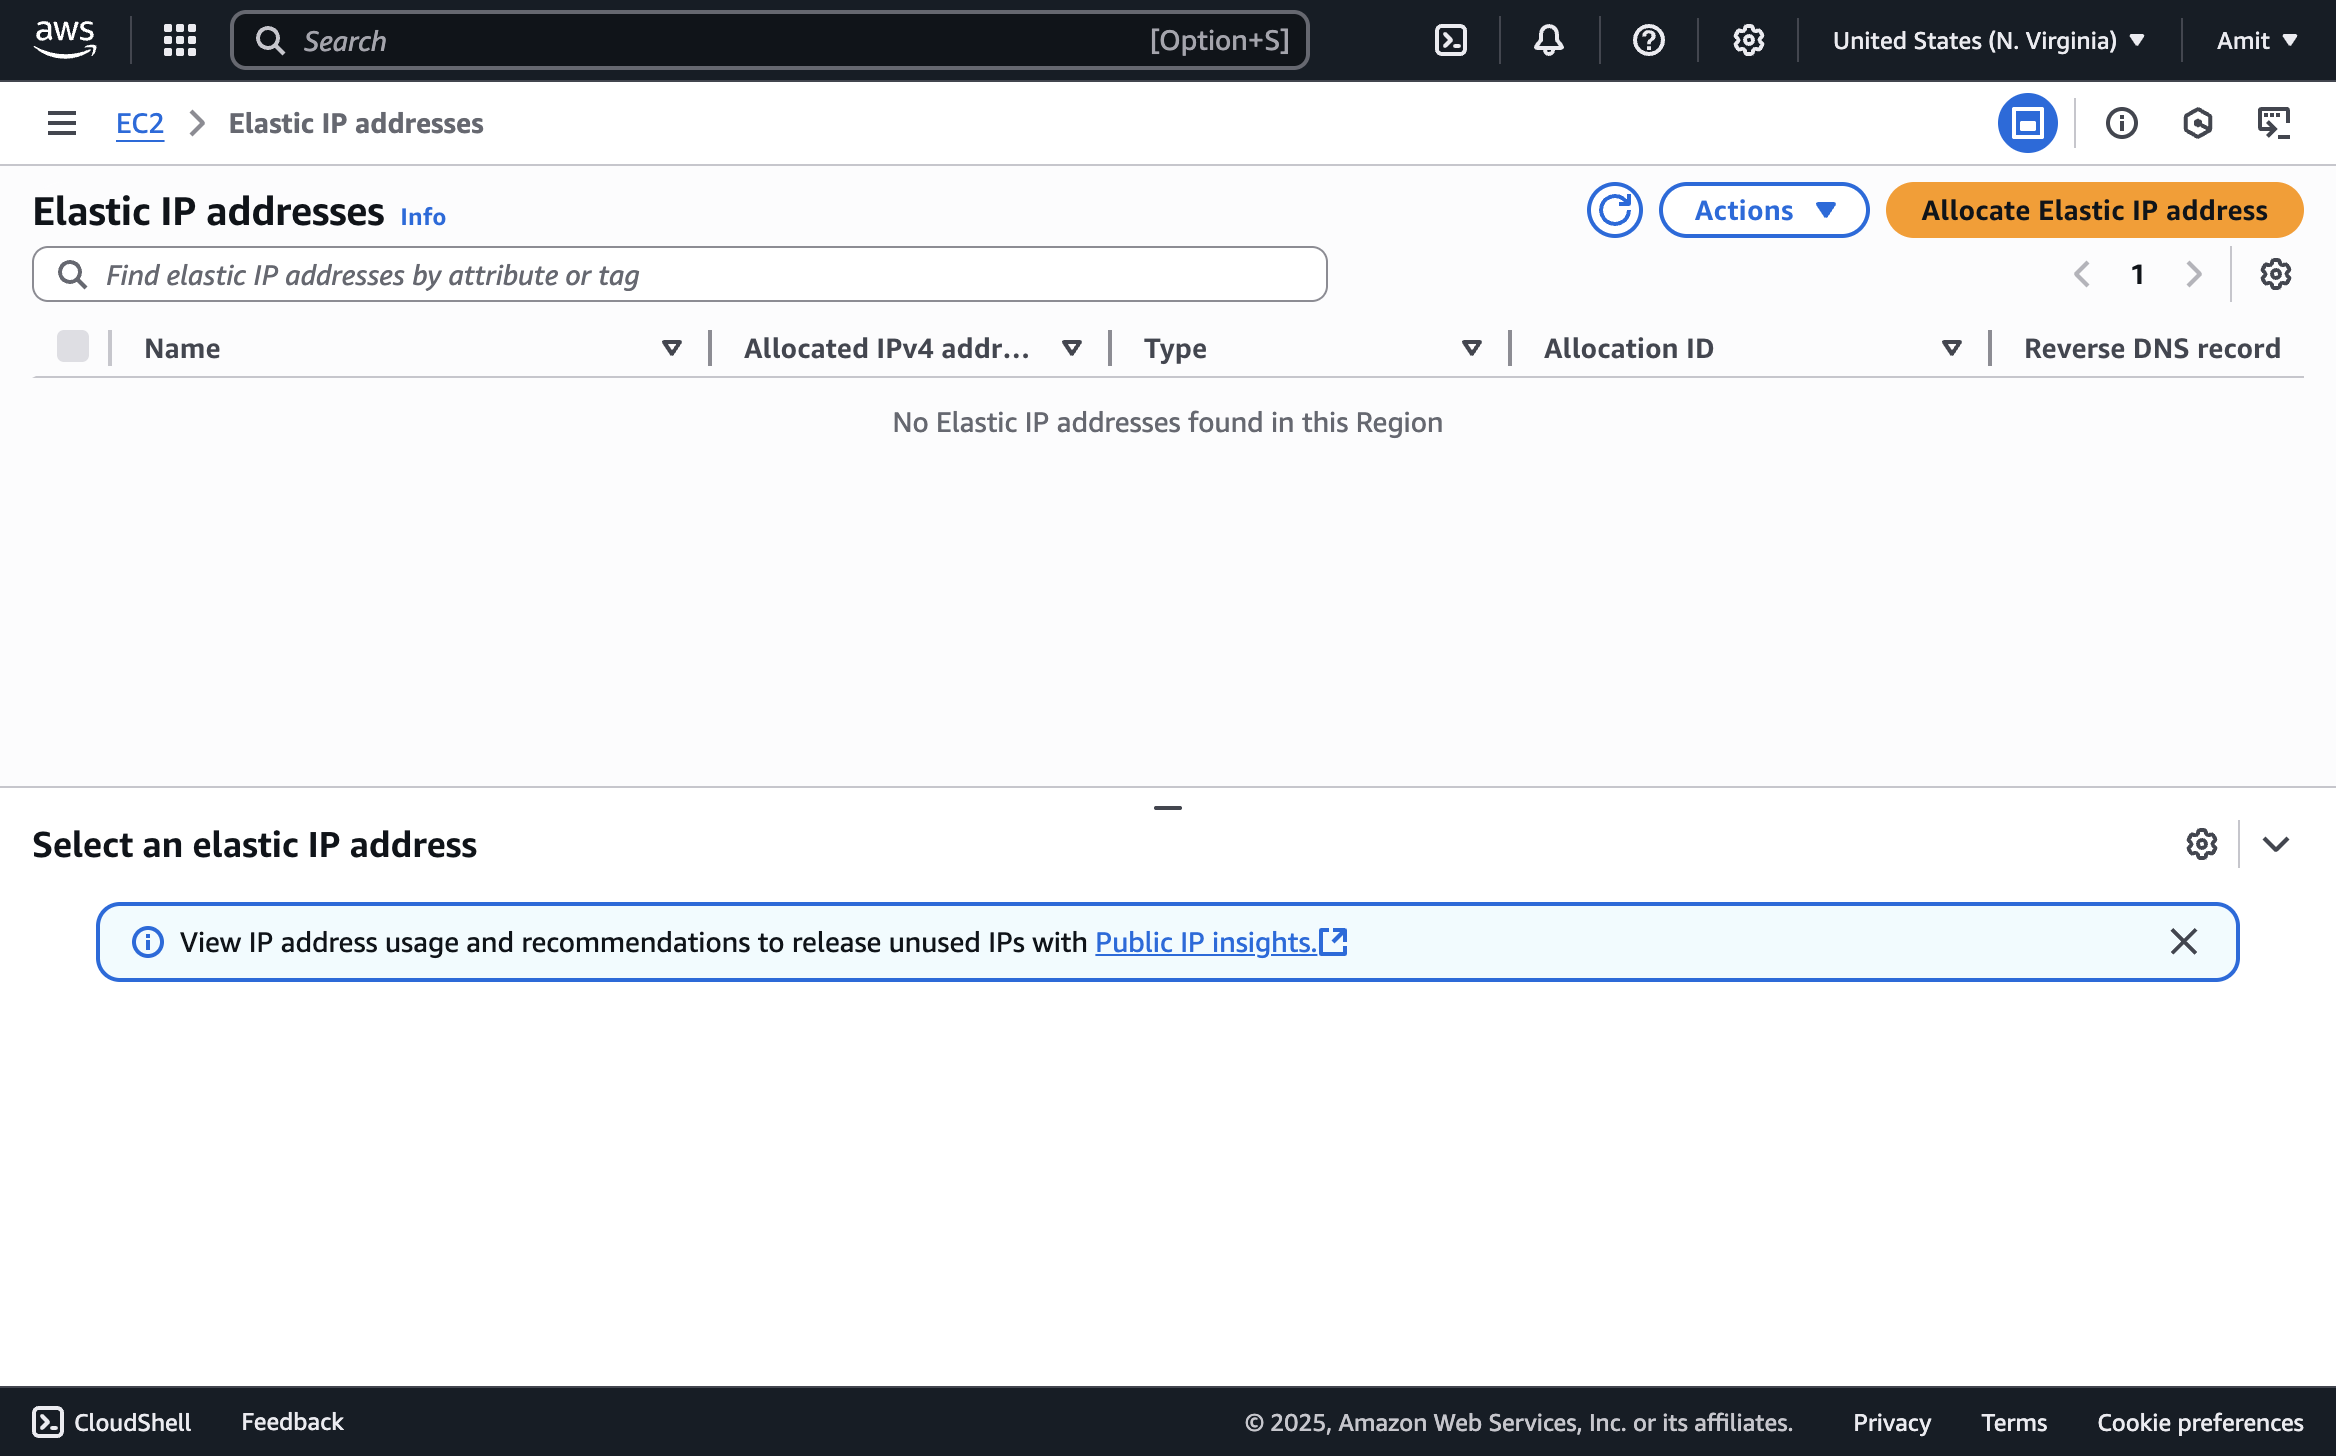
-
Click the "Allocate Elastic IP address" button.

-
Keep the default settings and click "Allocate"
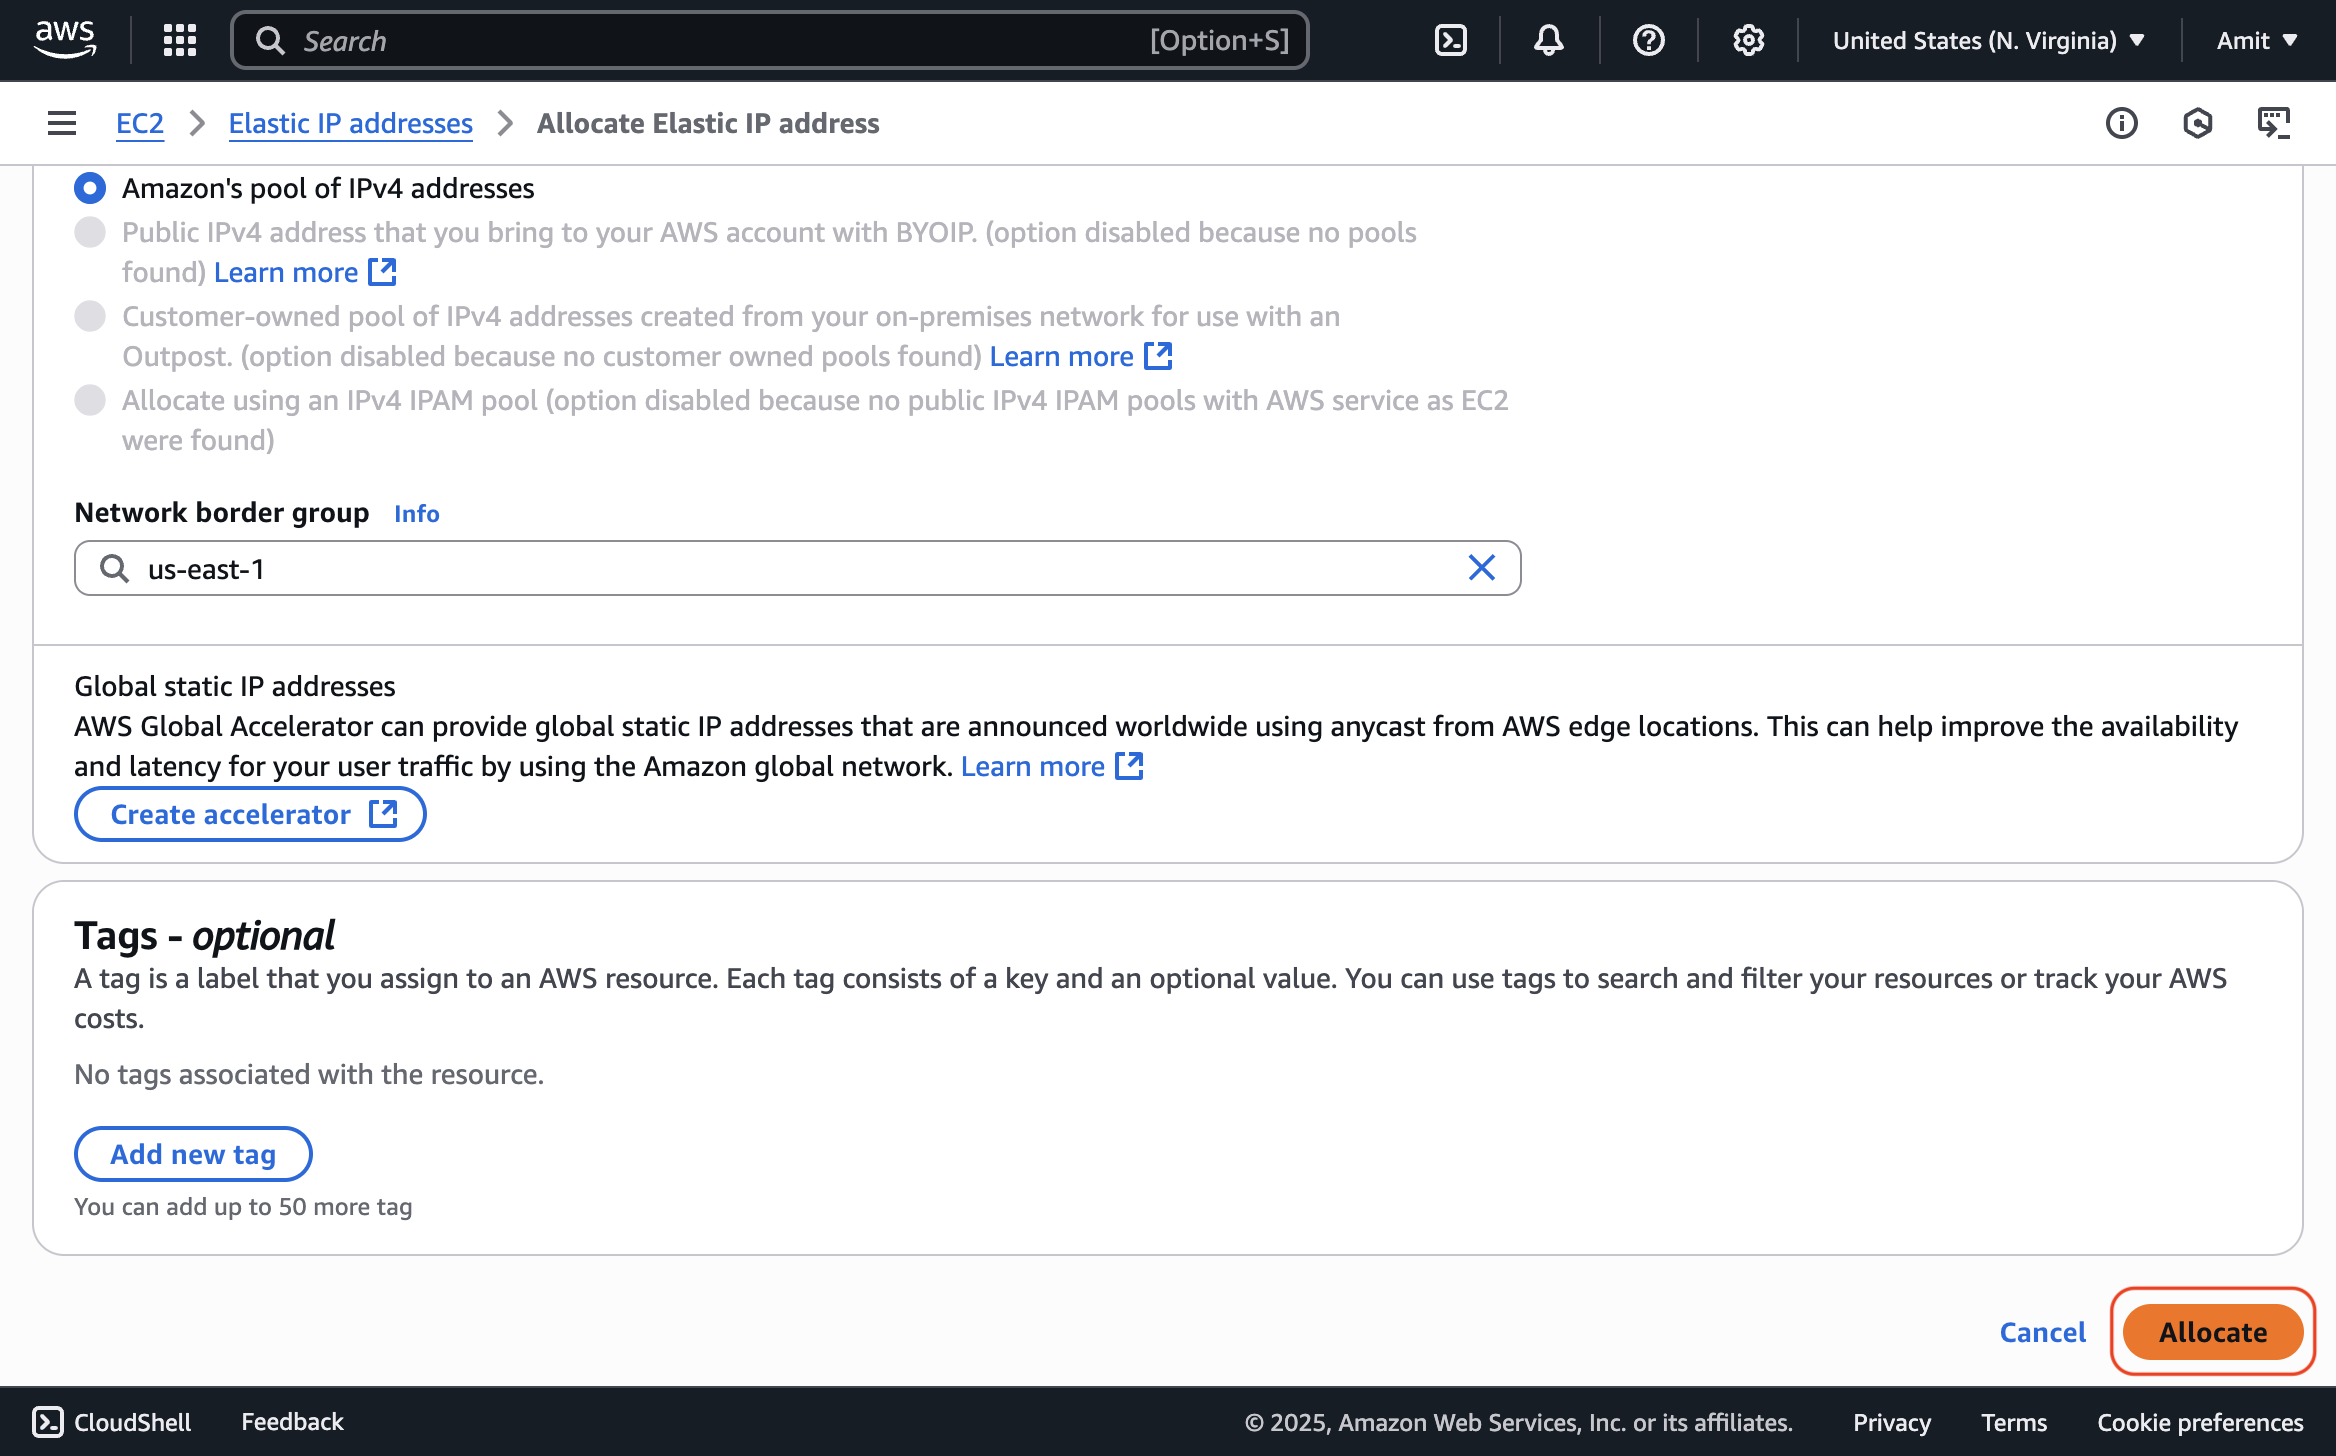
This creates an Elastic IP address that you'll use to access your app. You will assign this IP to your EC2 instance in the next step.
2. Create an AWS EC2 Instance
-
Go to the EC2 Dashboard and click "Launch Instance"

-
Configure your instance with these recommended settings. You may change the Machine Type and Boot Disk Size based on your scraping needs:
- Name and tags
- Name:
gmaps
- Name:
- Application and OS Images (AMI)
- Amazon Machine Image (AMI):
Ubuntu Server 24.04 LTS - Note: A
.debinstaller requires a Debian-based OS like Ubuntu.
- Amazon Machine Image (AMI):
- Instance type
- Instance type:
t3.medium - Note: 2 vCPU, 4 GB memory. Change based on needs.
- Instance type:
- Key pair (login)
- Key pair name:
Create new key pair > RSA (.pem) - Note: Required for SSH access.
- Key pair name:
- Network settings
- Allow SSH traffic from: ✓
- Note: Required for terminal access.
- Allow HTTP traffic from the internet: ✓
- Note: Required for accessing API via HTTP.
- Allow HTTPS traffic from the internet: ✓
- Note: Required for accessing API via HTTPS.
- Configure storage
- Storage:
80 GiB - Magnetic - Note: Magnetic is the cheapest disk type.
- Storage:

- Name and tags
-
If you're scraping data for your own needs, enable Spot Instances as they are 70-90% cheaper than On-Demand instances. Enable them with these settings:
- Advanced details
- Purchasing option:
Spot Instances - Note: Enables Spot Instances.
- Purchasing option:
- Customize Spot instance options
- Request type:
Persistent - Interruption behavior:
Stop
- Request type:
- Advanced details
Don't use Spot VMs for customer-facing APIs or mission-critical applications, as they can be stopped by AWS at any time if the resources are needed elsewhere.
-
Click Launch instance.
-
Now, associate the Elastic IP:
- Go to Elastic IPs
- Select your previously created Elastic IP
- Click Actions > Associate Elastic IP address
- Select your newly created instance and click Associate
-
Connect to your instance via SSH:
- Go to EC2 Instances
- Select your instance
- Click Connect > EC2 Instance Connect
- Click the Connect button
3. Installing Your Desktop App
Now that your EC2 instance is ready, let's install your Botasaurus Desktop API.
-
First, install the necessary packages on your instance by running the command below. This script installs Botasaurus CLI and the Apache web server to manage requests to your app.
curl -sL https://raw.githubusercontent.com/omkarcloud/botasaurus/master/vm-scripts/install-bota-desktop.sh | bash
-
Next, install the desktop application on the EC2 instance.
python3 -m bota install-desktop-app --debian-installer-url https://google-maps-extractor-with-api-omkar-cloud.s3.amazonaws.com/Google+Maps+Extractor+Api-amd64.deb --custom-args "--auth-token YOUR_AUTH_TOKEN"
When the installation completes, you'll see a link to your API documentation. Visit it see the api.

How to Delete the EC2 Instance and Avoid Incurring Further Charges?
:::warning[Backup Your Data]
Before deleting the instance, download any important data to avoid permanent loss.
:::
To prevent ongoing costs, you must delete both the EC2 instance and release the Elastic IP address as follows:
-
Cancel the Spot Request (Spot VMs only)
If you have enabled Spot Instances, cancel the Spot request before deleting the instance. Otherwise, they will keep respawning, again and again. To cancel the Spot request:- Go to Spot Requests
- Select your Spot request
- Click Actions > Cancel request
- Click Confirm to cancel
-
Terminate the EC2 Instance
- Go to EC2 Instances
- Select your instance
- Click Instance state > Terminate (delete) instance
- Click Terminate (delete) to confirm

-
Release the Elastic IP Address
- Go to Elastic IPs
- Select your Elastic IP
- Click Actions > Release Elastic IP address
- Click Release to confirm
That's it! You have successfully deleted the EC2 instance and released the Elastic IP. You will not incur any further charges.
How to add Domain Name and SSL to Api?
Please follow the steps mentioned in this guide.
❓ What are the different pages and how do they help me?
Mainly, there are 4 pages in the UI Dashboard:
- Home Page ('/')
- Output Page ('/output')
- Results Page ('/output/1')
- API Integration Page ('/api-integration')
Home Page ('/')
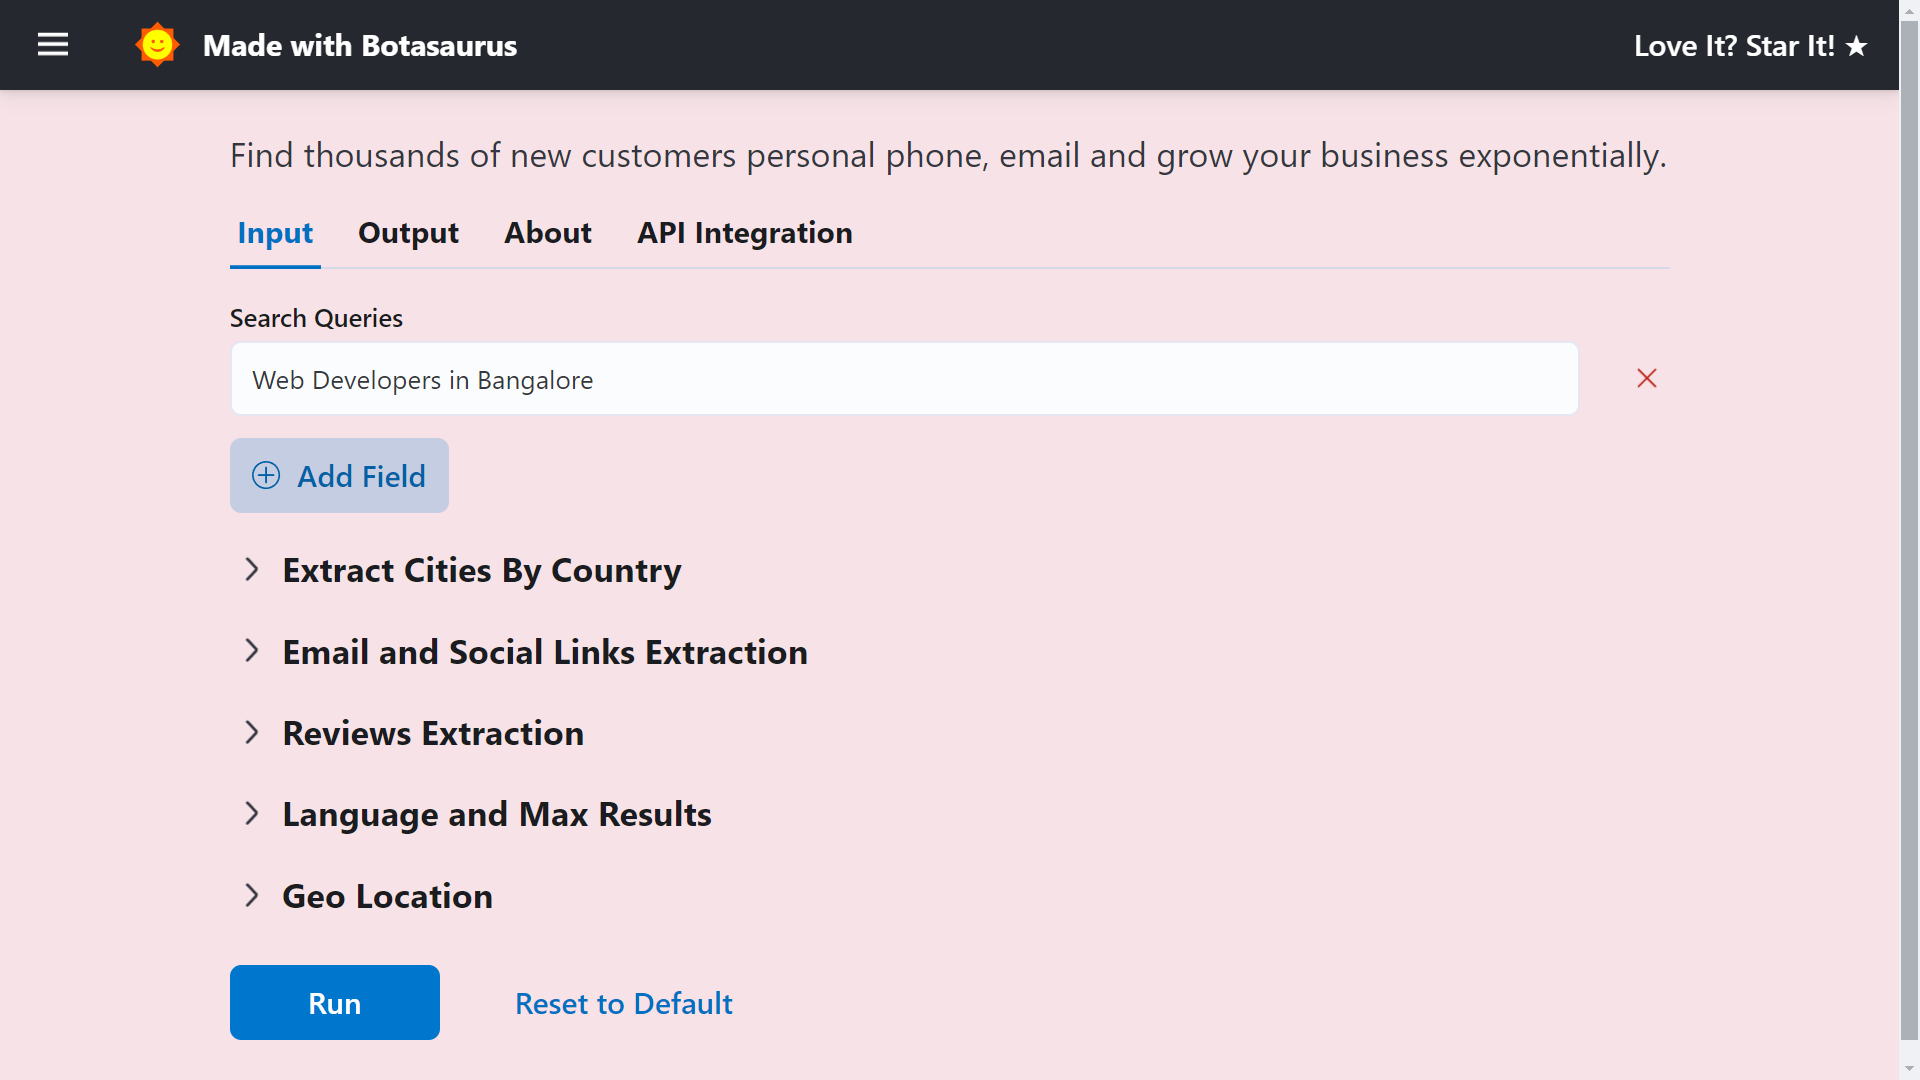
You can input your queries here and search by:
-
List of queries
-
List of links

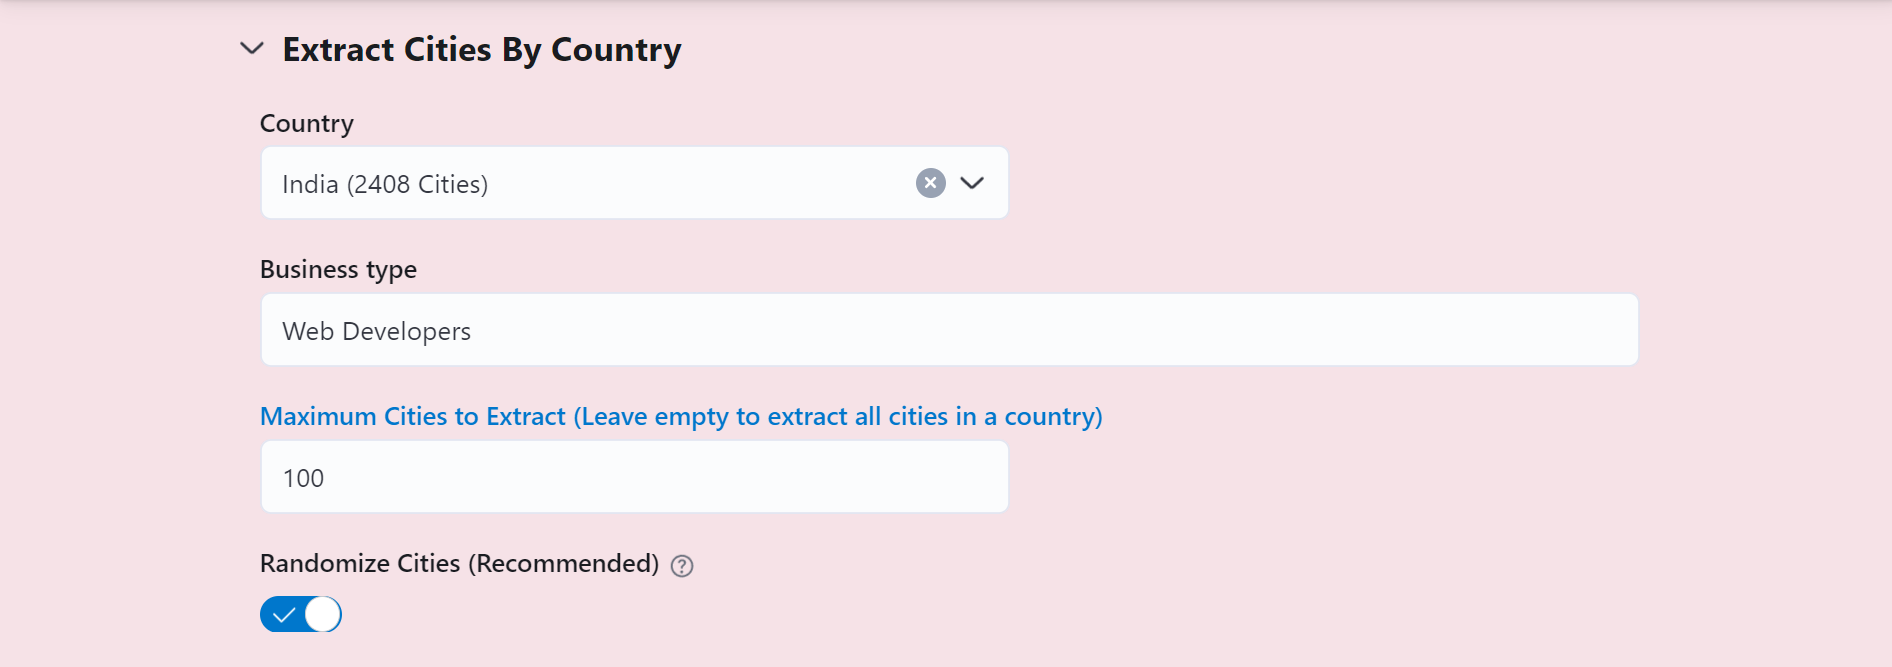
-
Scrape data for a specific type of business across all cities in a country.
-
Scrape Reviews

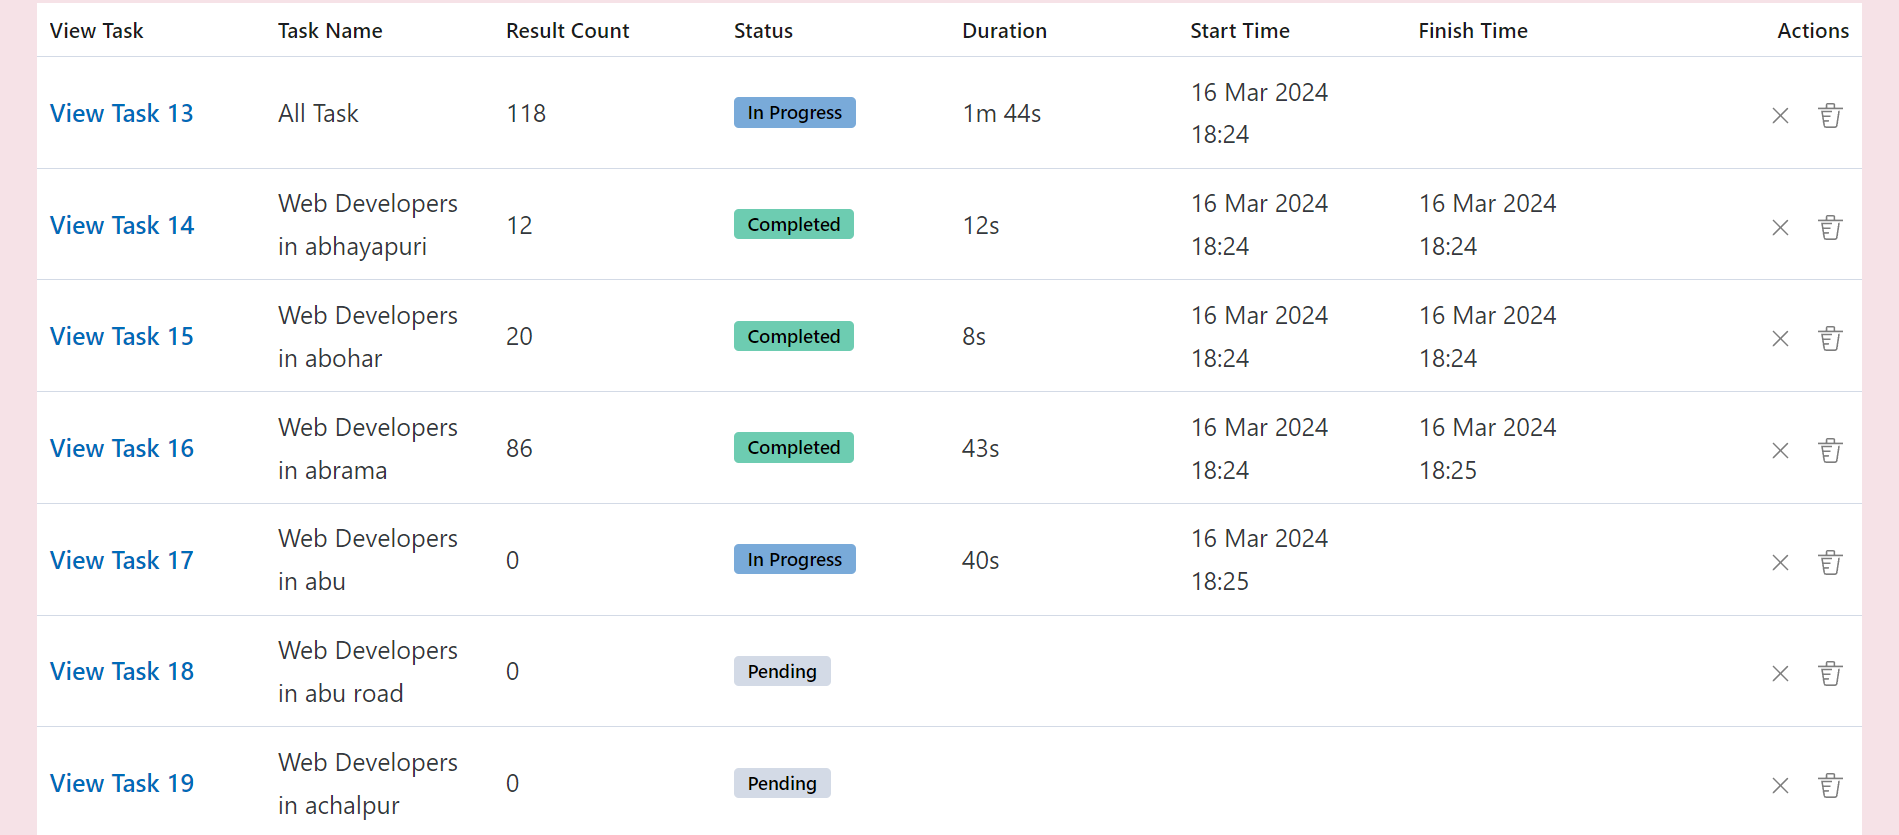
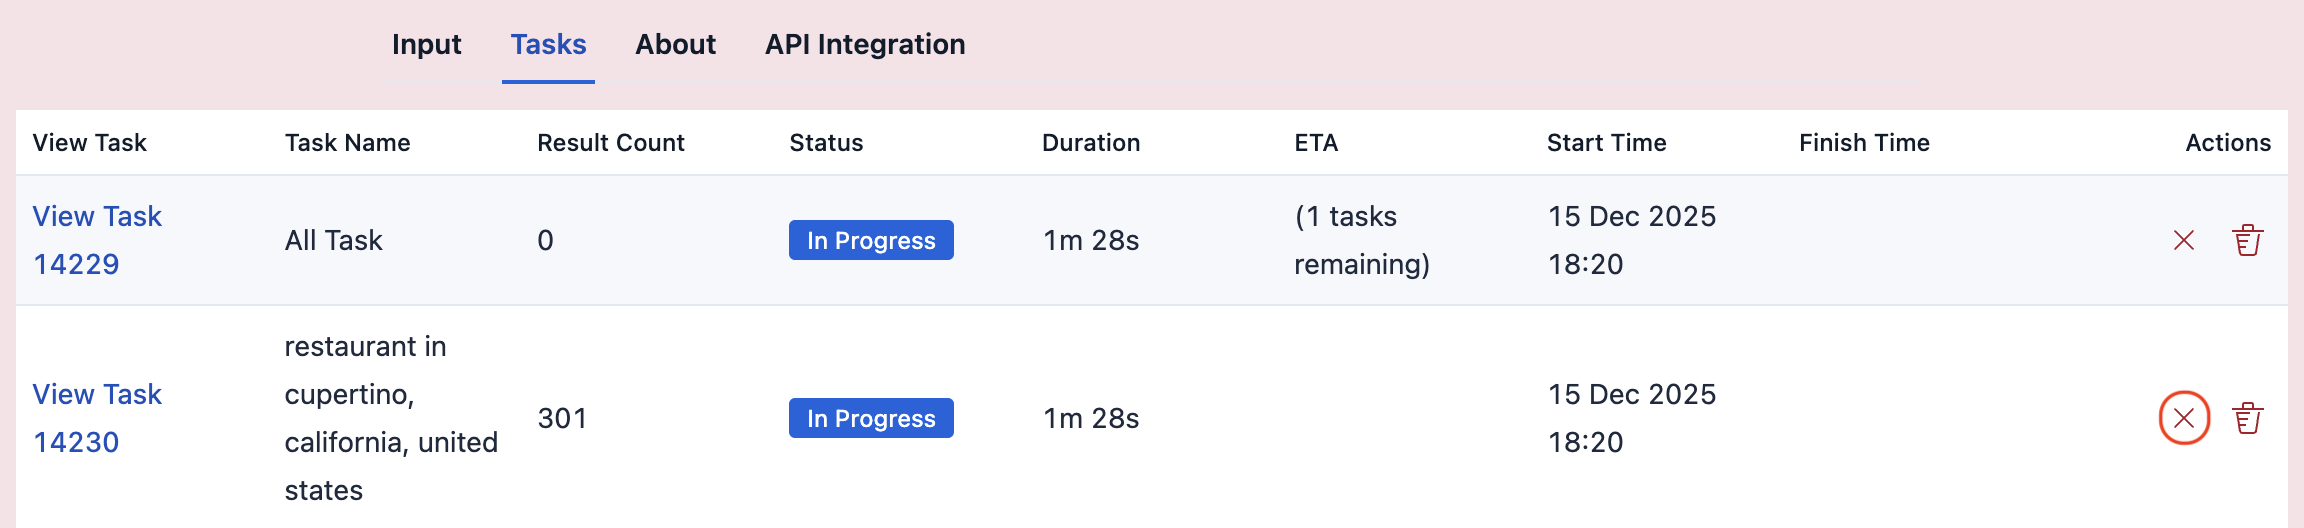
Output Page ('/output')
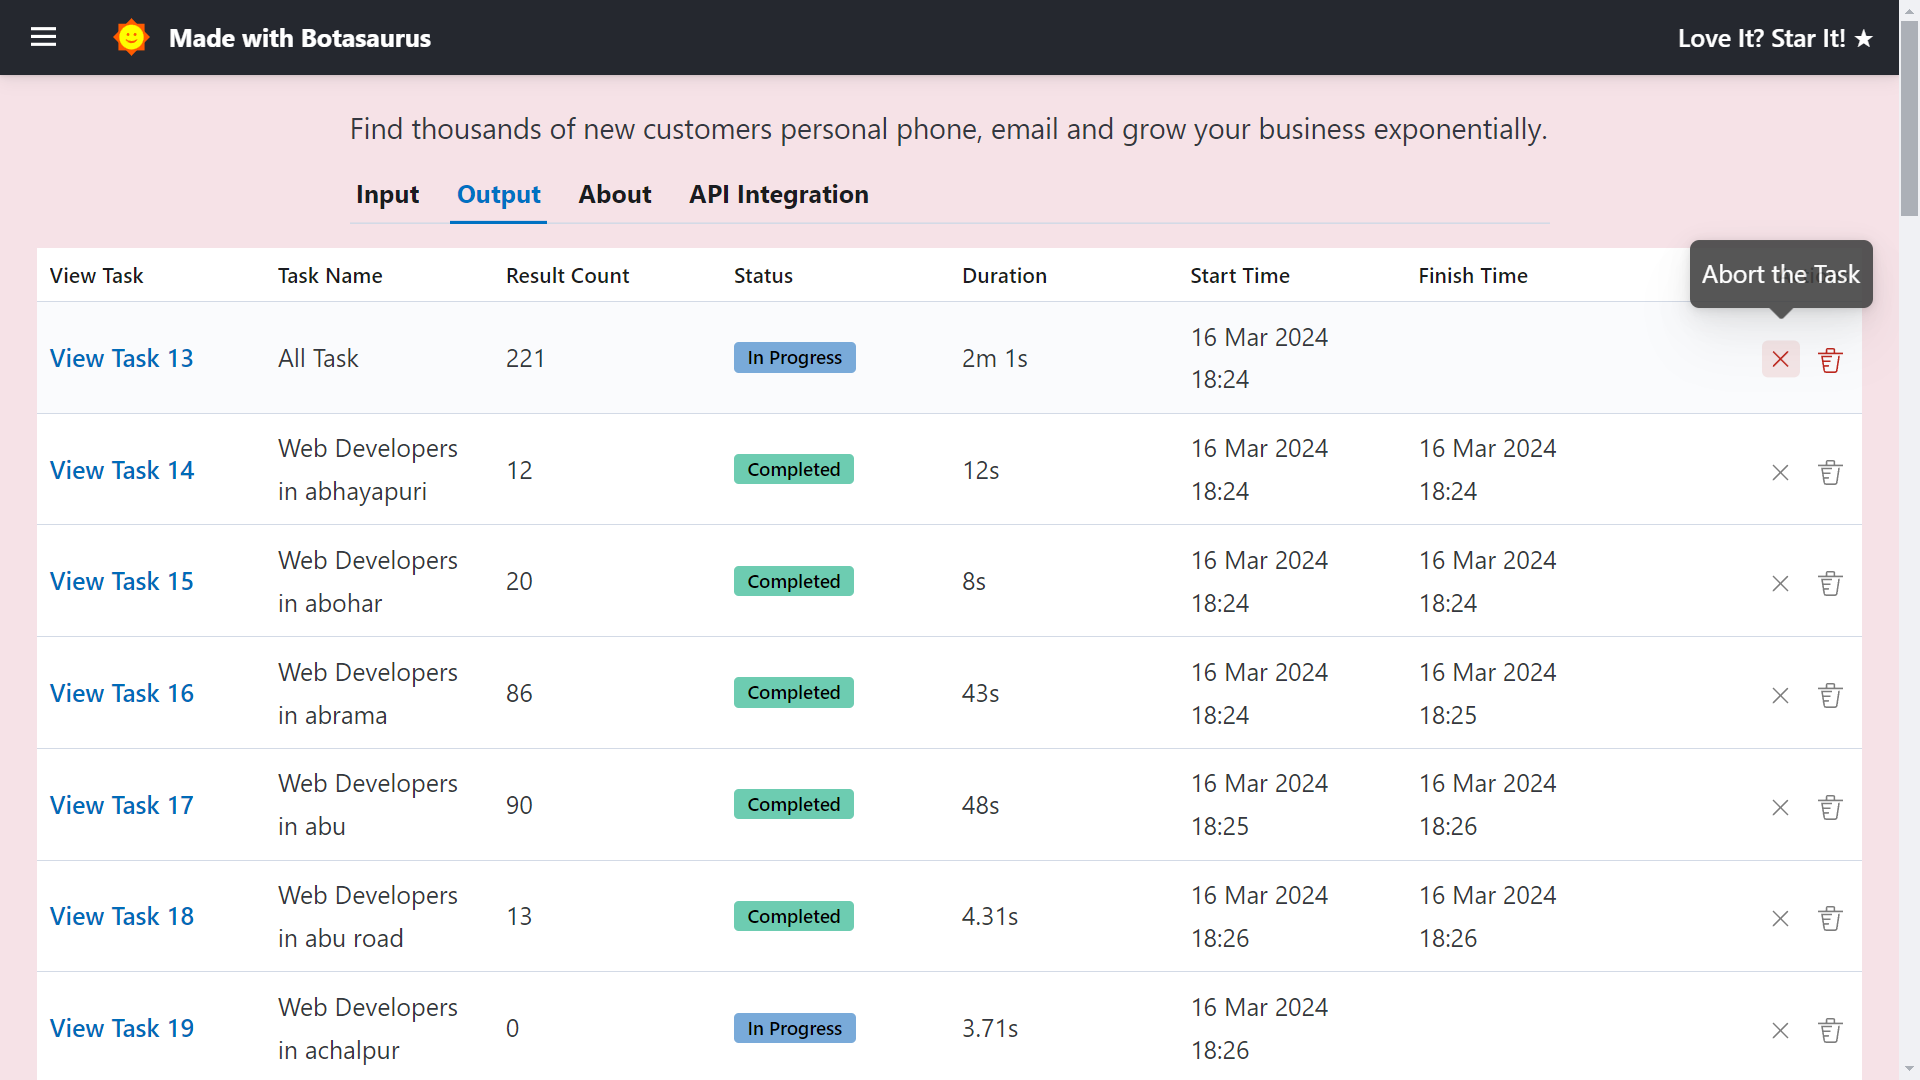
The Output page helps you manage your tasks. You can use it to:
-
See tasks and their status (pending, in progress, or completed).
-
Abort or delete any task.

-
Additionally, whenever you run a query, a task named "All Task" will be created for it, which combines results from multiple queries.
For example, if you search for "Web Developers" in "Cupertino, California" and "Redwood City, California", the "All Task" will show you the combined results for both queries.
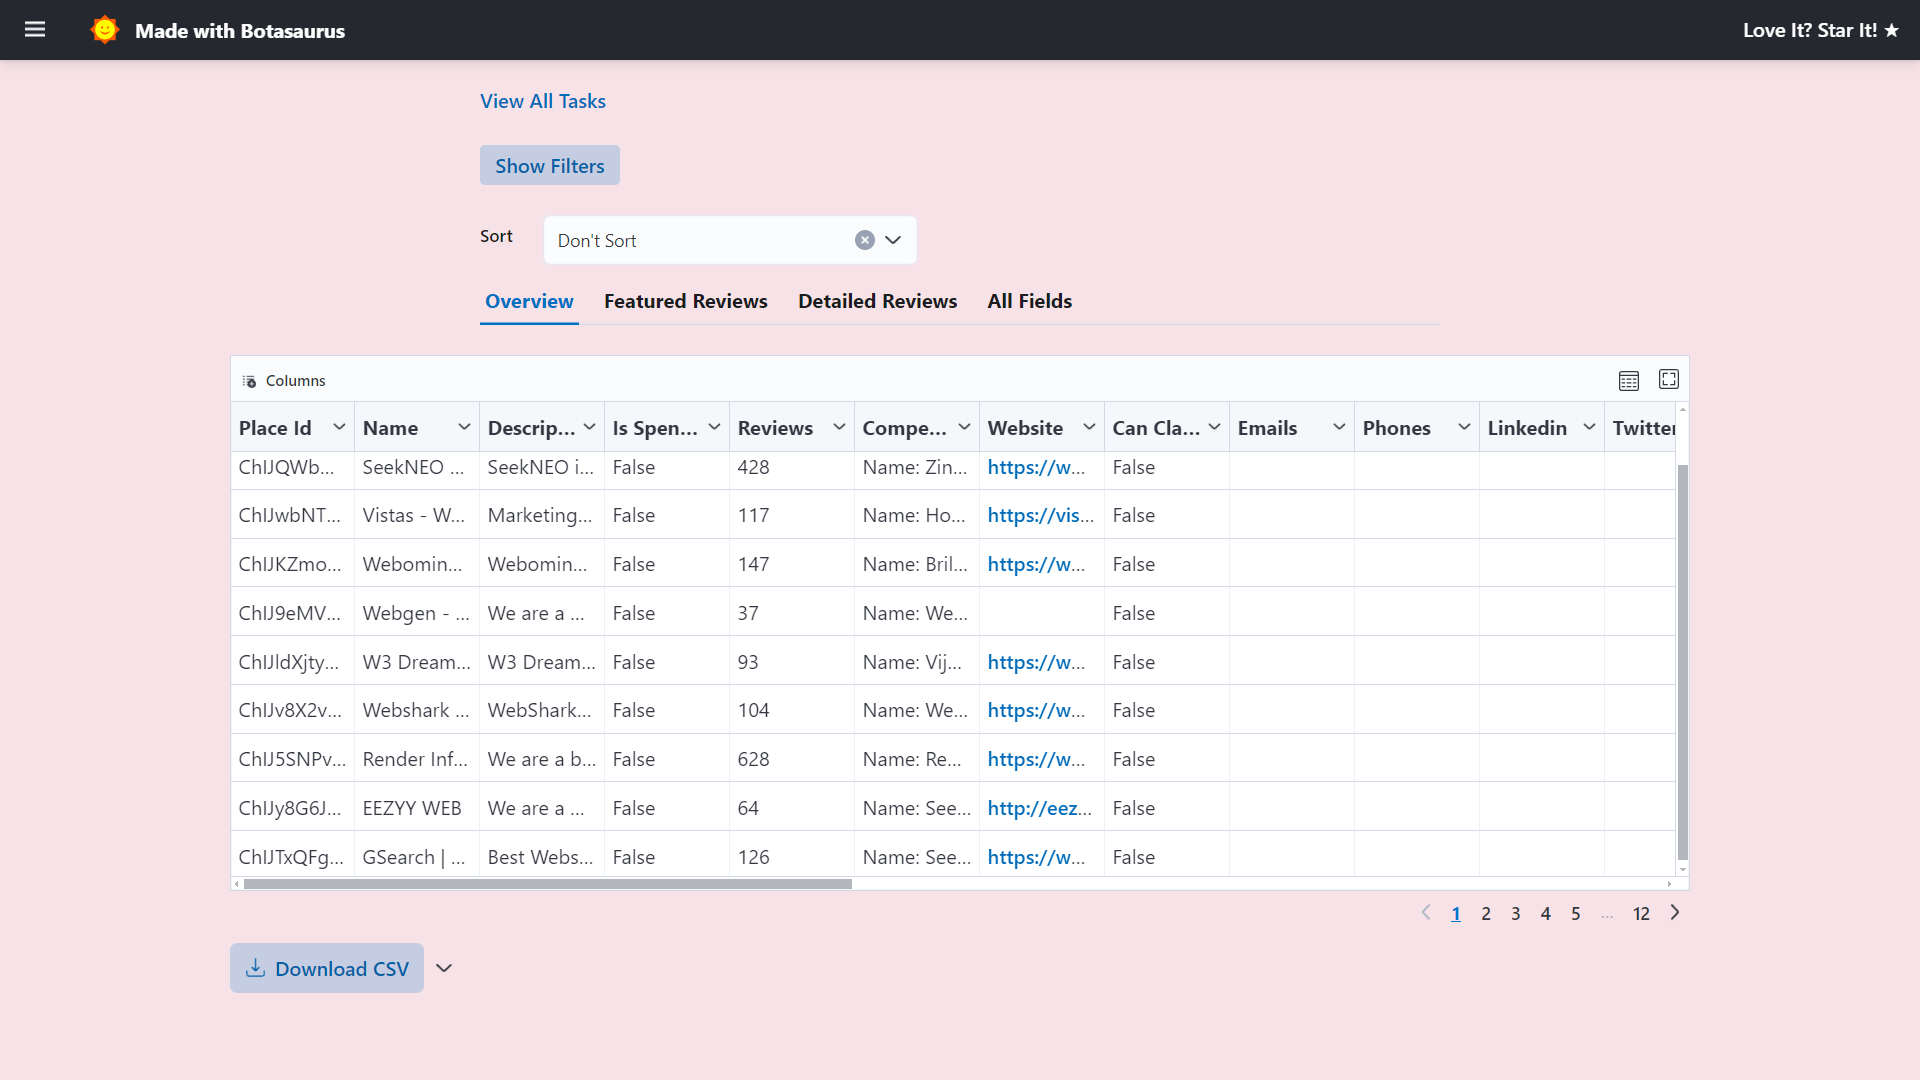
Results Page ('/output/1')
This is the most important page where you can view, sort, filter, or download the results of the task.
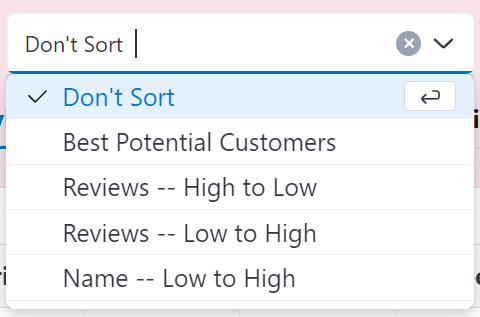
Sorting
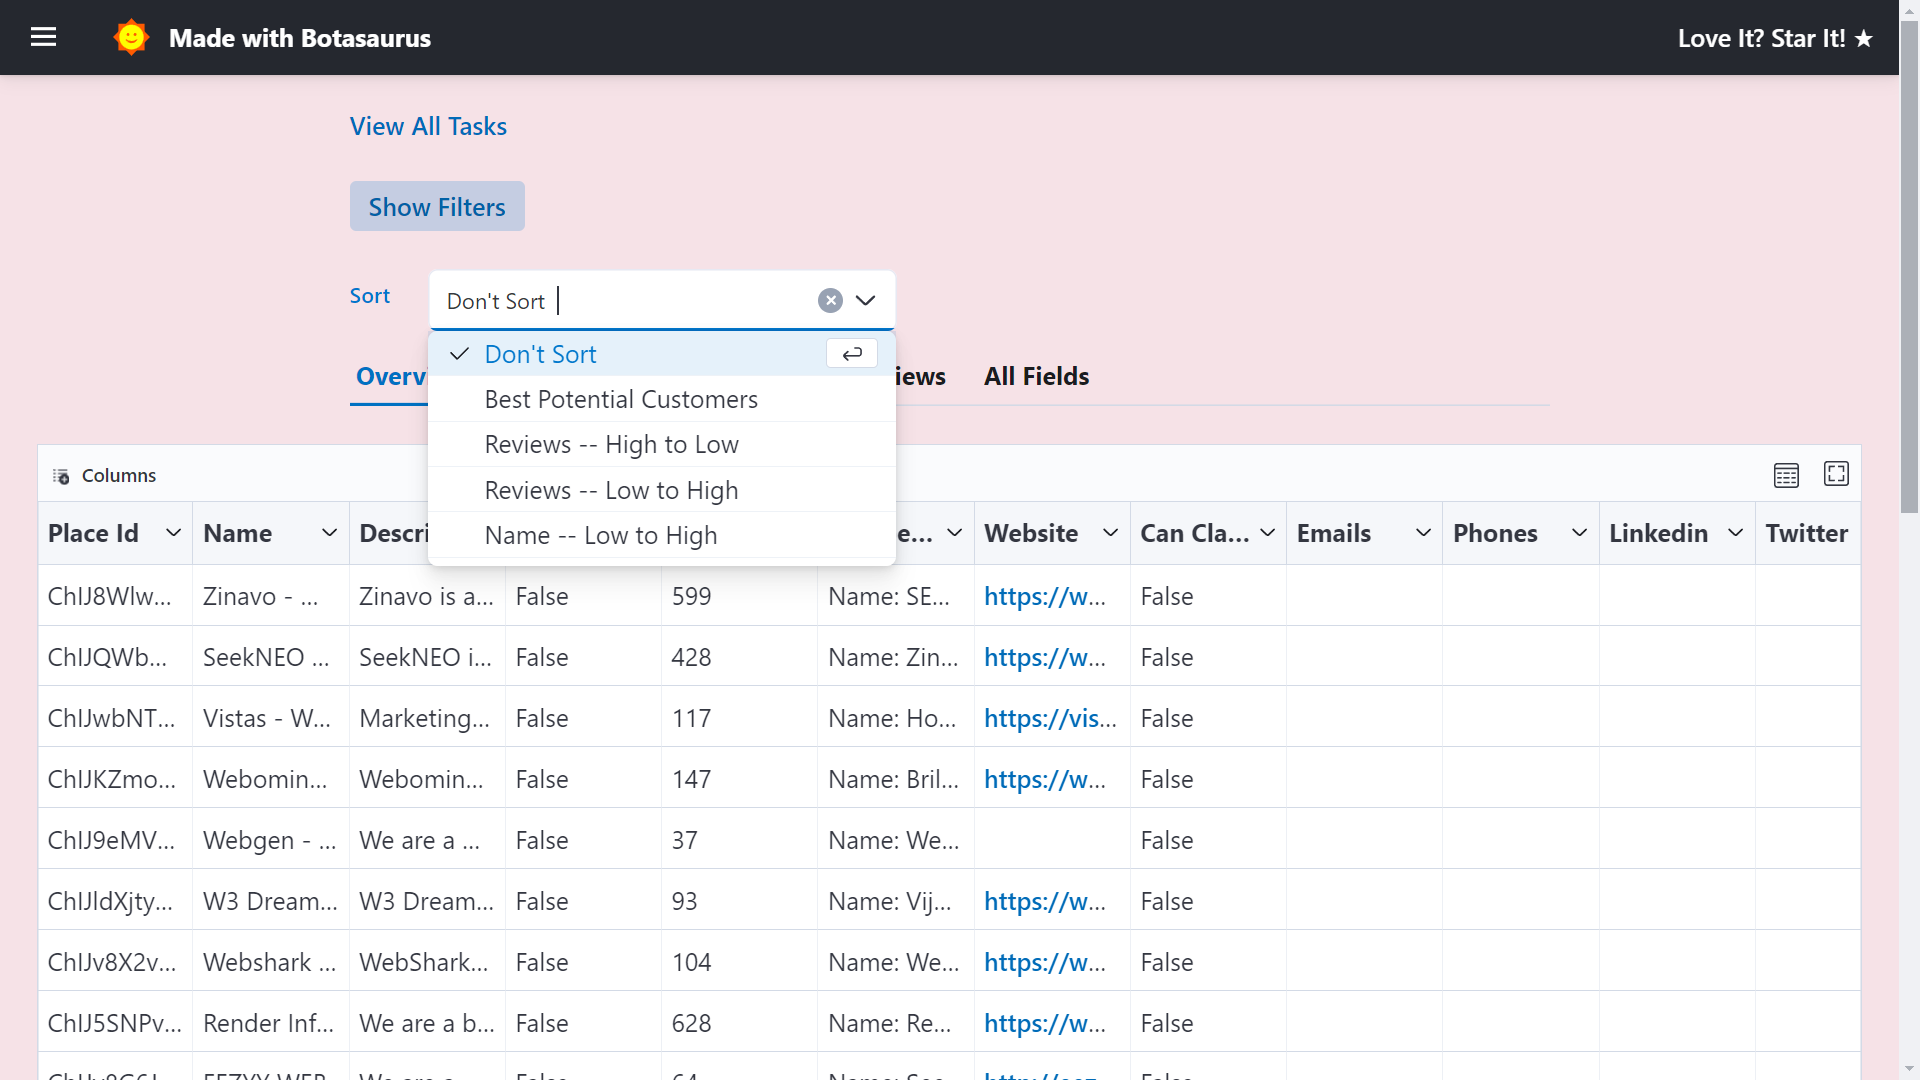
By default, we sort the listings using "Tech Savvy, High Earners" order, which is as follows:
- Reviews [Businesses with more reviews come first]
- Website [Businesses with websites come first]
- Is Spending On Ads [Businesses already investing in ads are more likely to invest in your product, so they appear at the very top.]
You can also sort by other criteria, such as name or reviews.
Filters
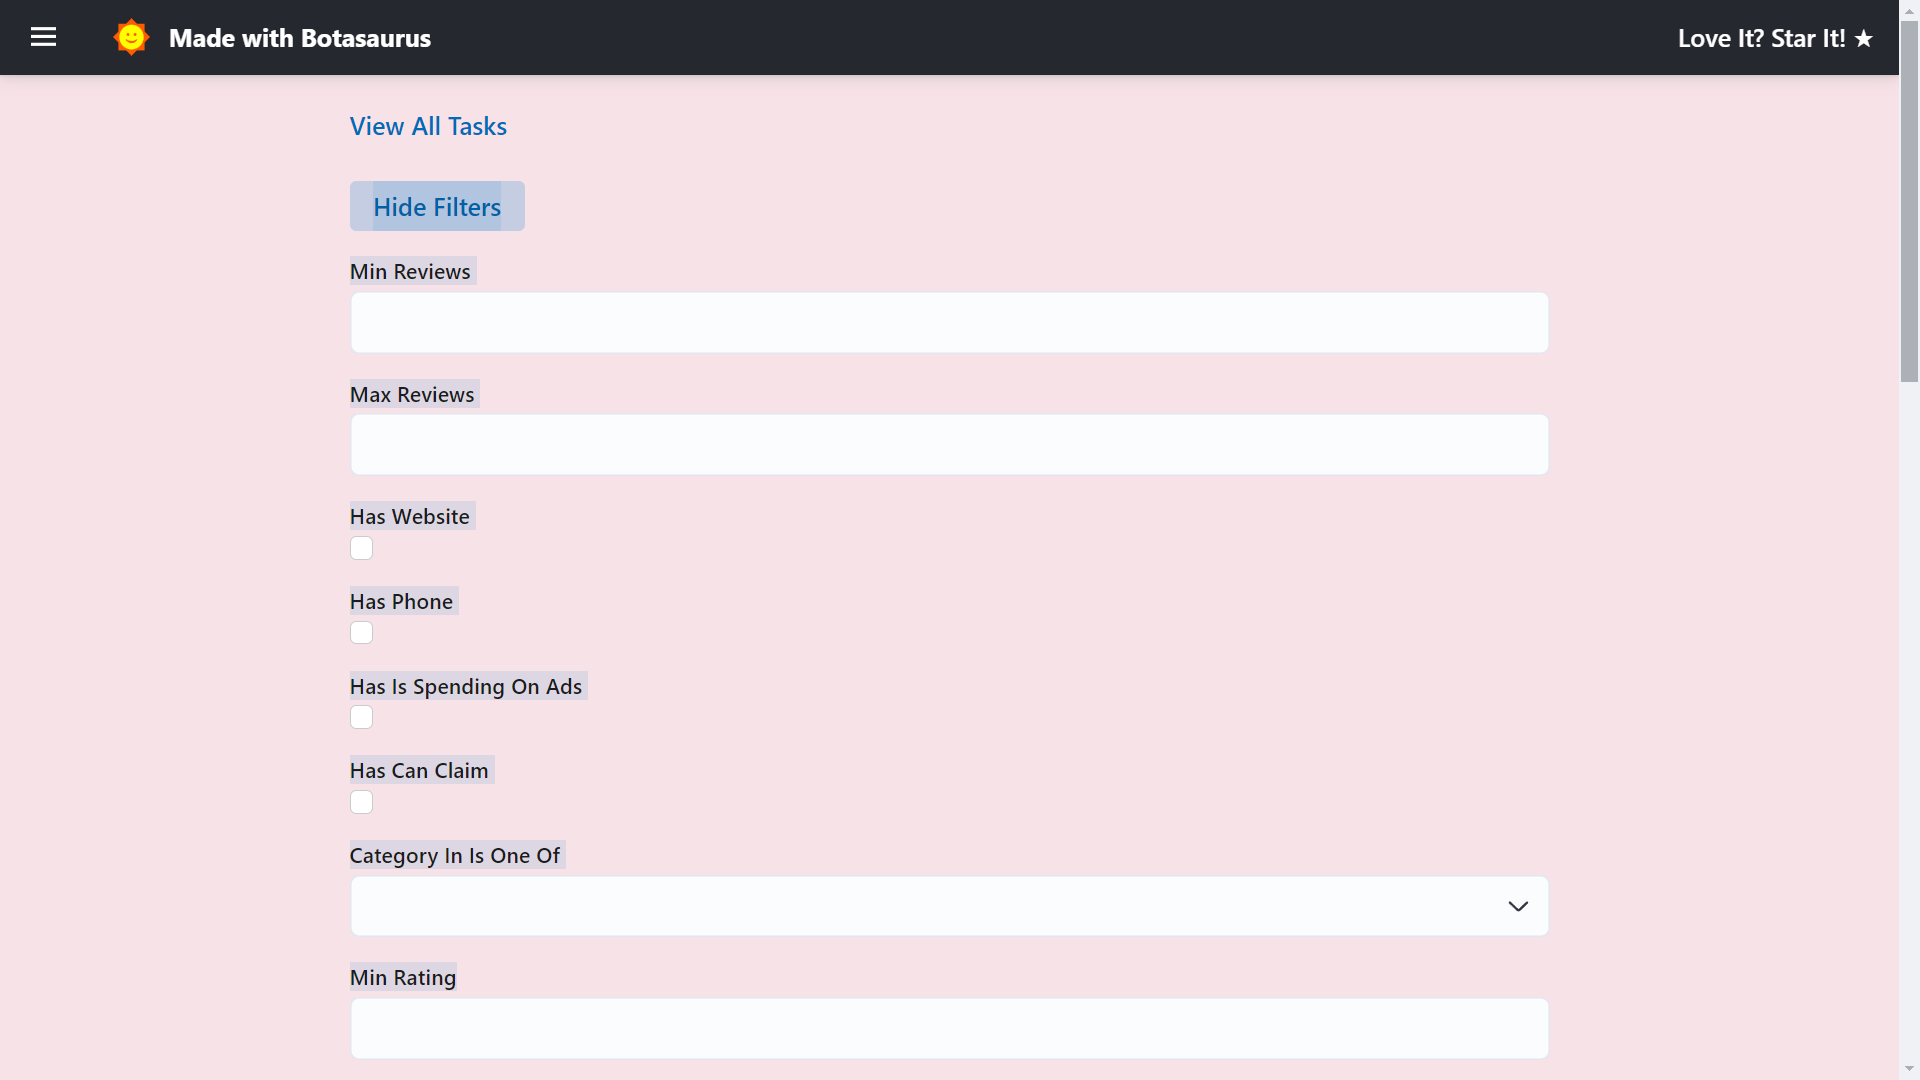
To find the exact results you're looking for, click the "Show Filters" button and apply the desired filters.
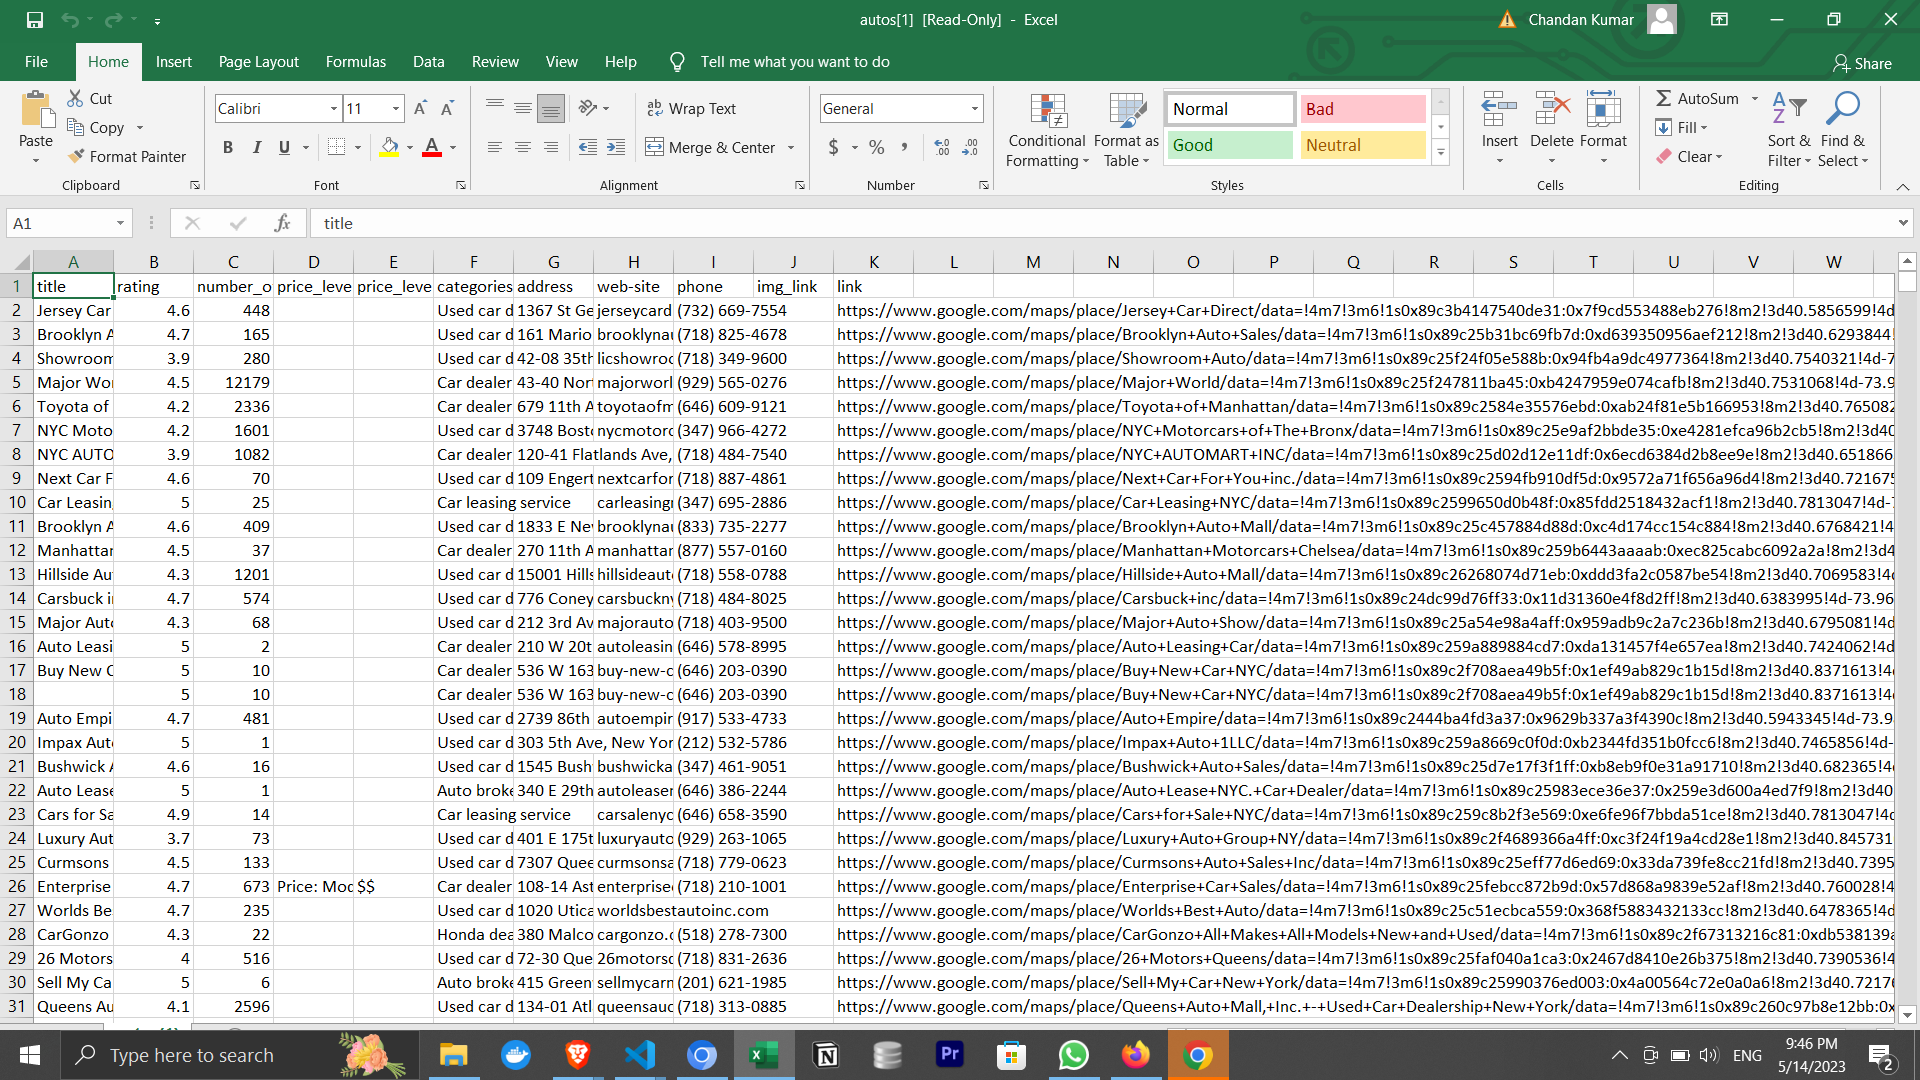
Export

Download results in various formats (CSV, JSON, Excel) using the export button.
API Integration Page ('/api-integration')
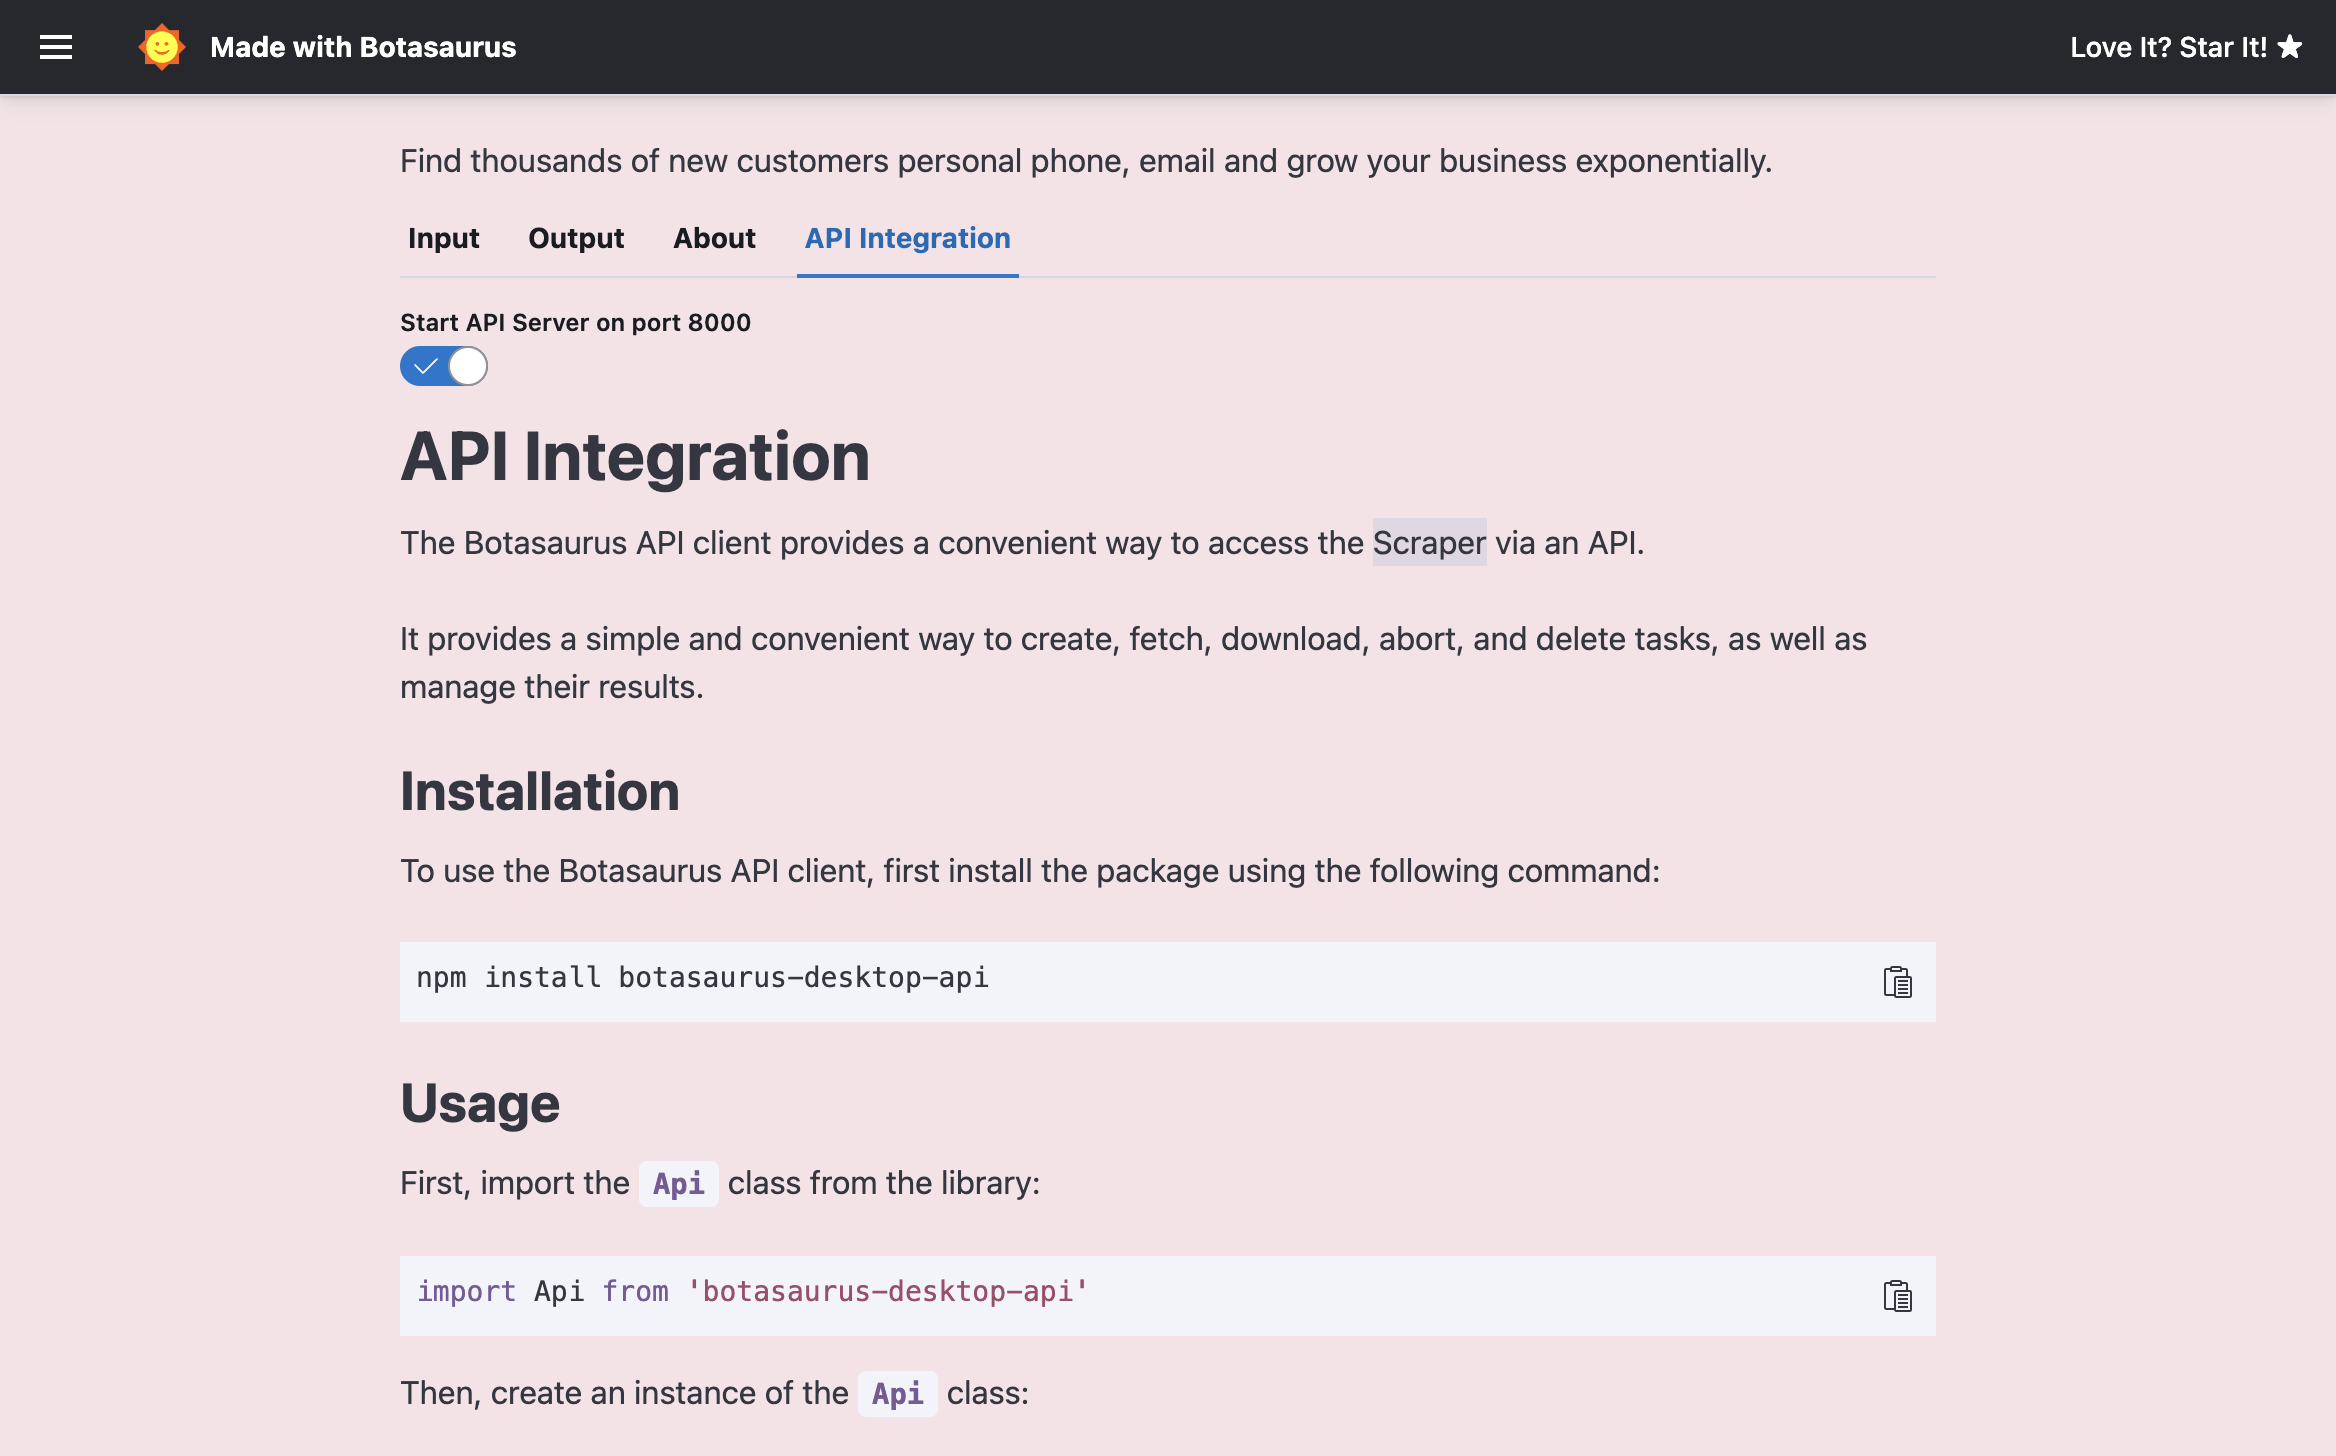
The API Integration Page shows documentation to help you integrate the Google Maps Extractor with your applications via API.
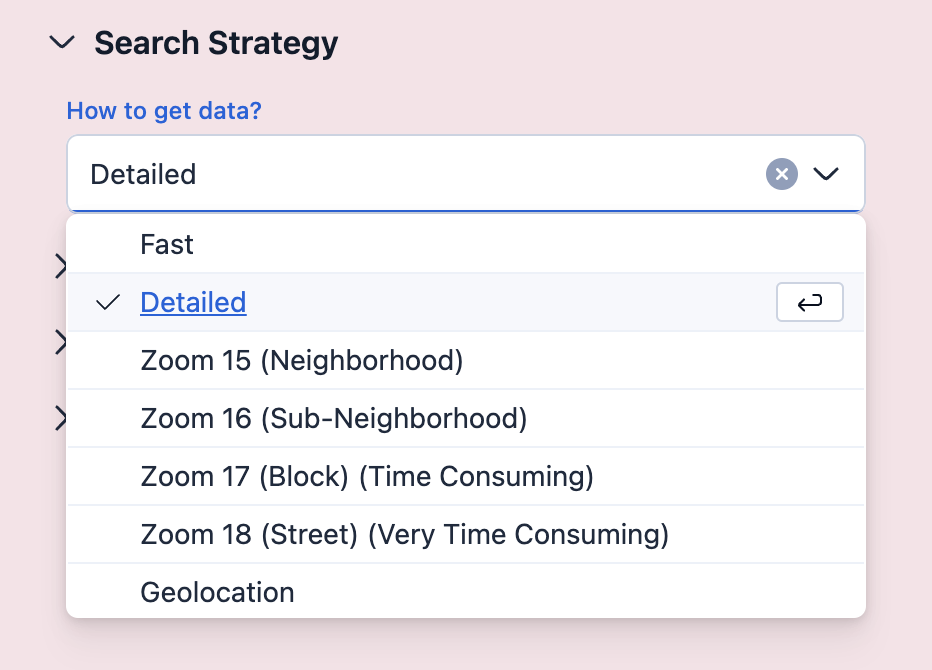
❓ What are the various search strategies, and which one should I use?
There are 5 kinds of search strategies:
- Fast (Default)
- Fastest
- Detailed
- By Zoom Level (15, 16, 17, 18)
- By Geolocation
Let's see when to use which strategy:
Fast (Default):
- Returns 120–1600 results per city.
- Completes in 1–10 minutes per city.
- When to use:
- Best for country-level extraction (completes in 1–2 days).
Fastest:
- Slightly faster than Fast mode (~30 seconds per city), but returns ~30–40 fewer results.
- When to use:
- When speed is the top priority and a small reduction in results is acceptable.
Detailed:
- Returns more results than Fast mode, but takes significantly longer.
- When to use:
- Best for single-city or state level extraction where thoroughness matters.
- ⚠️ When not to use:
- Not recommended for country-level extraction due to high time requirements.
- Tip: Set "Max Results" to 1000 per city, otherwise large cities like New York can take 2+ hours.
By Zoom Level (15, 16, 17, 18):
- Various Zoom Level sizes are given below:
- Zoom 15: Neighborhood Level
- Zoom 16: Sub-Neighborhood Level
- Zoom 17: Block Level (Time consuming)
- Zoom 18: Street Level (Very time consuming)
- When to use:
- When you want the absolute highest results. Use Zoom 18. It can take 3-4 hours, but you will have thousands of results for big cities like New York City.
- ⚠️ When not to use:
- Not recommended for country level extraction. It can take 3-4 hours for a single city.
By Geolocation:
- Search a specific latitude/longitude or inside a polygon.
- When to use:
- Getting results that are only in a specific area, but not outside it.
❓ How to use the Geolocation feature?
The Geolocation search strategy lets you search for businesses in a specific area of a city. Good for businesses in a specific area, but not outside it.
Real-World Example: Web Developer Targeting Restaurants
Suppose you are a web developer, specializing in making websites for restaurants. Here's a strategy to get customers:
- Find restaurants in a specific neighborhood — e.g., Chinatown, San Francisco.
- Study top restaurants — Identify what successful Chinatown restaurants are doing that drives more customers to them.
- Personalize your pitch — When you contact owners, you can:
- Highlight specific tactics their nearby competitors are using on their website to attract more customers
- Suggest improvements based on what's working for their competitors
Why this works: Business owners are interested in what their local competitors are doing. This approach helps you come across as knowledgeable about their market.
❓ How to create polygons and search using Geolocation?
- Visit geojson.io
- Search for your desired city or neighborhood (e.g., "San Francisco")
- Draw the search area using the polygon/circle tool
Tips:
- Press Enter to save your drawing.
- Left Click on drawing to delete it.
- Draw as many shapes as needed to cover your area
- Copy and paste the GeoJSON from geojson.io into the text area of Polygons Data.
- Press Run to start the task.
❓ I have enough results and want to stop the task. How do I do it?
Click on the Abort Icon to abort the task.
Note:
- Aborting an All Task will abort its child tasks.
- If you close the application while a child task is in progress:

That in-progress task will lose all progress and start from 0 when you reopen the app.
❓ I want all restaurants (or any category) in the US. What's the best approach?
Use the Country Level Data feature, with default Search Strategy "Fast".
It can take 2-3 days to complete for countries with tens of thousands of cities, like the US.
⚠️ Important: Don't use Zoom 18 for country-level data—it would take 20-30 days.
❓ I'm an AI research student. I need all coffee shops in San Francisco for my recommendation AI. How can I get this data?
This is the kind of use case our tool was built for—helping students access data for their research projects.
Use the Zoom 18 search strategy for San Francisco. Let it run overnight. You'll have tens of thousands of results, which is perfect for your research project. There's no cost, as you get 200 free searches each month.
❓ What else can I use this tool for?
-
Finding customers for your startup. Very common use case.
-
Hiring Top Talent
- Example: To hire a good salesperson, search for "Sales Training" in a specific country and contact the training centers for candidate recommendations.
- Benefits:
- Much higher quality candidates compared to online job portals
- Saves a lot of time that would otherwise be spent screening and interviewing a much larger pool of candidates
- We've done this ourselves as well.
-
Discovering the Best Service Providers
- Find top-rated service providers in your area for specific needs.
- Examples:
- Search for "Yoga Classes" in your city to find the highest-rated yoga classes for health and long life.
- Search for "Library" in your city to find the best place to focus on your work.
- Search for "Restaurant" in your city to find the tastiest food options.
- Search for "Computer Repair" in your city to find the most reputable and reliable computer repair shops.
- The list goes on...
This tool can help you save time in various aspects of your personal and professional life.
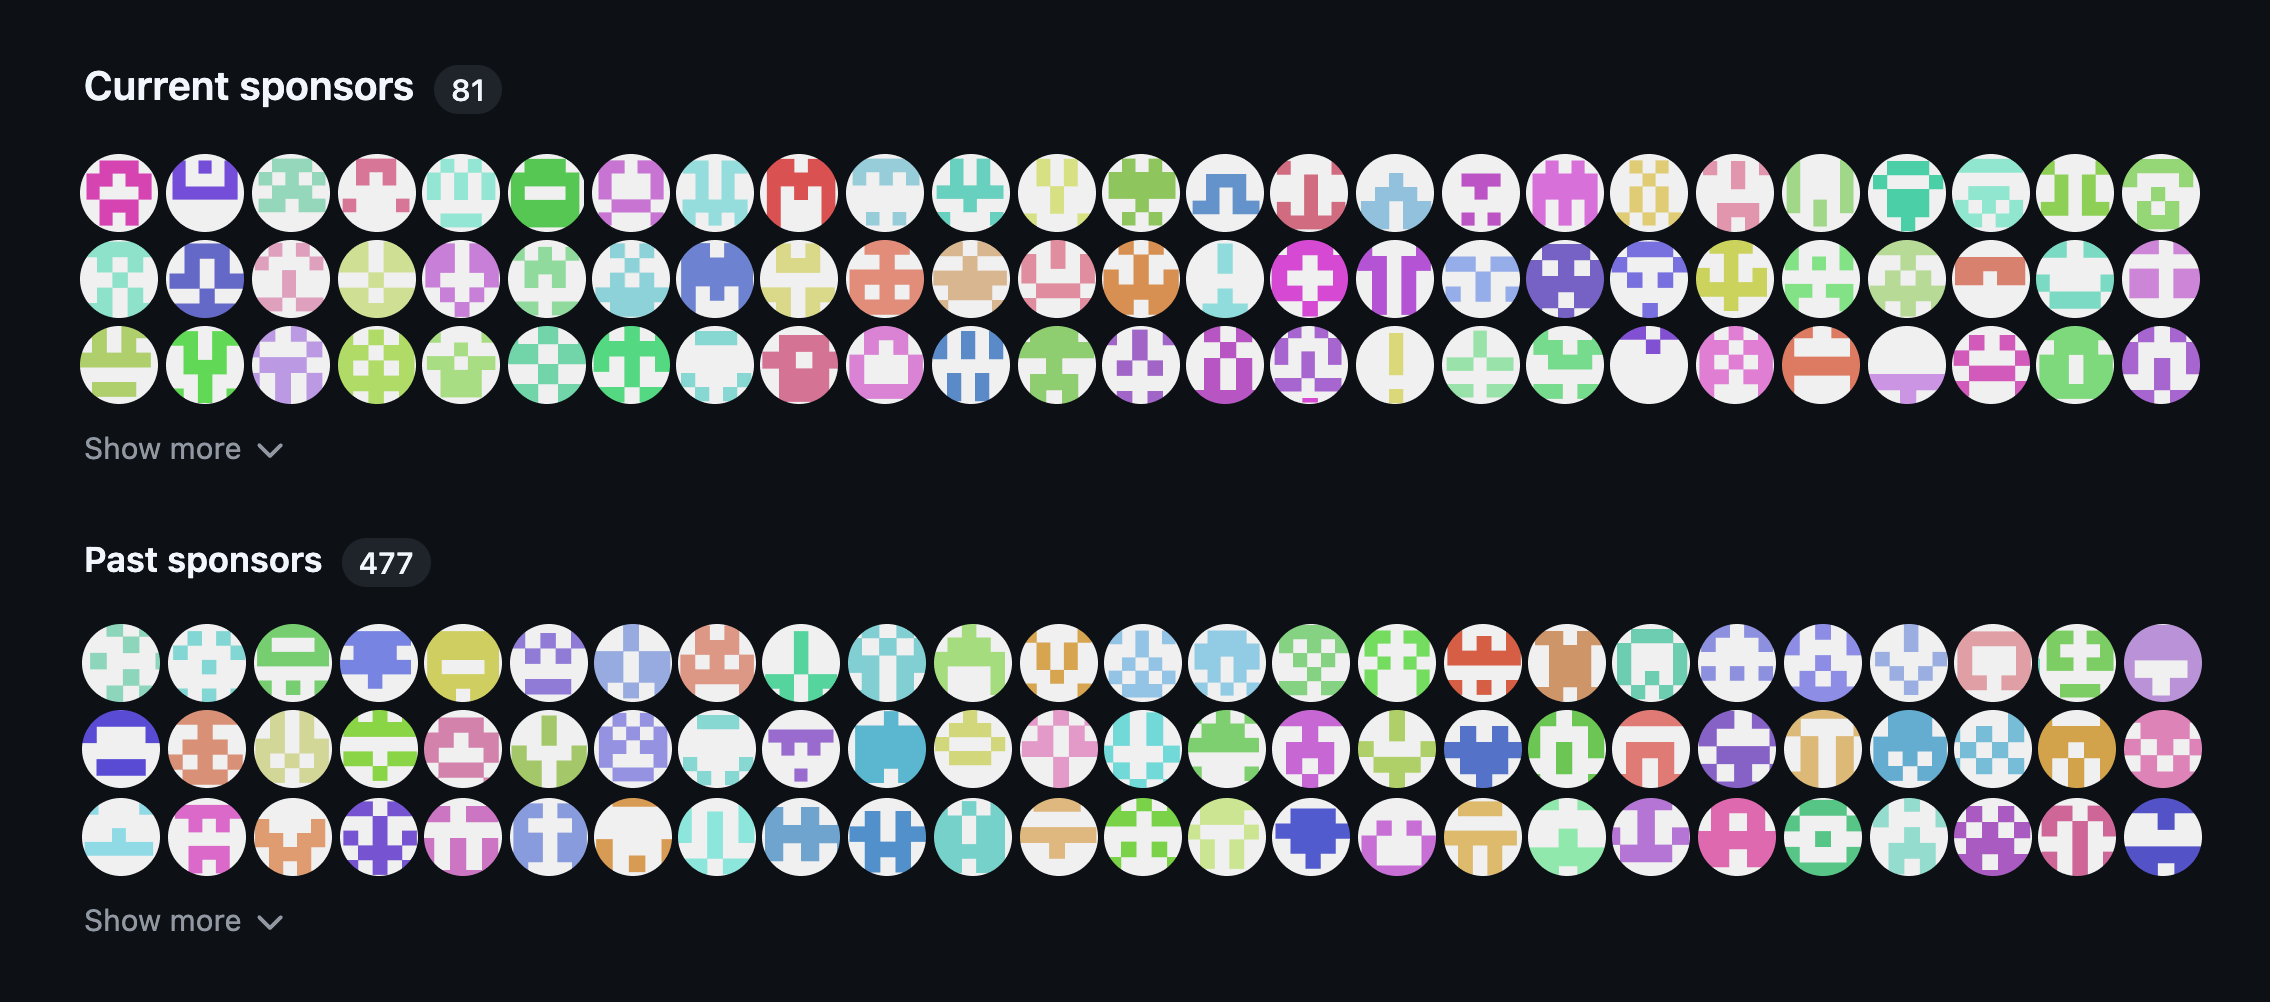
❓ Tell me about Omkar Cloud.
We're a data company with 20+ tools for OCR, data conversion, and developer APIs. Some things we are proud of:
- Built Botasaurus, an open-source automation framework with 3.7K+ GitHub stars
- Sponsored by 1000+ developers on GitHub
❓ Why should I use your Product? There are 10s of Google Maps Scrapers on the Internet, some by brands bigger than yours.
For big brands, this is just one of many tools. For us, it is our core product. We've put in thousands of development hours perfecting it, and we're extremely proud of it.
Coming to Hard Facts:
- 📊 Tens of thousands of results per city with Zoom 18. Only 1-2 other brands can do this.
- 🔑 200 free searches every month. Other websites charge $28 for just 50 searches.
- ⚡ Faster performance with lower bandwidth usage.
- 🖥️ Easy to use — just open, enter query, start seeing results in a few seconds.
- 📁 50+ data points extracted, most in the market.
- 🔌 REST API access for seamless integration into your applications and workflows.
- 🛡️ 90-day no-questions-asked 2-click refund guarantee. No other brand offers this.
A Solid Product doesn't need elaborate explanations, it speaks for itself. Try it, and see it for yourself.
❓ I'm starting my business. Which cities should I choose to find customers?
The key is to start with customers who:
- have money, and
- are willing to spend it on solutions that make their lives easier.
These are the richest cities, tech-hubs in your target country. Choose them because they earn more, so they buy more easily.
We recommend following these steps:
- First choose your target country.
- Then choose the richest cities in that country.
- Use Zoom 18 Search Strategy for maximum results.
- Reach out via cold calls or personalized emails—show how your product/service solves their problems.
Examples:
- If your chosen country is
US -> Start with San Francisco, Los Angeles, New York City.
Australia -> Start with Sydney
Switzerland -> Start with Zurich
Note:
Don't start by targeting full country data. You'll have a lower conversion rate and lower revenue per customer.
❓ Which country should I choose to find customers?
Your own country, because you're more comfortable talking to people there.
Once your product is perfected, and is creating good value for your customers, you can start focusing on US, as they tend to be more open to trying new products and services.
❓ What is the Enrichment Section in App?
The Enrichment API turns Google Maps business data into sales-ready contacts.
You've got businesses from Google Maps. Now you need to actually reach them. That's where enrichment comes in:
-
Website Contacts Enrichment
- Get emails and social profiles from websites.
- AI ranks the best email for sales outreach.
- Verify email deliverability with MillionVerifier or ZeroBounce.
- Place Sales Summary—AI-generated business context tailored to YOUR product. Recommended for cold emailing or calling, as it enables you to deliver a tailored pitch for the highest chance of conversion, rather than generic outreach.
- Phone Carrier Info—know if it's a landline or mobile. Must for cold calling, so you don't waste time on landlines.
-
Apollo Leads Enrichment
- Find decision-makers (CEO, Founder, etc.) at any business via apollo.io. Apollo is the highest-rated lead generation tool on G2 with 8,500+ reviews.
- Get their name, title, verified work email, LinkedIn, phone number, and company data.
Bottom line: Same leads, same sales—but with enrichment, your conversion rate multiplies. That's more customers from the same effort.
Start enriching for free—100 credits free/month. No credit card needed.
❓ Enough theory. Give me real-world examples of how I can use this tool to find customers.
-
Web Developer → Search "real estate agency" in "San Francisco", filter 50+ reviews, no website. Offer "done in 7 days" website for $1000 + $40/mo hosting.
-
Google Ads Agency → Target Gyms/Yoga Studios with high reviews but no website (successful but technically novice). Offer to run Google Maps Ads to bring 20 new members/month. Gym owners love anything that brings foot traffic.
-
Dental Software → Find Dentists with 50+ reviews, no website. Visit during non-peak hours, demo your product, and offer 6 months free trial. They'll pay $40-60/month when it saves their receptionist 10+ hrs/week.
❓ How to apply this to my product/service?
There are 3 parts to making sales:
1. Learn First
Going into sales without learning is like going to battle with sticks. You won't survive.
Read sales books—they'll save you time and help you avoid common mistakes. For cold outreach specifically, read "The Cold Email Manifesto". It's practical, and it works.
2. Make a Strategy
Filter your leads — Only contact businesses most likely to buy:
- Reviews: 75-200 (established, but small enough to care)
- Rating: 4+ stars (you're the best of the best—obviously you'll only talk to the best)
Use Enrichment — Enrich your data to save research time and increase your conversion rate:
- Social Links & Emails → Get the emails for sales outreach
- Email Verification → Ensure deliverability
- Place Sales Summary → Personalize your pitch
- Phone Carrier Info → Know if it's a landline or mobile
Sort by reviews — Bigger businesses first. They pay more.
Mark your best leads — In Excel, highlight businesses most likely to benefit from your service with a green background.
For Cold Calling:
- Read "The Cold Email Manifesto" first—it applies to calls too
- Use Phone Carrier Info Enrichment to skip landlines
- Call during industry non-peak hours to reach owners directly
- Use Place Sales Summary to personalize your pitch
- Get a dedicated phone number, protects your personal number
For Cold Emailing:
- Use AI-Recommended Emails + Email Verification Enrichment
- Use Place Sales Summary to personalize each email
- PERSONALIZE! PERSONALIZE! PERSONALIZE! (takes 15-20 minutes per email, but converts way better)
We recommend cold calling over cold email, here's why:
- Simpler — Just pick up the phone. No complex email sequences.
- Faster feedback, faster improvement — Rejections tell you exactly what to fix for the next call.
- Less competition — Most people do cold email. Fewer calls = more attention = higher close rate.
If you're new to sales, start with cold calling—it's simpler, faster, and converts better than email. As a bonus, you'll learn faster due to instant feedback.
You're an introvert, and calling feels scary. You're right—it is scary. People will hang up on you and rudely reject you.
But think about it: you've done harder things before. Haven't you?
Compared to those, calling is a piece of cake. People way less smart than you have closed deals. You'll totally crush it.
Try it for 2-3 days—if it doesn't work, you can always switch to email.
3. Execute
Most founders quit after 3-4 rejections. You should not.
If someone rejects you, they are unwise and making a mistake. It's their fault, not yours.
And you're a diamond 😎. Only Jewelers recognize diamonds, not blacksmiths.
So, keep going. Also, in worst cases, expect 40-50 connected calls (~2-4 days of calling) to close 1 deal. That's normal.
This is the most important FAQ, so be sure to read it again and put it into practice.
❓ Are there any usage limits?
The free version allows 200 searches per month. For unlimited searches, consider the Pro Monthly Subscription:
- Unlimited searches every month – never hit a cap again.
- Access via REST API for easy integration into your own tools & scripts.
- Just $48/month – cancel anytime. All future updates and priority WhatsApp support included.
- Zero risk: a generous 90-day, no-questions-asked refund guarantee.
1000+ people are already using the Pro subscription to grow their businesses.
❓ How to Subscribe?
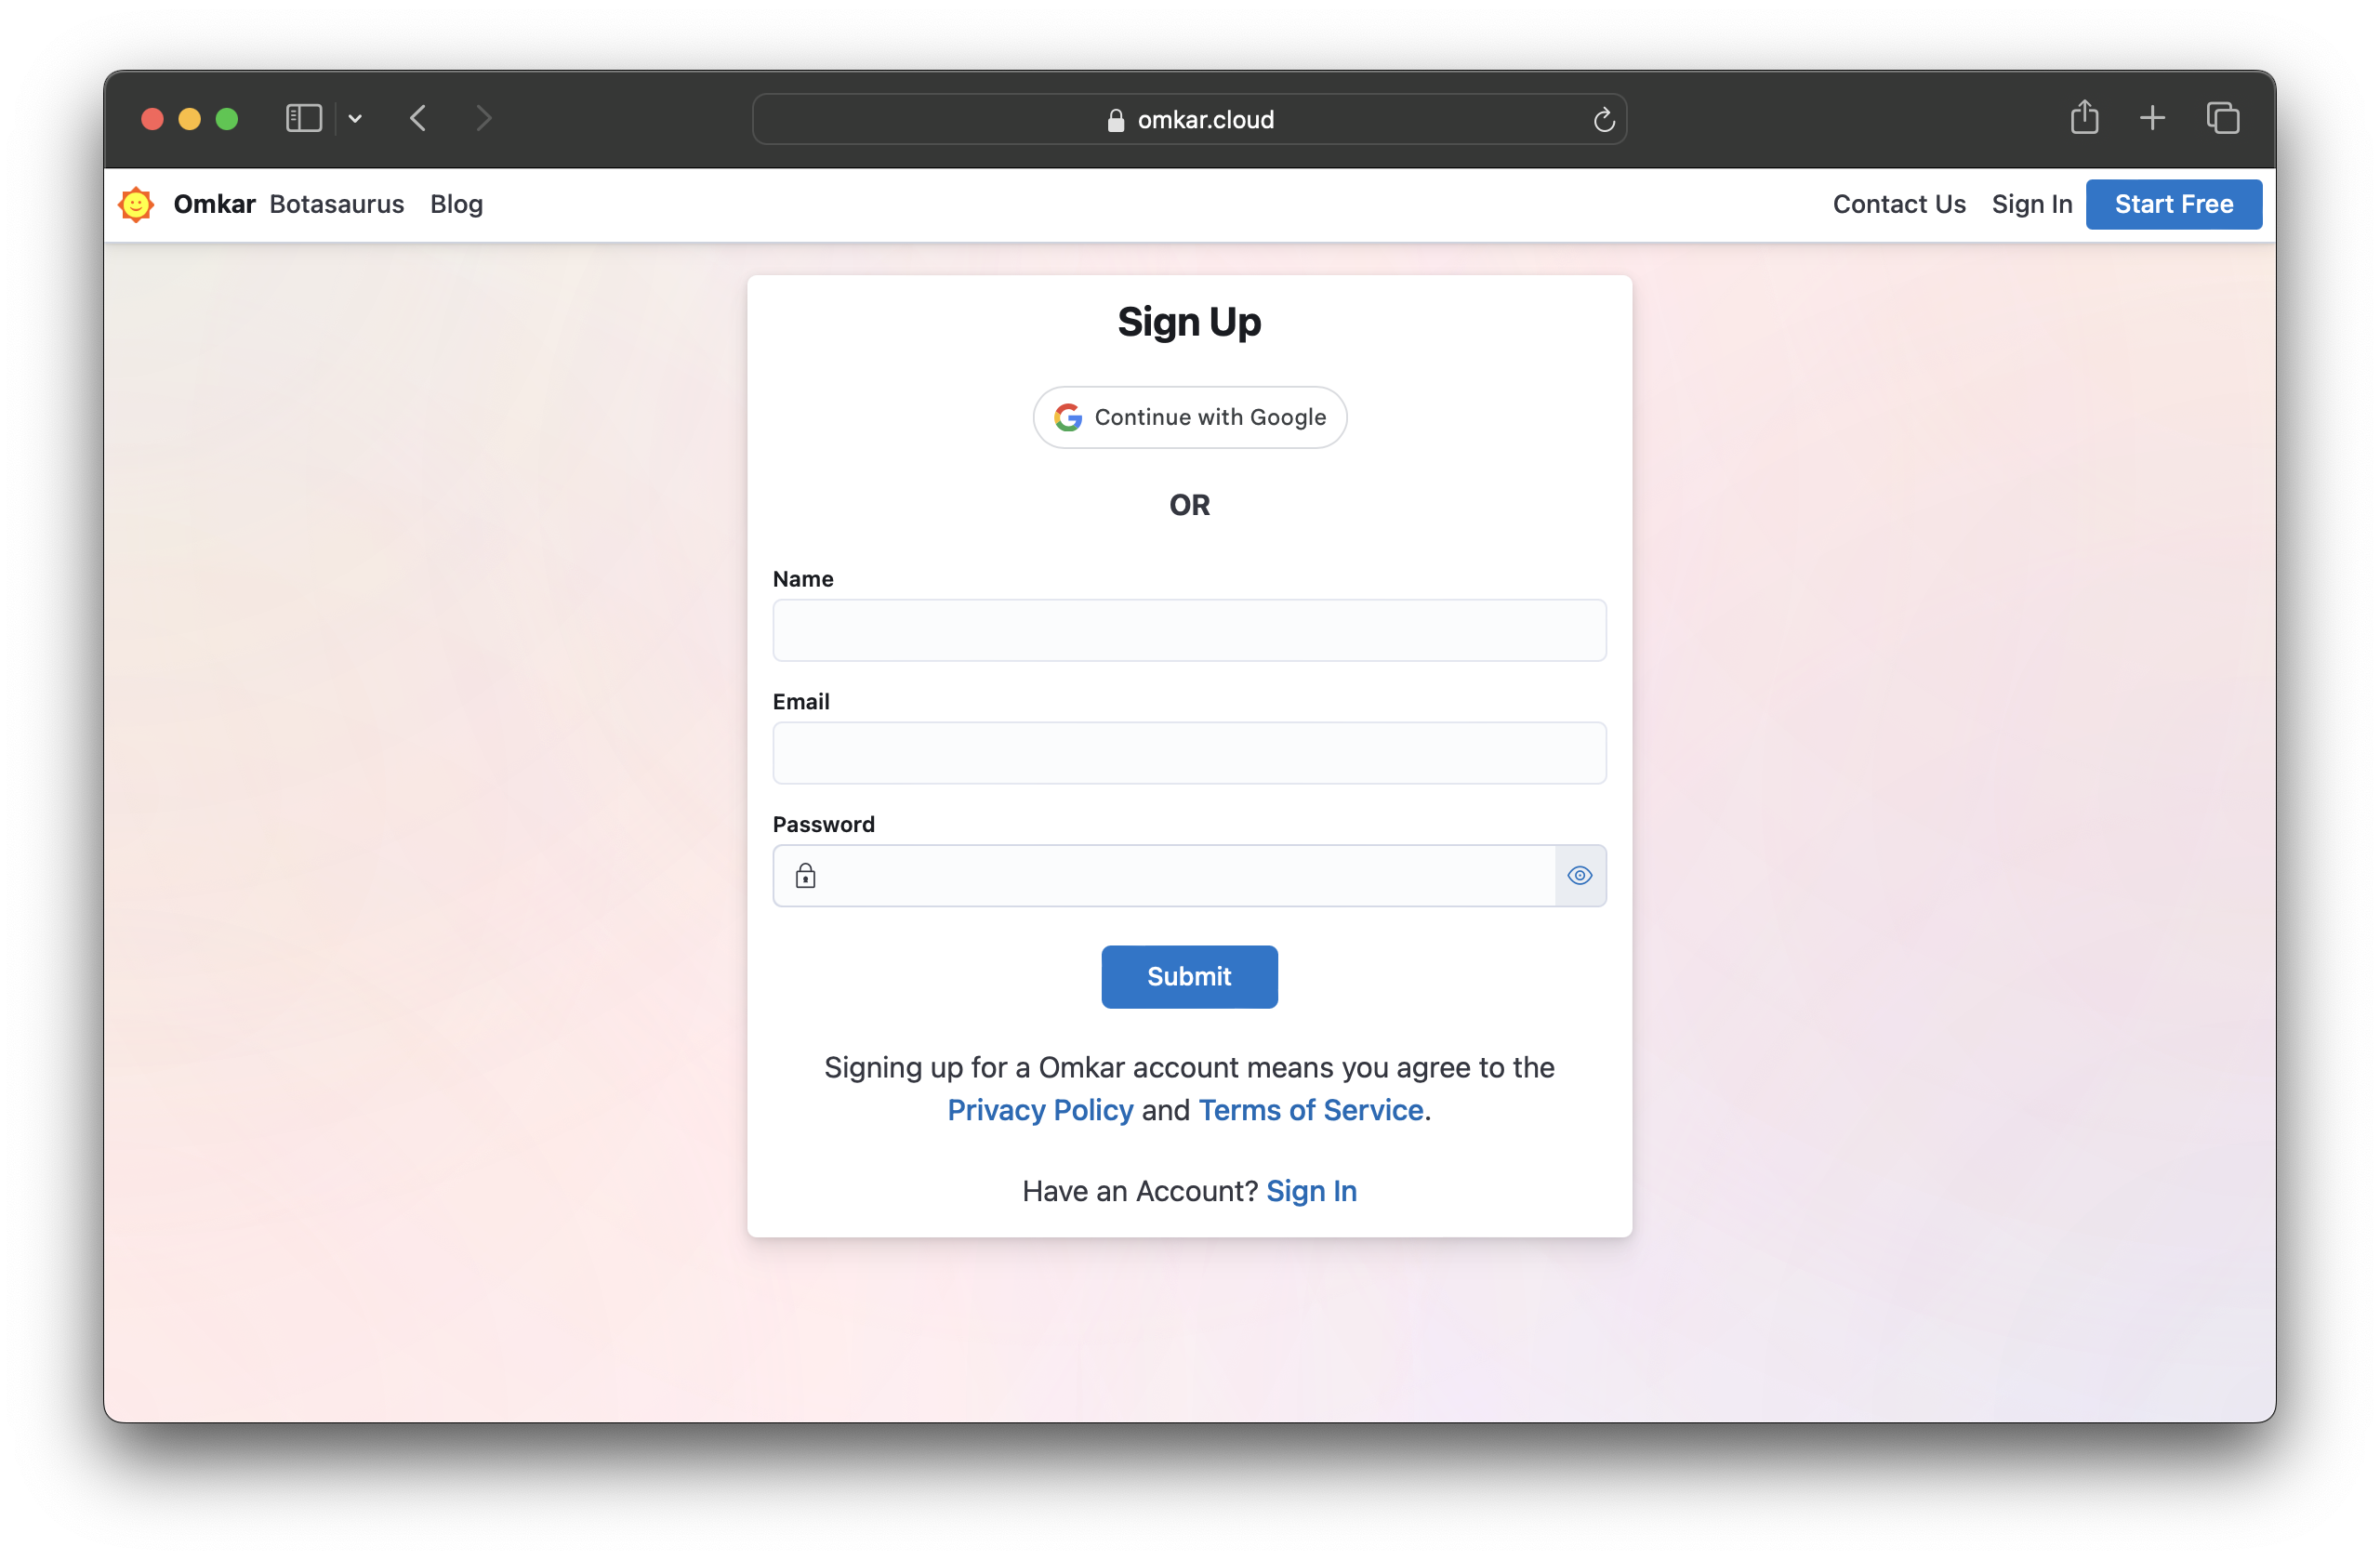
-
Create an account on Omkar Cloud by visiting this link.
-
Go to the Google Maps Extractor API Pricing Page and subscribe for $48/month using PayPal or a credit/debit card.
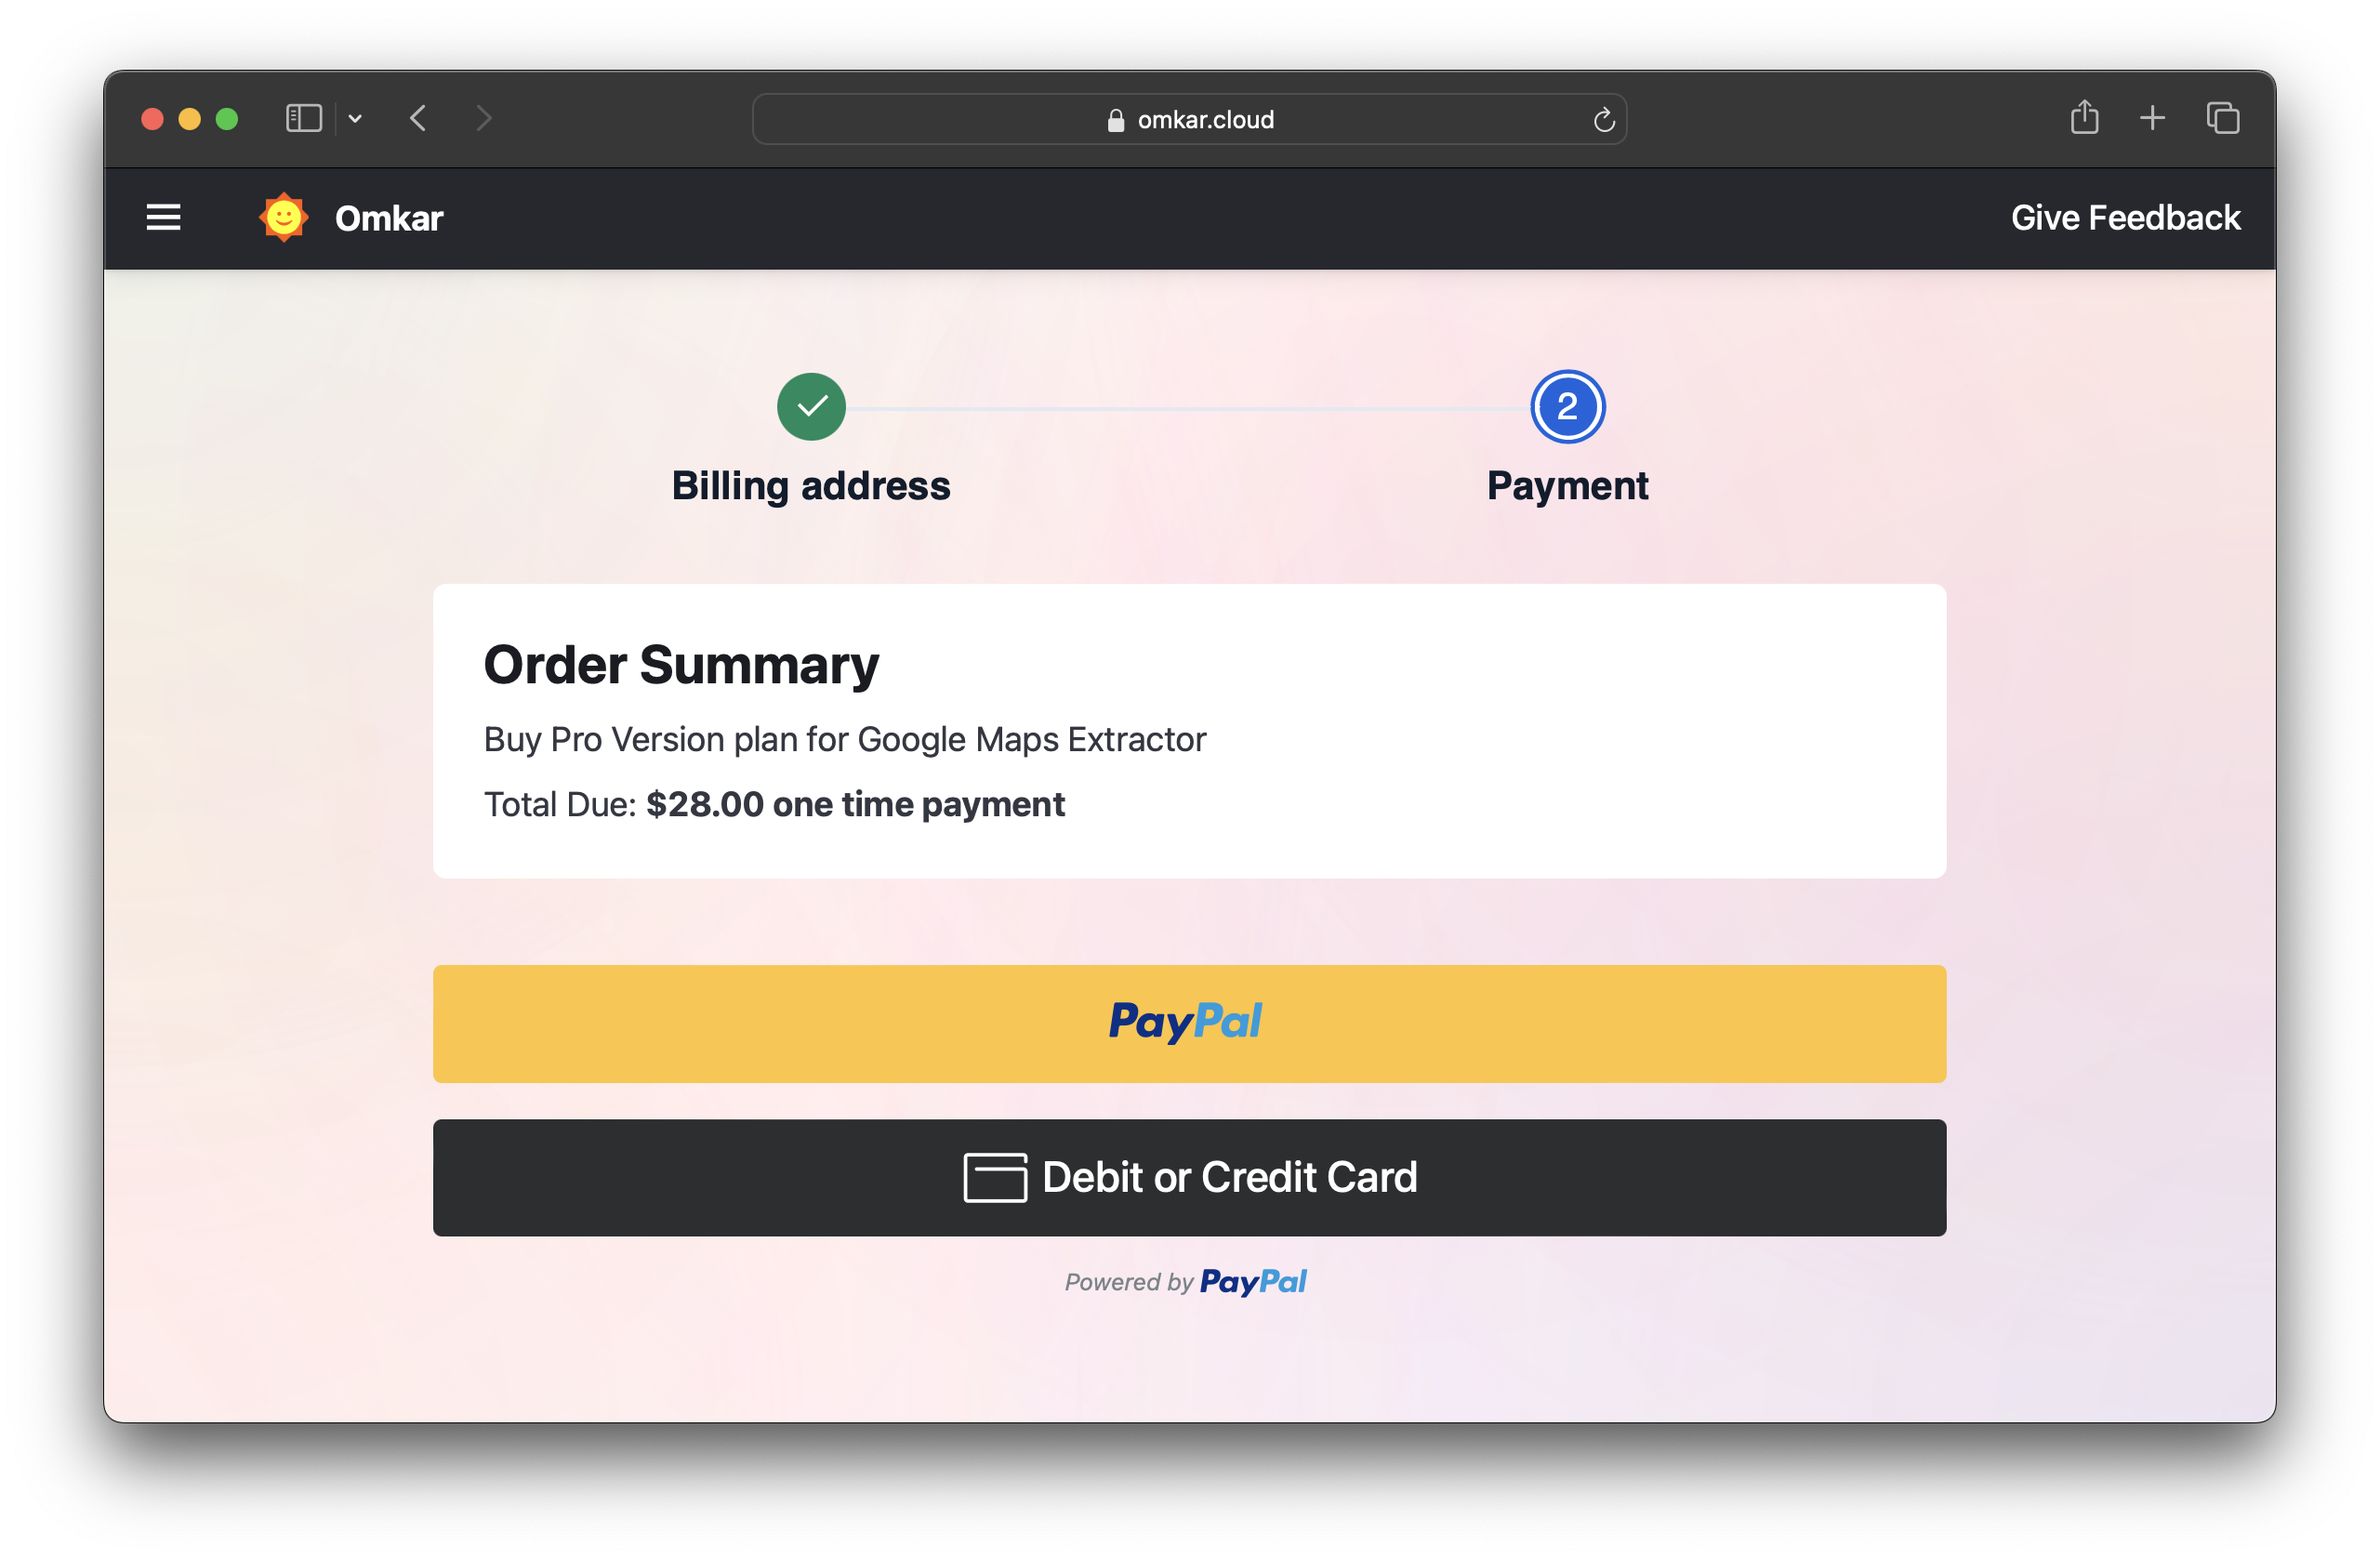
💳 Note: Your card details are handled securely by PayPal and never shared with us.
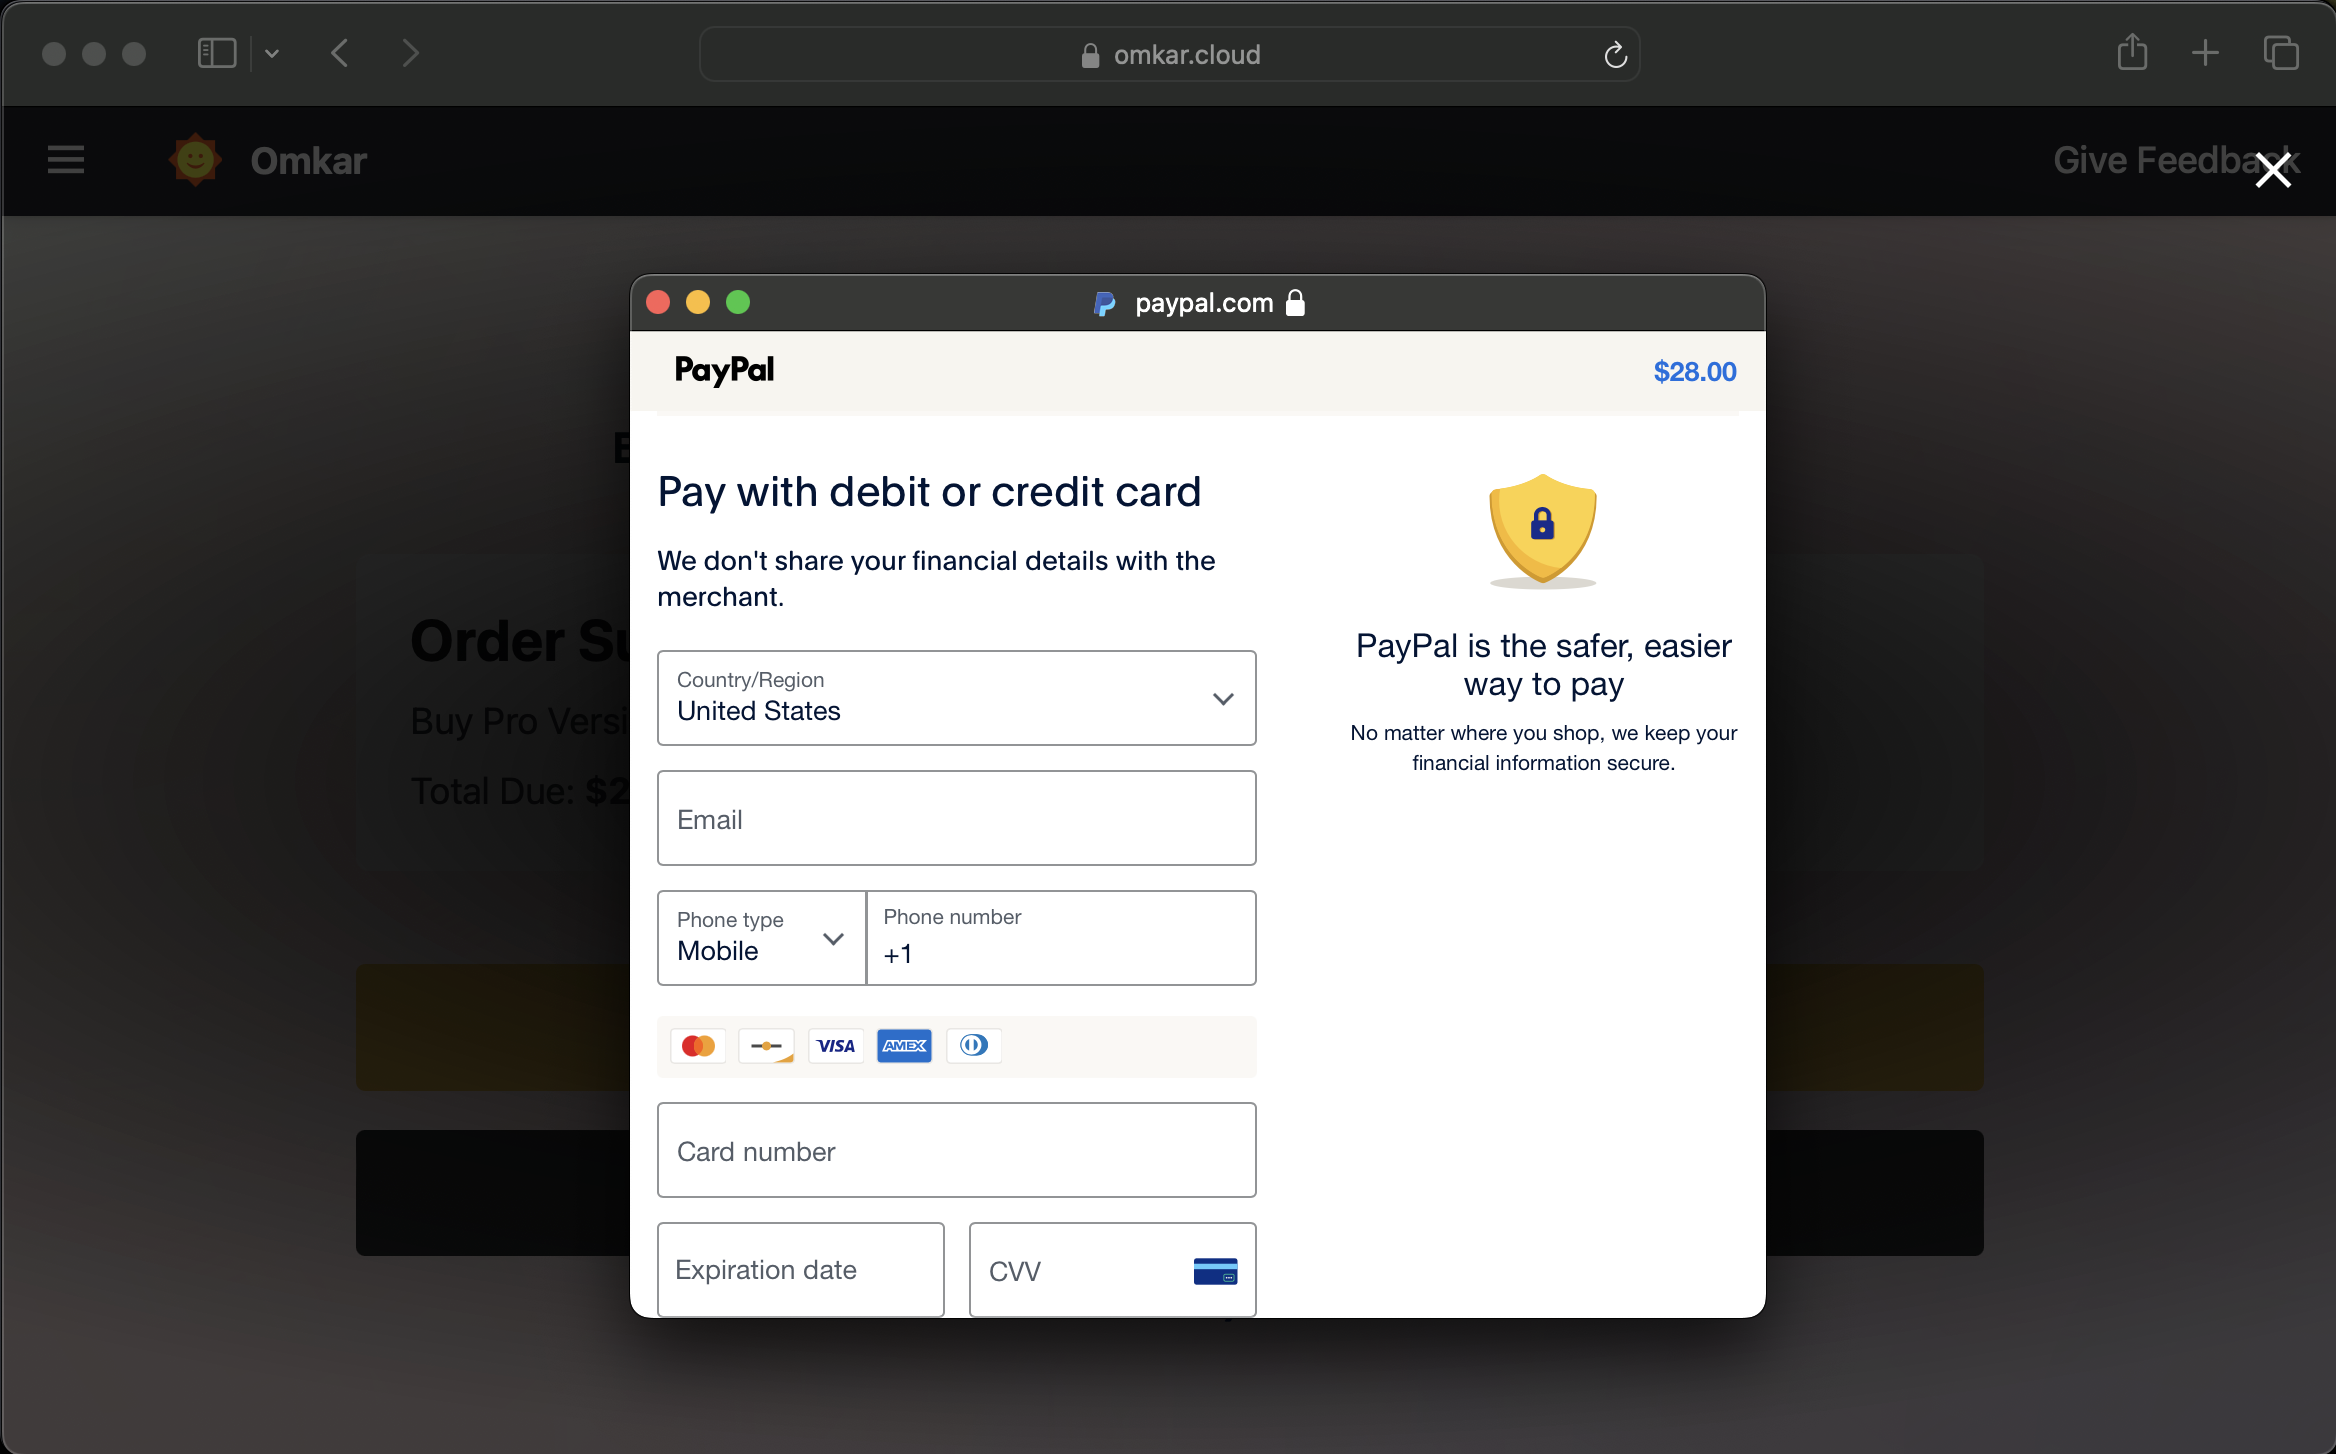
After checkout, you will see activation instructions. Follow them and start scraping right away!
❓ What if I Don't Get Value from It?
We offer a 90-day refund guarantee. If the product doesn't meet your needs within that time, you can request a refund through a simple 2-click process.
The risk is on us, not you, because we're confident in what we've created!
❓ How do I get a refund?
Follow these steps:
-
Go to Transactions Page
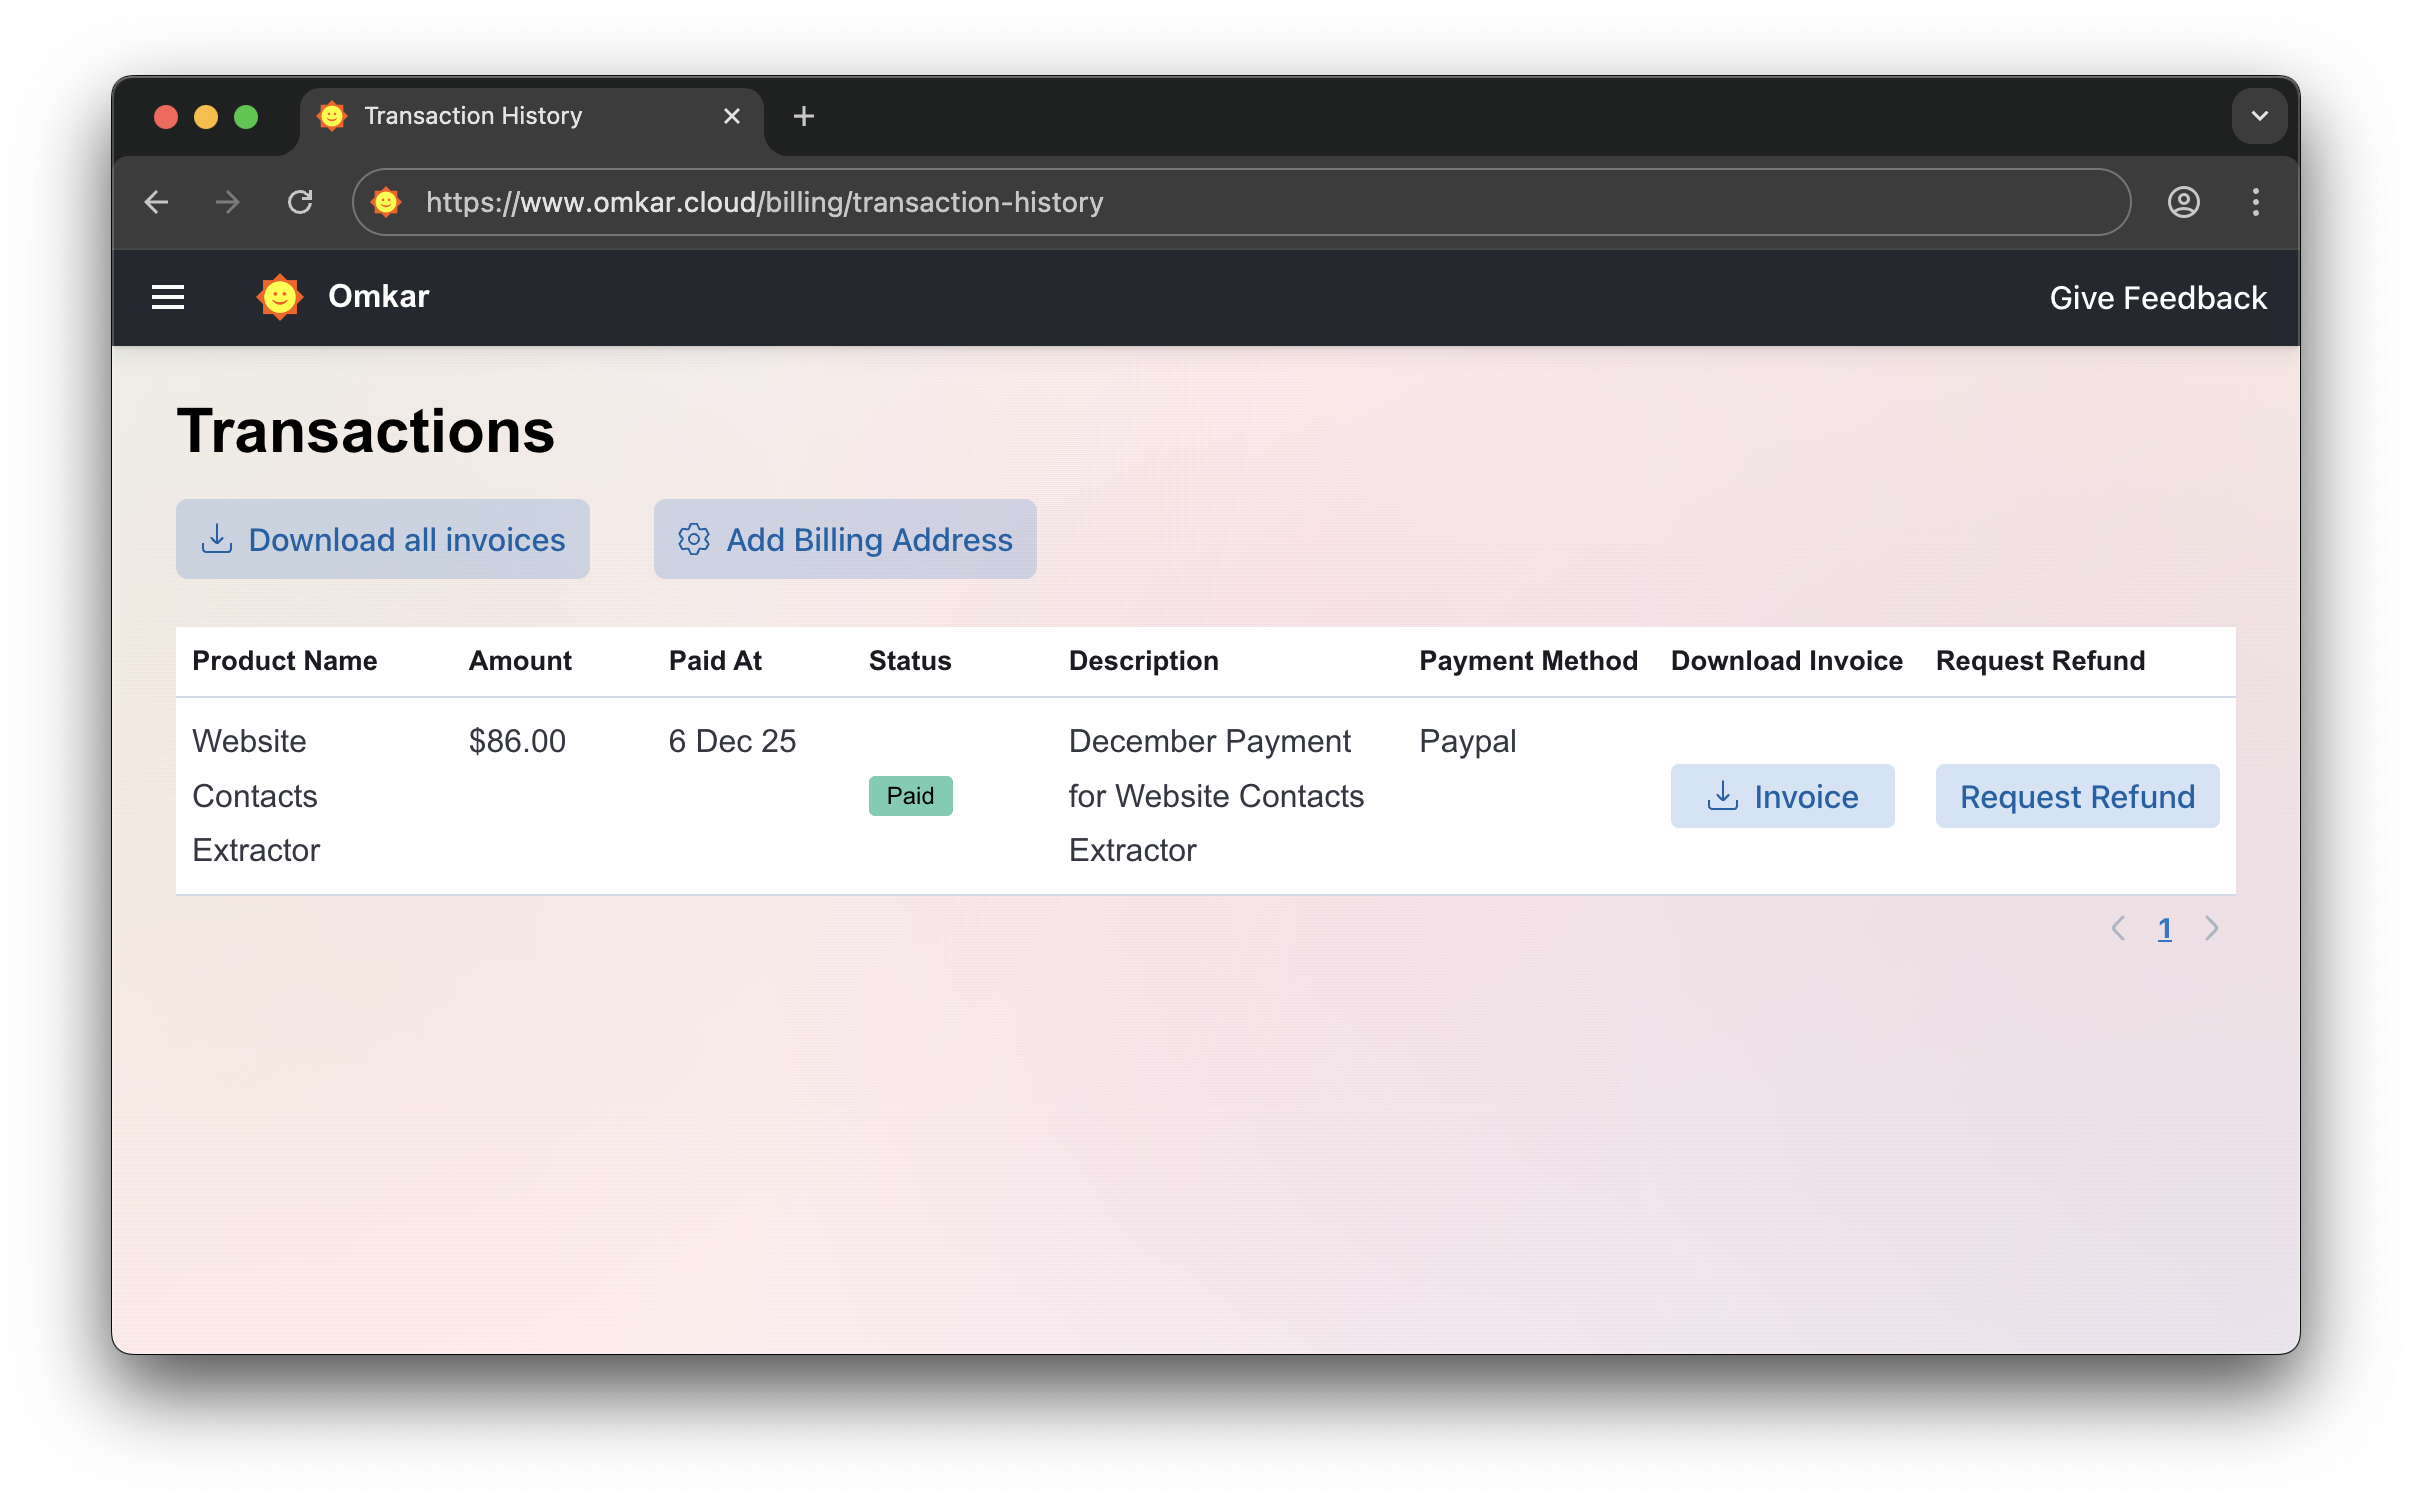
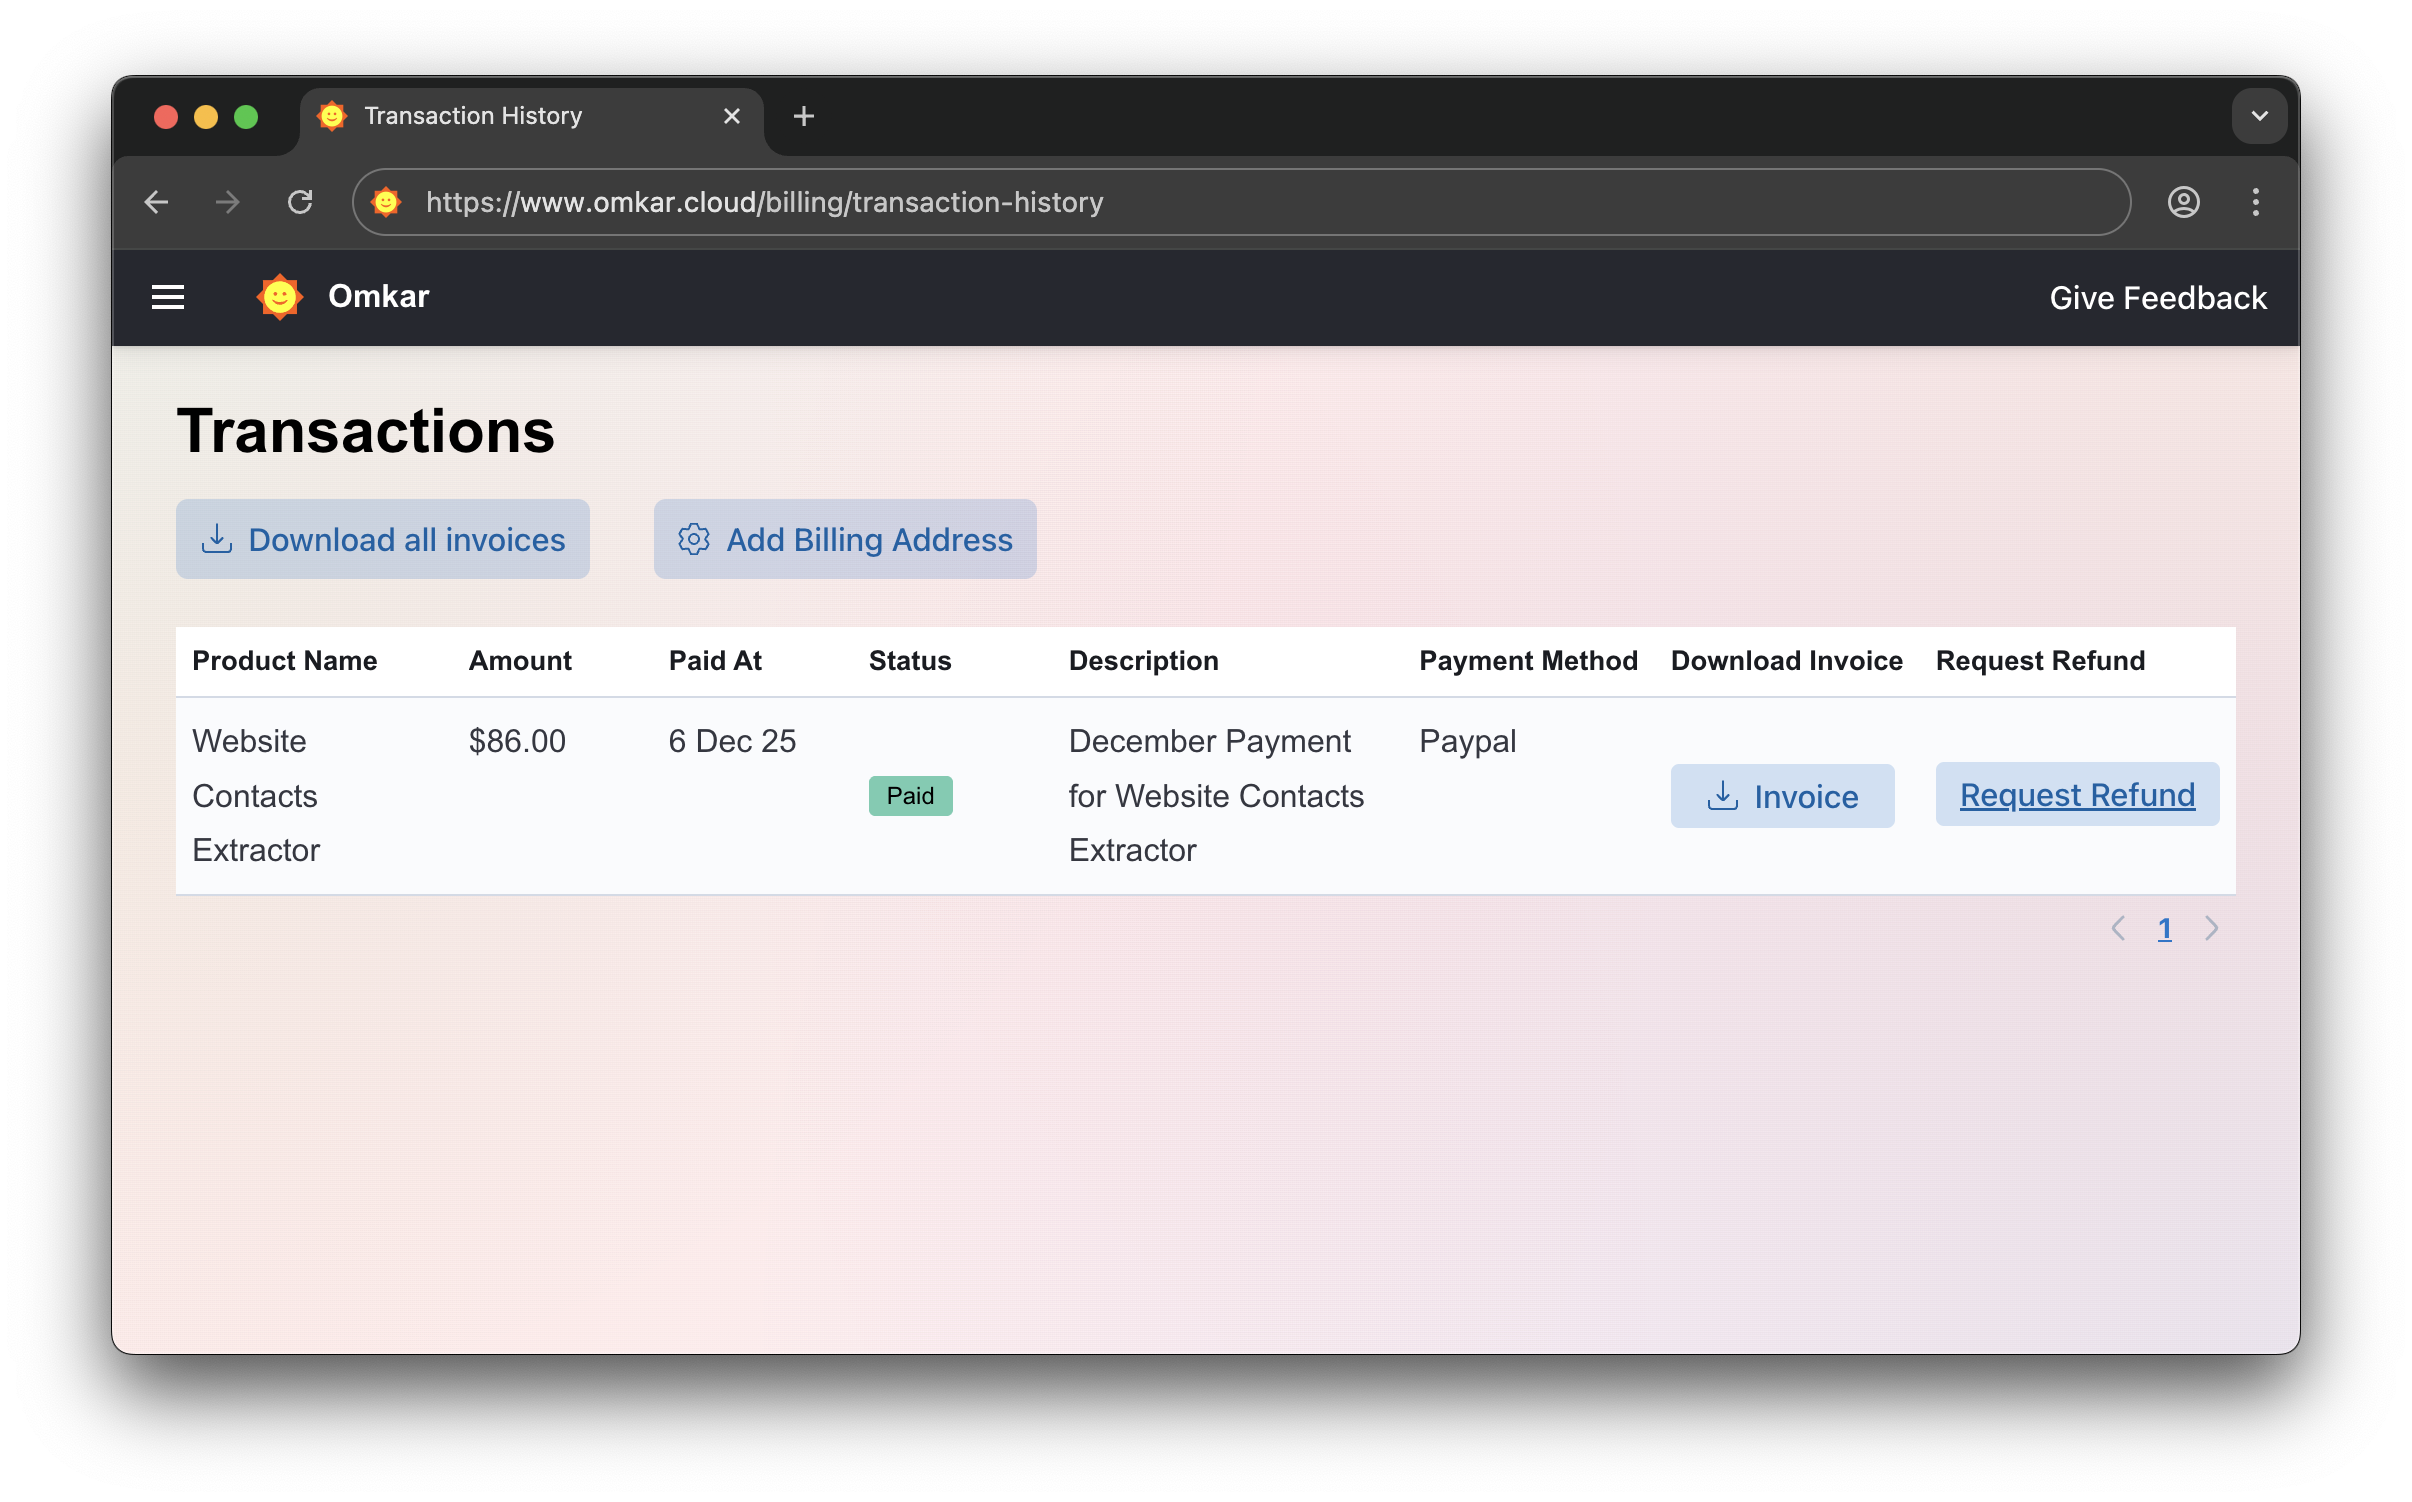
-
Click "Request Refund"
-
Confirm by clicking Request Refund again. Amount will be refunded in 1-2 business days. We'll email you updates.
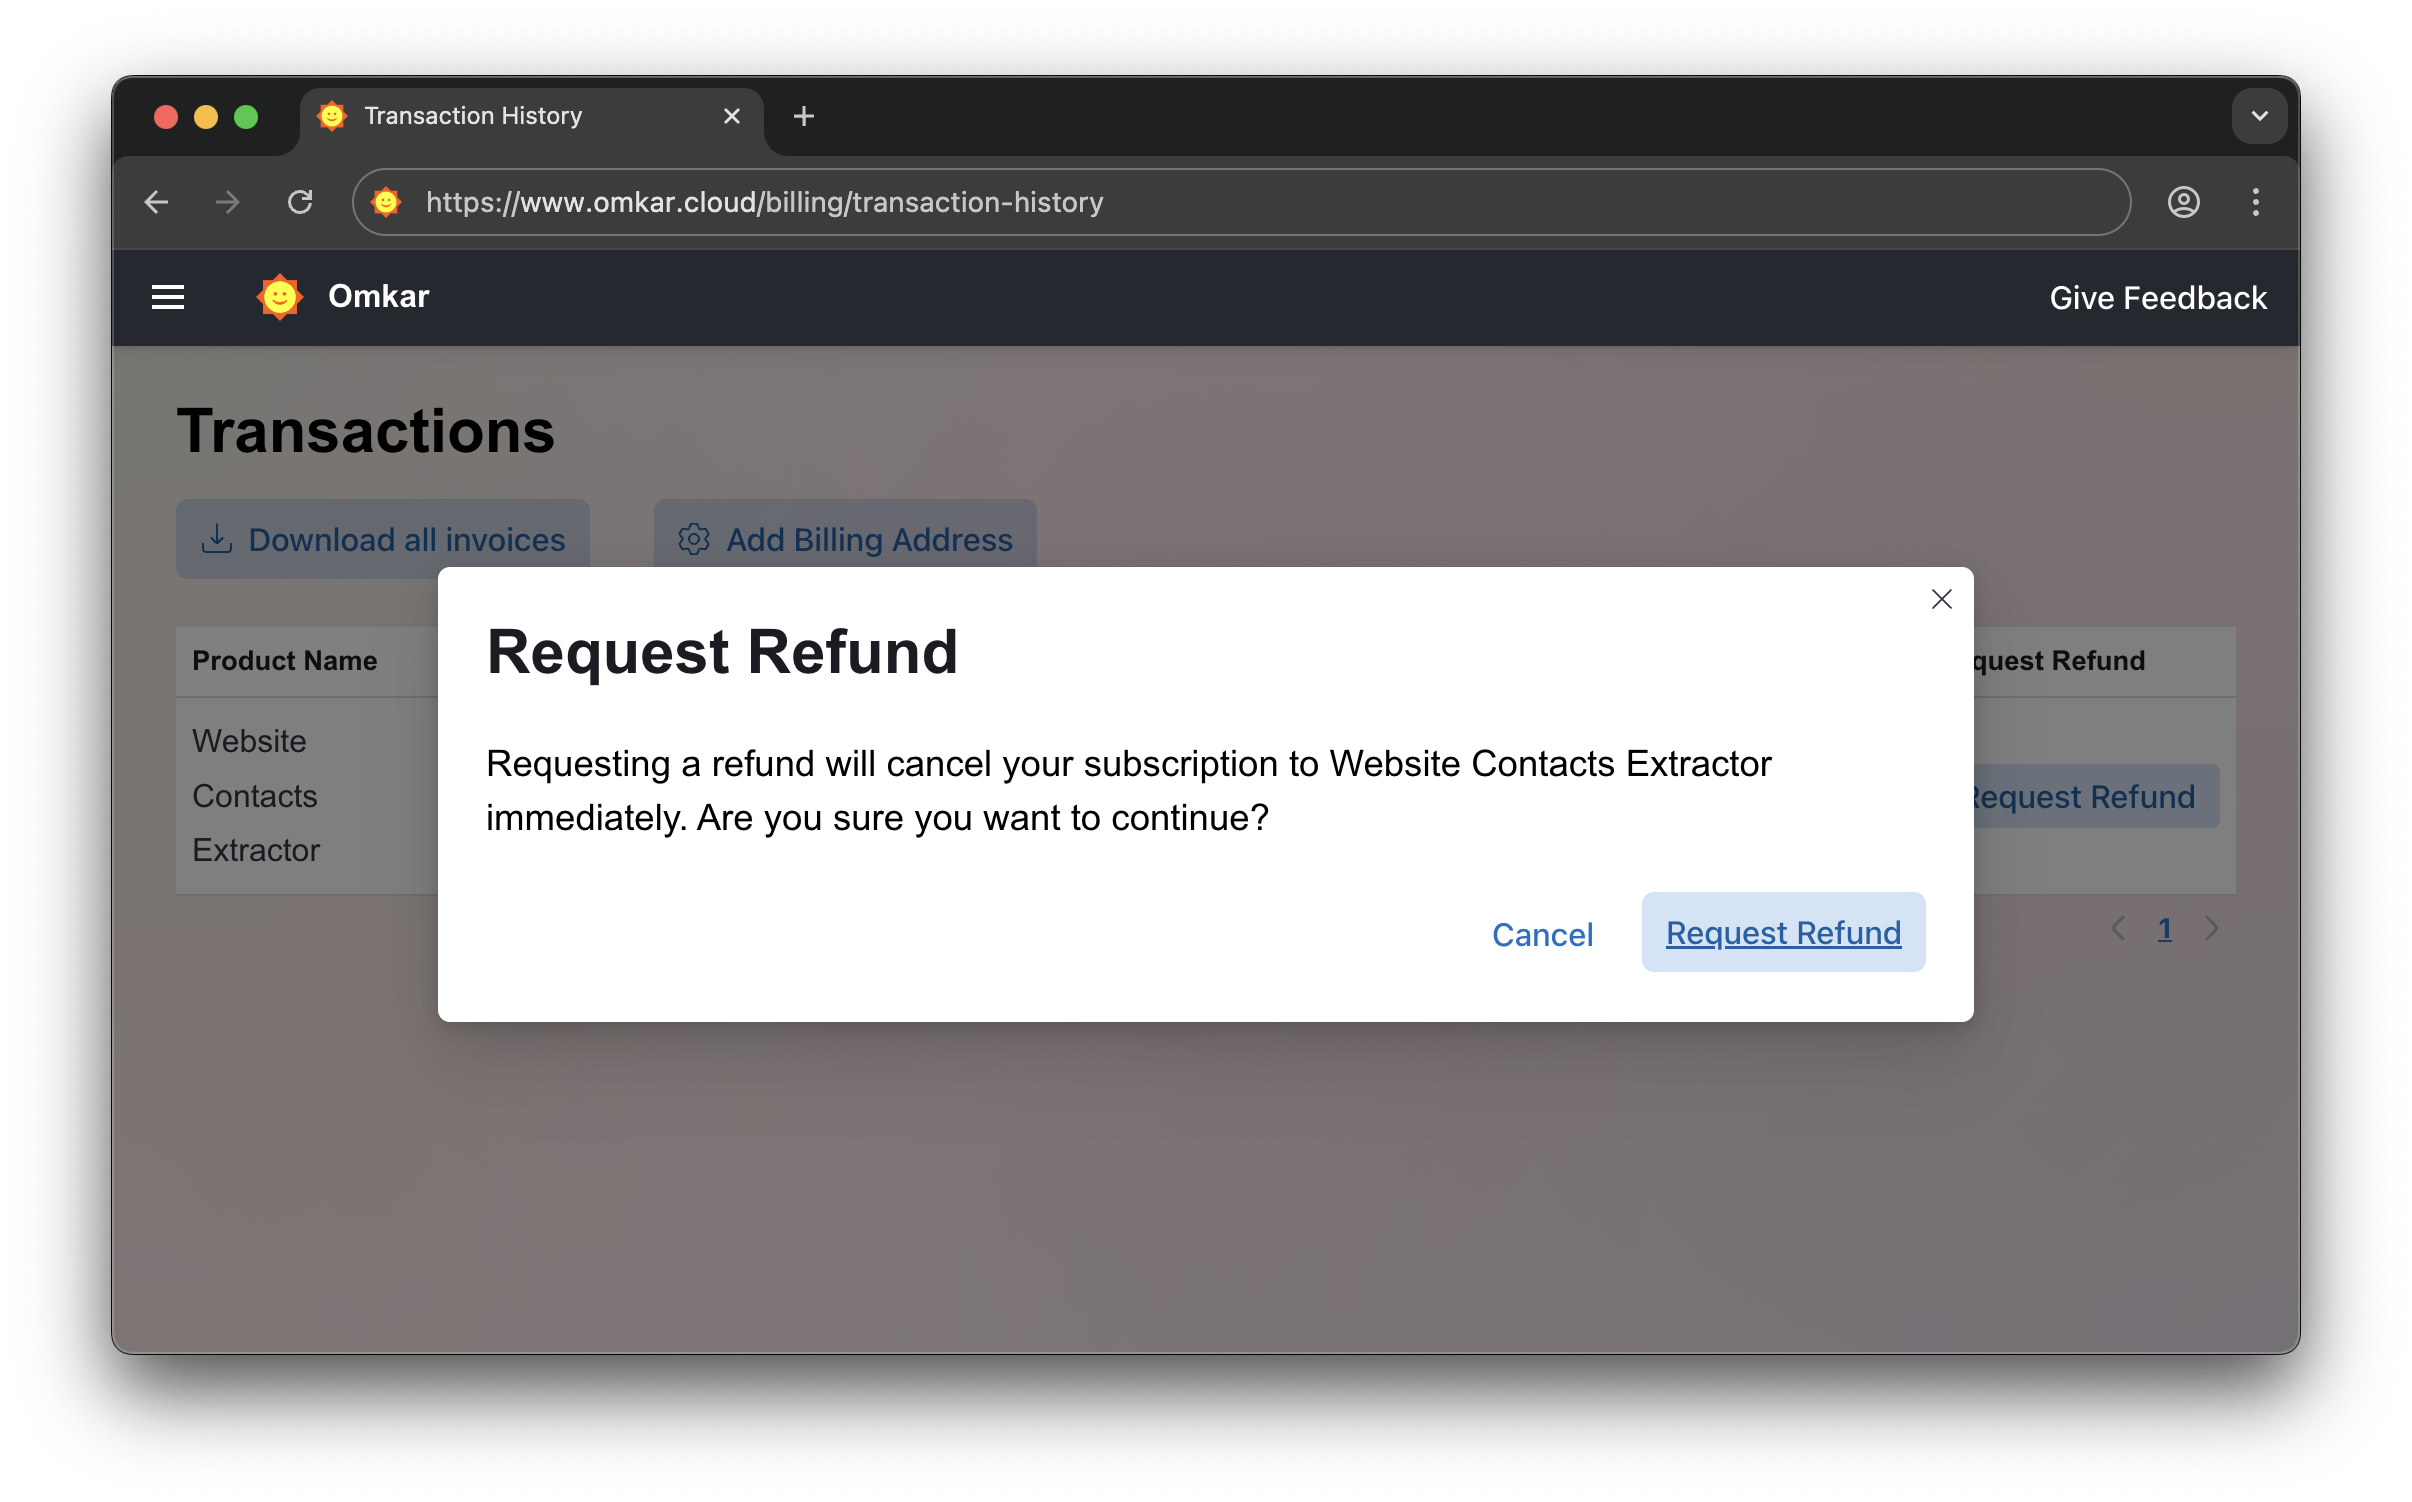
No emails. No explanations. Simple 2-click process.
❓ Is there a catch in refunds?
No catch. It is a simple 2-click process, exactly as described above.
❓ Any other products that might be useful to me?
-
Google Maps Extractor (Desktop App): If you don't need an API and just want a desktop app, check out our Google Maps Extractor. One-time payment of $28, unlimited searches for a lifetime.
-
TripAdvisor Scraper: Tripadvisor is the best platform if your target is to find restaurants/hotels. It gives websites + email addresses of the businesses. Try it for free here.
-
Discover more tools: Visit omkar.cloud/tools to explore additional tools. All have free plans available.
❓ How Did You Build This Extractor?
We used Botasaurus Desktop, which powers the Google Maps Extractor API.
Botasaurus is a web scraping framework that makes life a lot easier for web scrapers.
It handled the hardest parts of our extractor, such as:
- Building a desktop app for Windows, Mac, and Linux.
- Creating a fantastic UI dashboard with task management features.
- Sorting, filtering, and exporting data as CSV, JSON, Excel, etc.
- Caching, parallel, and asynchronous scraping.
If you're a web scraper, I really recommend learning about Botasaurus Desktop here 🚀.
Learning Botasaurus Desktop takes about 25 minutes. If you do web scraping, it can save you thousands of hours over your career.
❓ While a task is in progress, "All Task" shows around 80K results, but after completion it drops to 70K. Why?
We remove duplicates at the end of all tasks, so expect the final count to be lower than what you see during progress.
Google lists the same places across multiple cities, so expect results to drop by 20% to 40% for country-level extraction.
❓ In the exported file, the characters are in English instead of Japanese/Korean/Hindi. How can I preserve the original language when exporting?
When exporting, any non-English characters are converted to English. For example, "しんちゃん" is converted to "Shinchan."
We do this because Excel can't render non-English characters properly.
If you want to retain the original characters and avoid converting them to English, simply uncheck the English conversion checkbox:
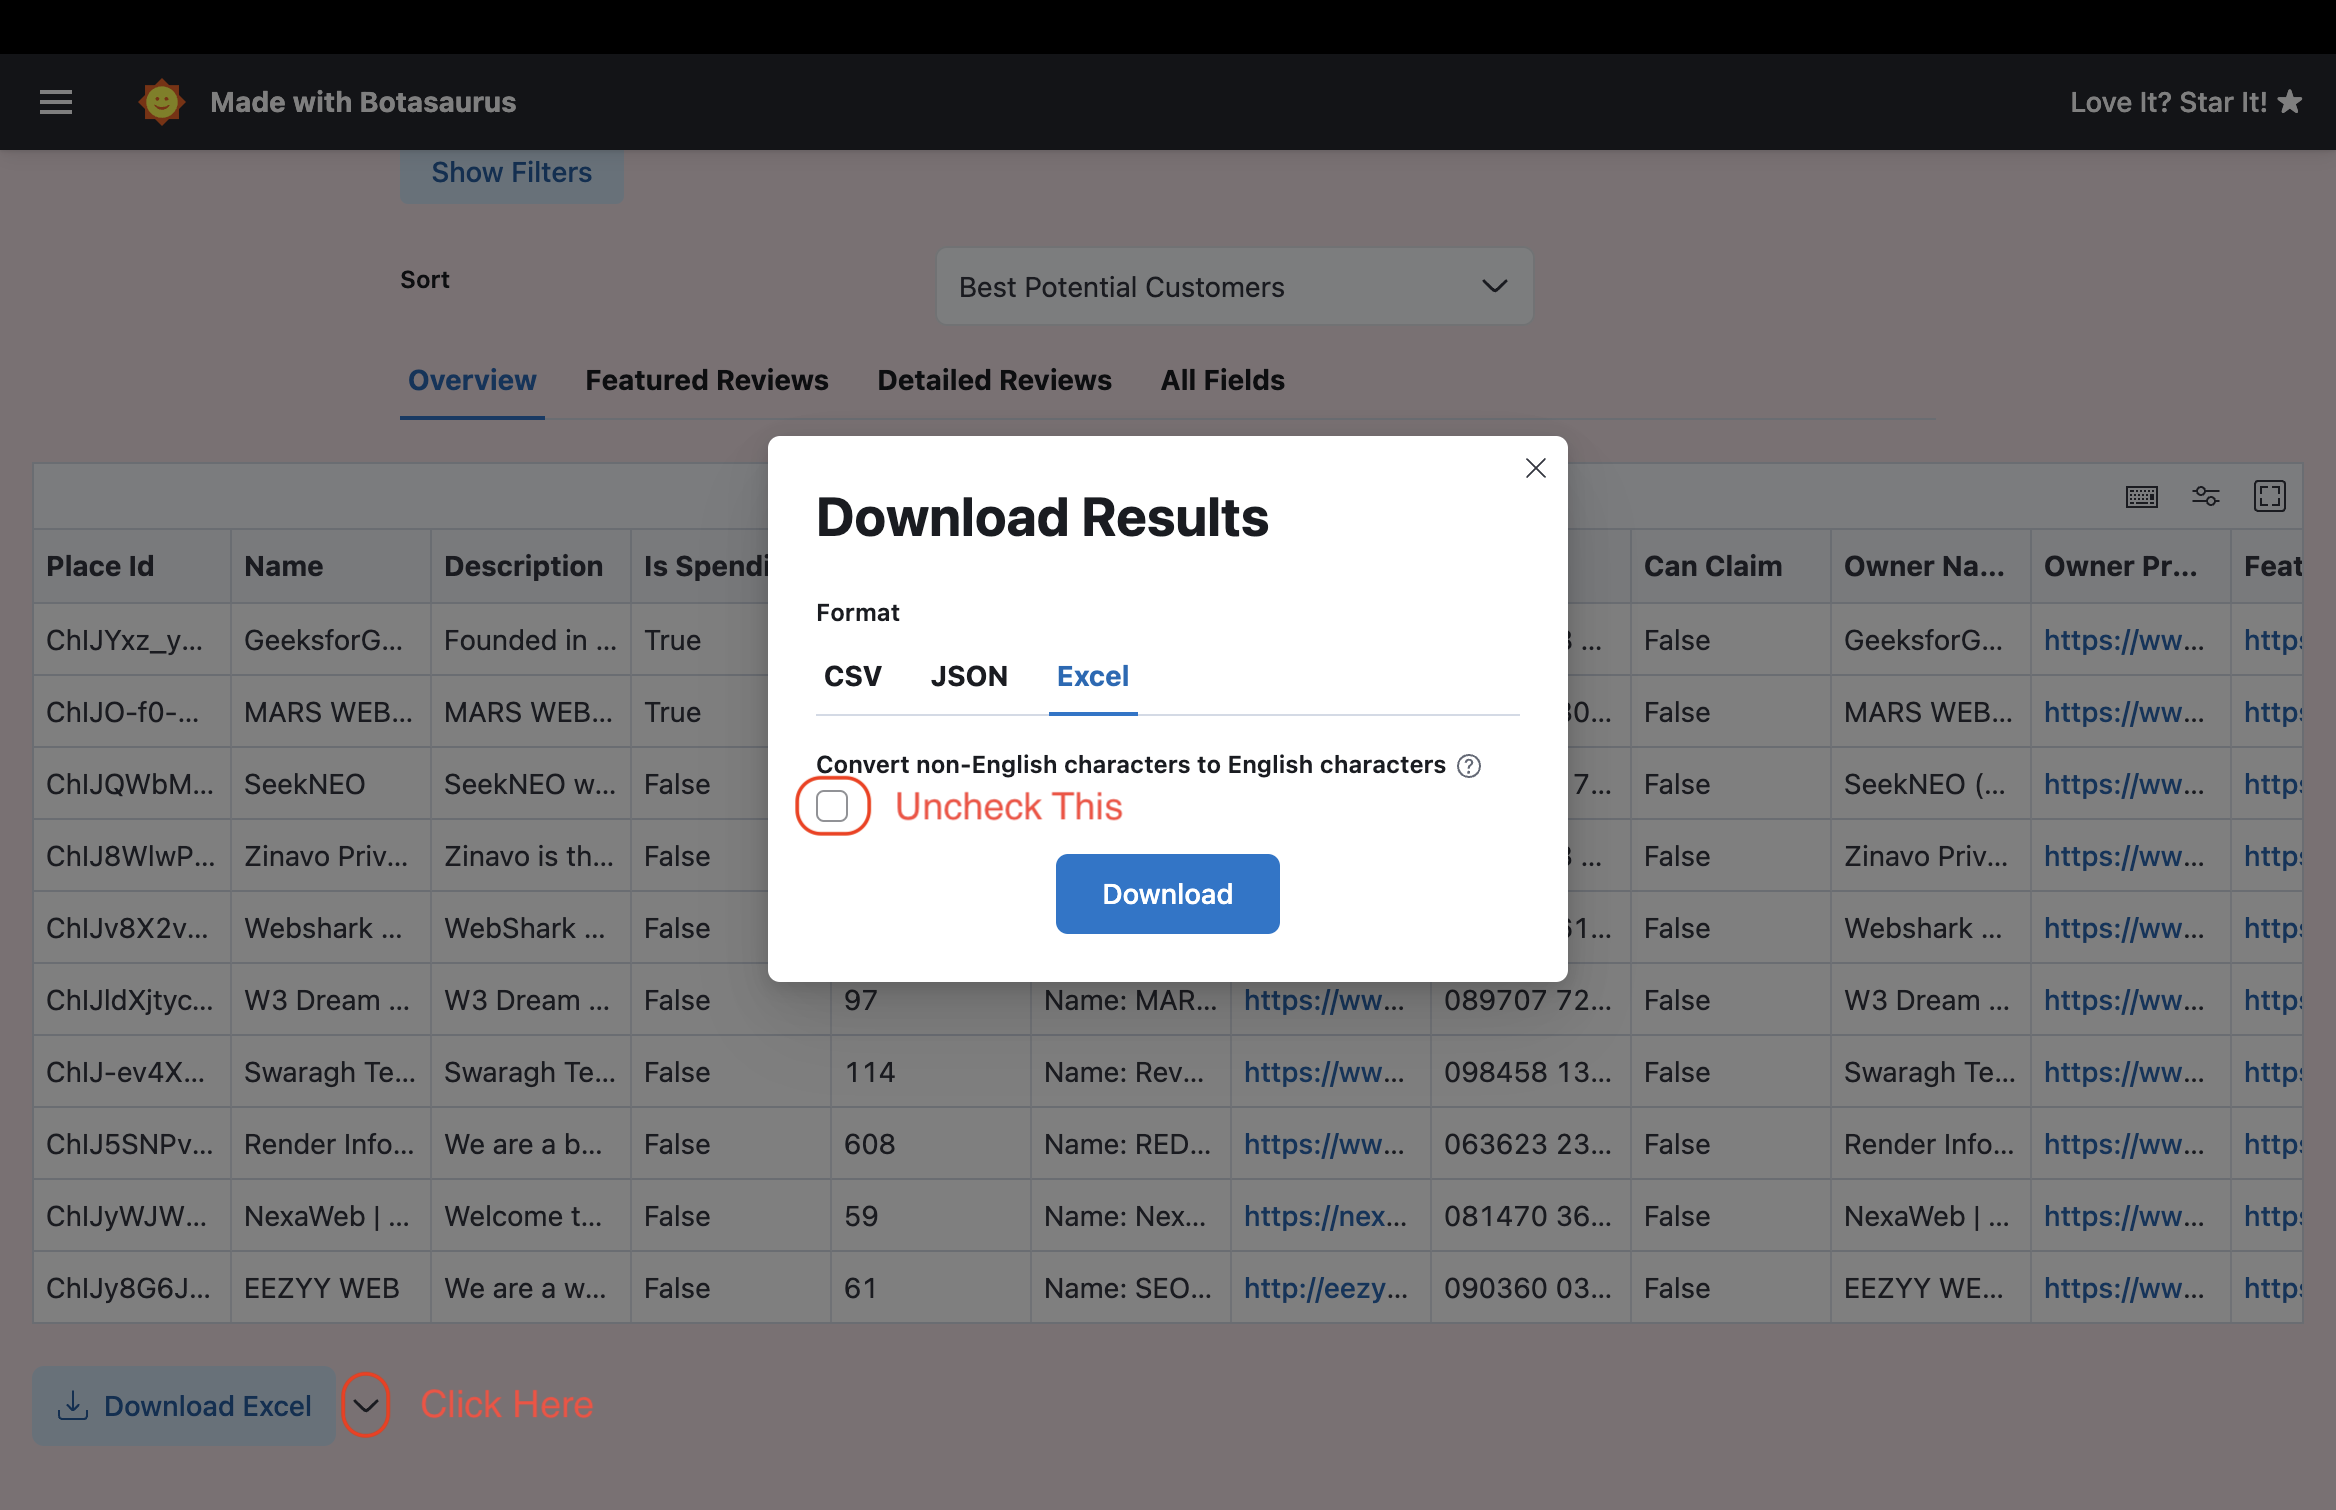
In case you are unable to view the non-English characters properly in Excel, then the easiest solution is to upload the file to Google Sheets, which renders the characters properly.
❓ Do I Need to Do Anything Else to Use the Tool Effectively?
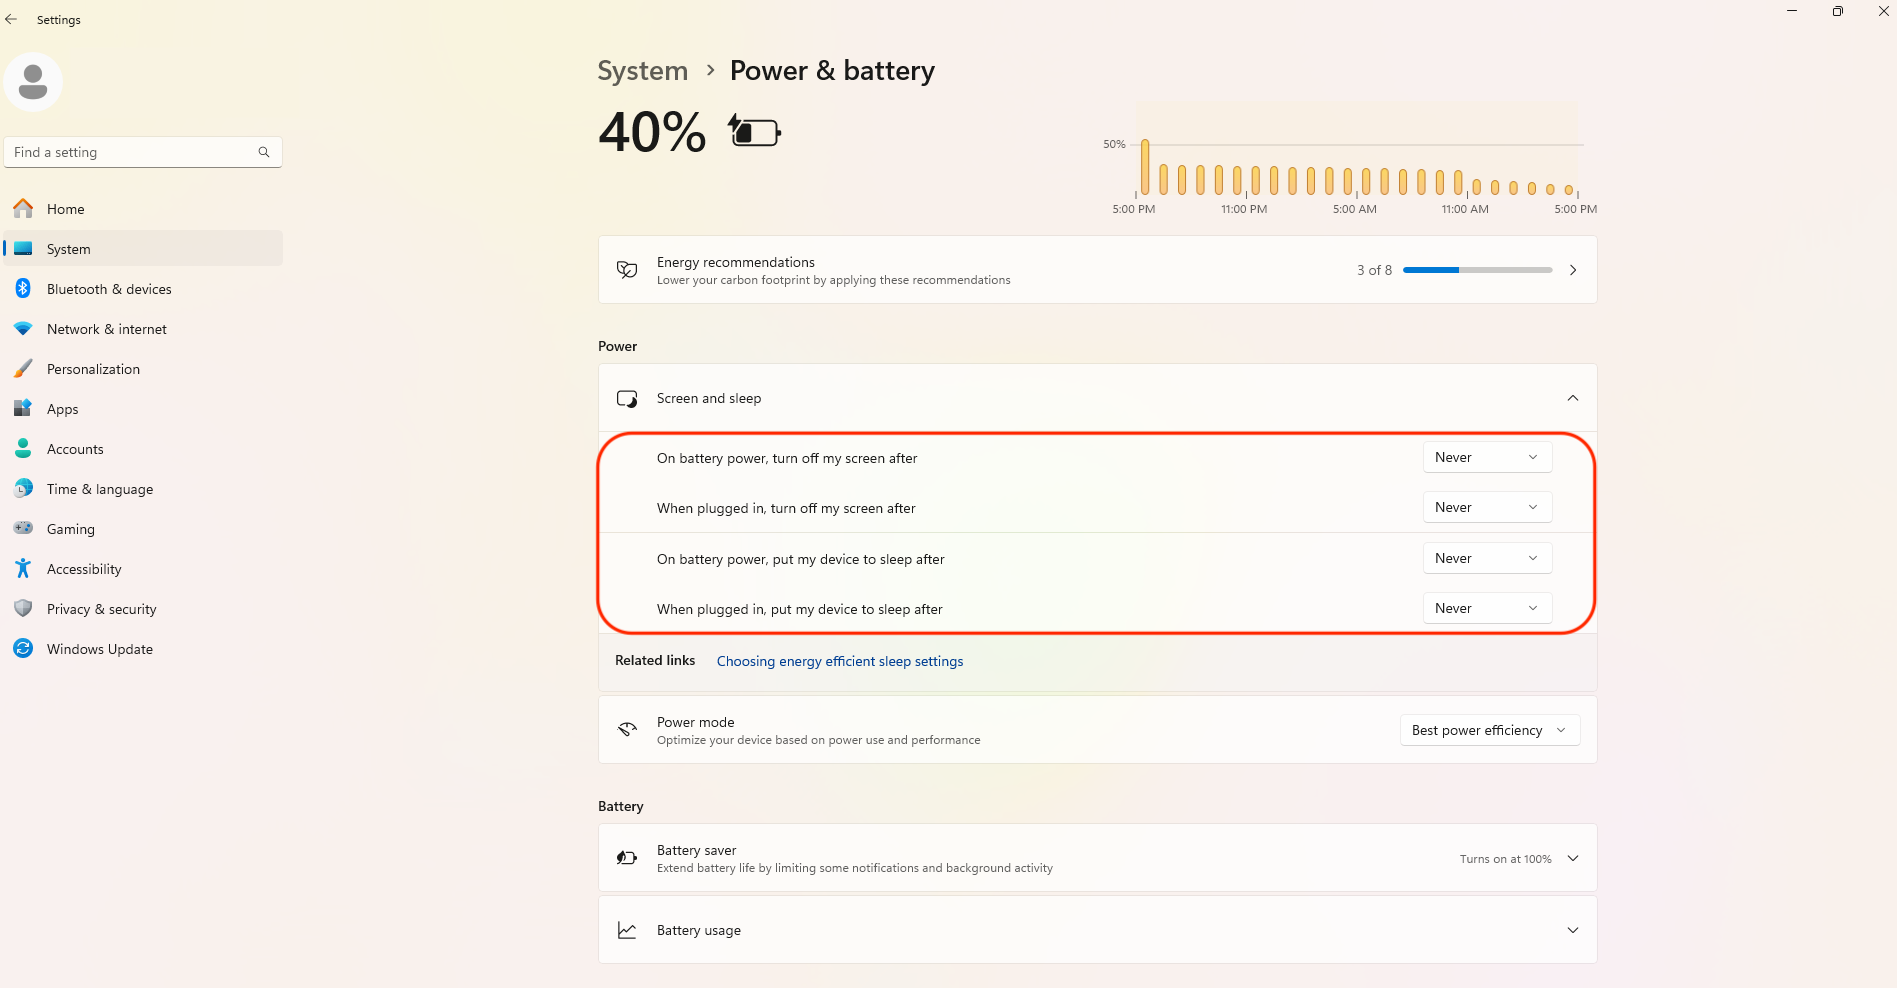
- Disable Auto Sleep Mode
Auto sleep mode will prevent the tool from running and cause tasks to fail. Here's how to turn it off:
-
On Windows:
Go to Start > Settings > System > Power & battery > System > Screen & Sleep. Set the following settings to "Never"
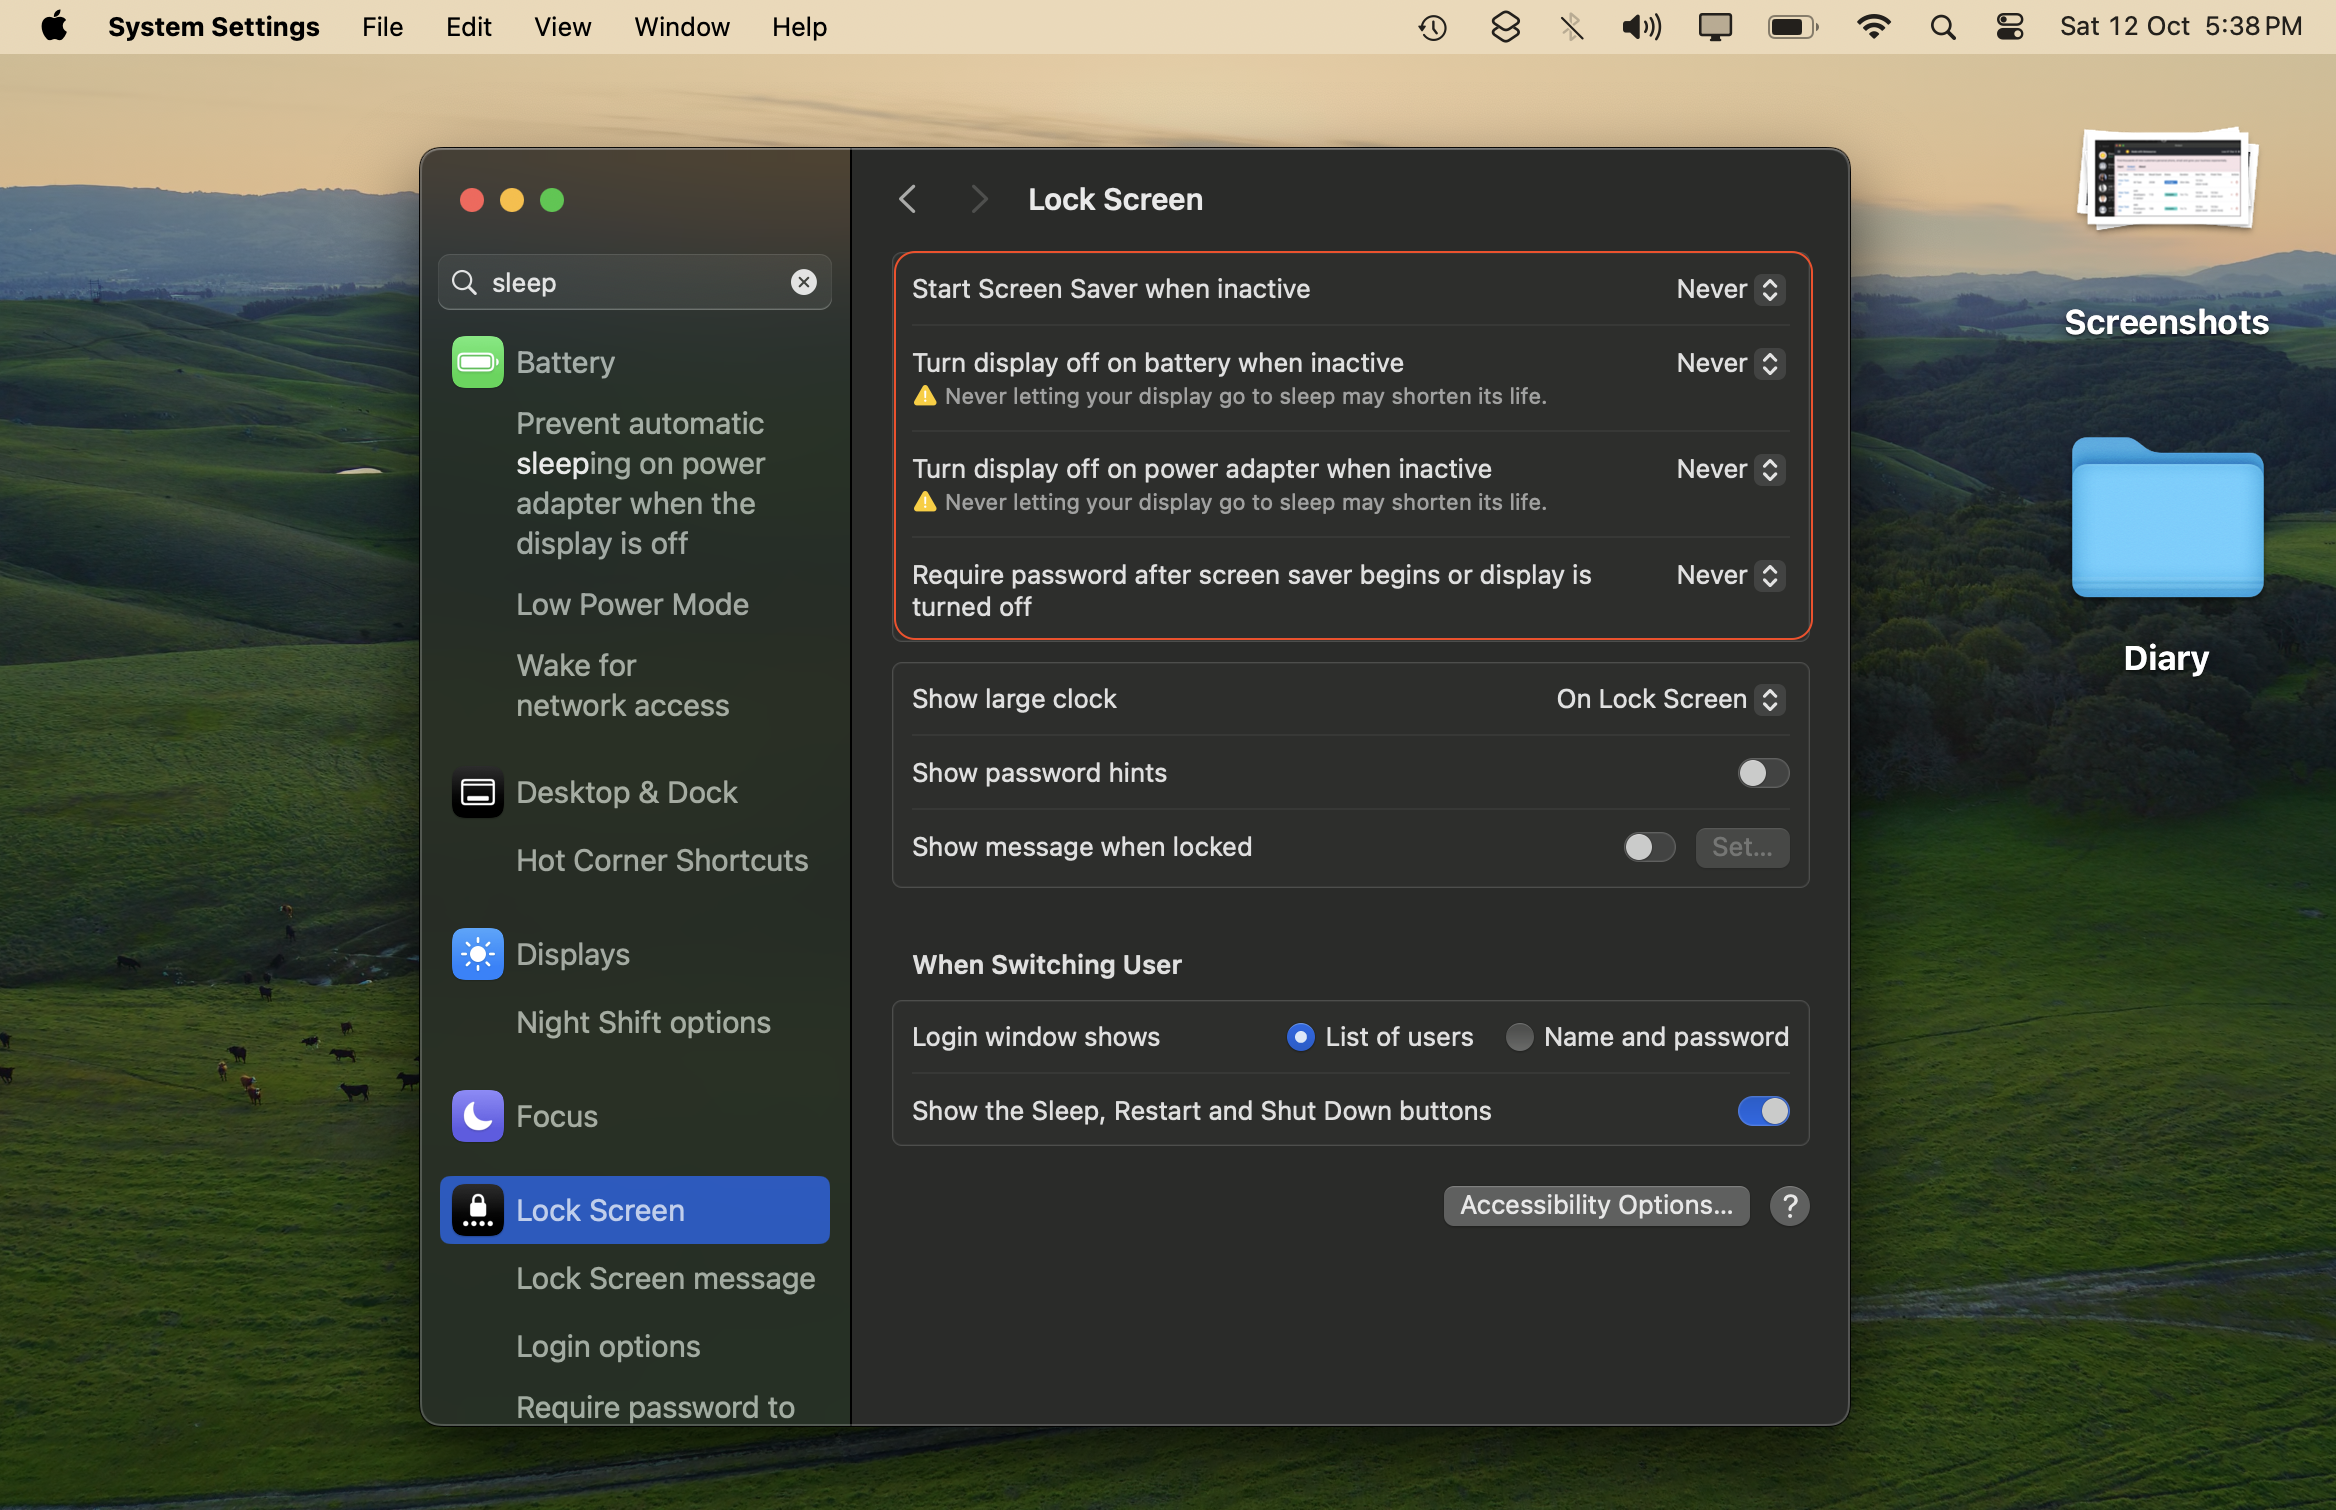
-
On Mac:
Open Settings > Lock Screen, then set the following settings to "Never."
-
Linux?:
You're awesome at computers, so go ahead and figure it out! ;)
- Ensure you maintain a stable Internet connection, as switching connections will cause currently running tasks to fail.
❓ On macOS, Google Chrome is not opening when I run the app. What should I do?
This is a known issue specific to macOS. We expect it to be fixed by December 2026.
To resolve the problem:
- Close this app
- or restart your computer.
After that, Google Chrome will launch normally.
❓ Can you tell me about the Done For You service?
If you need full country data—say all "Restaurants in US" (29.5K cities)—it can take 10–12 days on your system.
With our Done For You service, we refine your search queries for higher-converting customers and deliver in 1-2 days.
Pricing: ~$60 for a single category in USA (300K+ results). $200 off on your first purchase of $250+. So if your project costs $250, you only pay $50!
Why use this service?
- Saves extraction time (10-12 days reduced to 1-2 days).
- We help refine queries to target relevant businesses.
- 90-day refund guarantee.
Email us and let us know what you sell and who you're looking for.
❓ Do you do custom big data projects?
Yes, we do big data projects for businesses.
- We work with data daily and have built tools like this product.
- 90-day refund guarantee.
You can email us here to inquire about your project.
❓ There is a feature in another app that I need, and this product doesn't have it.
Let us know! We consider feature requests and can suggest alternatives if we can't implement them.
❓ Questions? We have answers.
Reach out anytime. We will solve your query within 1 working day.


Feel free to message us. We typically reply within 1 working day.
❓ Love It? Star It ⭐!
We've poured thousands of hours into building this—so you can find customers and grow your business.
If this tool has been helpful, please give us a star ⭐ on GitHub. You have a big heart ❤️—it takes just one click, and you'll be doing us a great favor.

Made with ❤️ using Botasaurus Web Scraping Framework
Not in your Budget?
If you are a student or a person just starting your business, and the Pro Version is not in your budget, you can let us know via WhatsApp or Email and we will provide you with the Pro Version. Don't hesitate—it will take 5 minutes to WhatsApp/Email, and it will make us happy 😊 to help you.