Deployment Guide
Now is a happy time for developers, similar to the excitement I felt as a child waiting for summer holidays. It's deployment time!
If you have successfully completed your SaaS, congratulations on achieving this significant milestone. As someone who has built omkar.cloud, I understand the effort required to code your startup. However, be prepared to invest twice the amount of effort into marketing your SaaS.
What we will do
We will guide you through the process of deploying your website from running locally on your localhost to the Cloud.
The website will be a full stack website with frontend and backend with a SQLite database served over SSL.
We will also make a CI Pipeline to deploy code on commit to master Branch.
To accomplish this, we will perform the following steps:
- Replace project name, domain name and logo.
- Get the Brevo API key.
- Set up Google Cloud Platform (GCP) for deployment.
- Create a GitHub repository for your application.
- Configure GitHub secrets for Github Actions.
- Push the code to the GitHub repository.
This tutorial involves several technologies such as Kubernetes and GitHub Actions, Don't worry if you don't grasp every aspect of how Deployment works; you only need to follow the steps provided, and in no time your website will be successfully deployed for the world to see..
What you need
To successfully complete this tutorial, you will need:
- A GCP Account
- A Domain Name
- A Good Logo
- A Good Name
If you haven't purchased a domain name yet, I recommend using Namecheap as I have personally used them for omkar.cloud and had a good experience. Just stay away from GoDaddy as they have been known to use Shady Marketing Practices, See this Video.
To create a Google Cloud Platform (GCP) account, you will need to provide a credit or debit card. Once your account is created, you will receive a $300 credit that can be used to pay for GCP services for three months.
Replace
Now we will replace project name, domain name and logo.
Replace Support Emails
- Open the project in Vs Code
- Search and Replace "no-reply@yourdomain.com" with email you want to use when sending Email Verification and Support Email.
- Search and Replace "support@yourdomain.com" with email you want to use when sending Welcome Emails and for general contact us queries.

Replace Name
- Open the project in Vs Code
- Search and Replace "yourname" with your Name

Replace Company Name
- Open the project in Vs Code
- Search and Replace "yourcompanyname" with your Company Name

Replace Domain Name
- Open the project in Vs Code
- Search and Replace "yourdomain.com" with your domain you have purchased "name"

Generate Brevo Api Key
- Create an Account on Brevo
- Visit https://app.brevo.com/settings/keys/api
- Click on "Generate a new API key" button and generate an API key.
- Keep the API key in some secure place as of now, we will use it later when deploying to GCP.
Setup GCP
Now, we will set up the GCP Cluster. I will tell you when there you need to change some variables. Please only modify the variables I tell you and keep the other variables untouched, such as the cluster name and zone etc.
As they are hardcoded and will be used multiple times in the commands of this Tutorial. Once you have become familiar with the tutorial, feel free to rename them according to your preference.
Enable the following APIs for your Project to create a GKE cluster:
- Artifact Registry: https://console.cloud.google.com/marketplace/product/google/artifactregistry.googleapis.com
- Kubernetes Engine: https://console.cloud.google.com/marketplace/product/google/container.googleapis.com
- Compute Engine: https://console.cloud.google.com/marketplace/product/google-cloud-platform/compute-engine

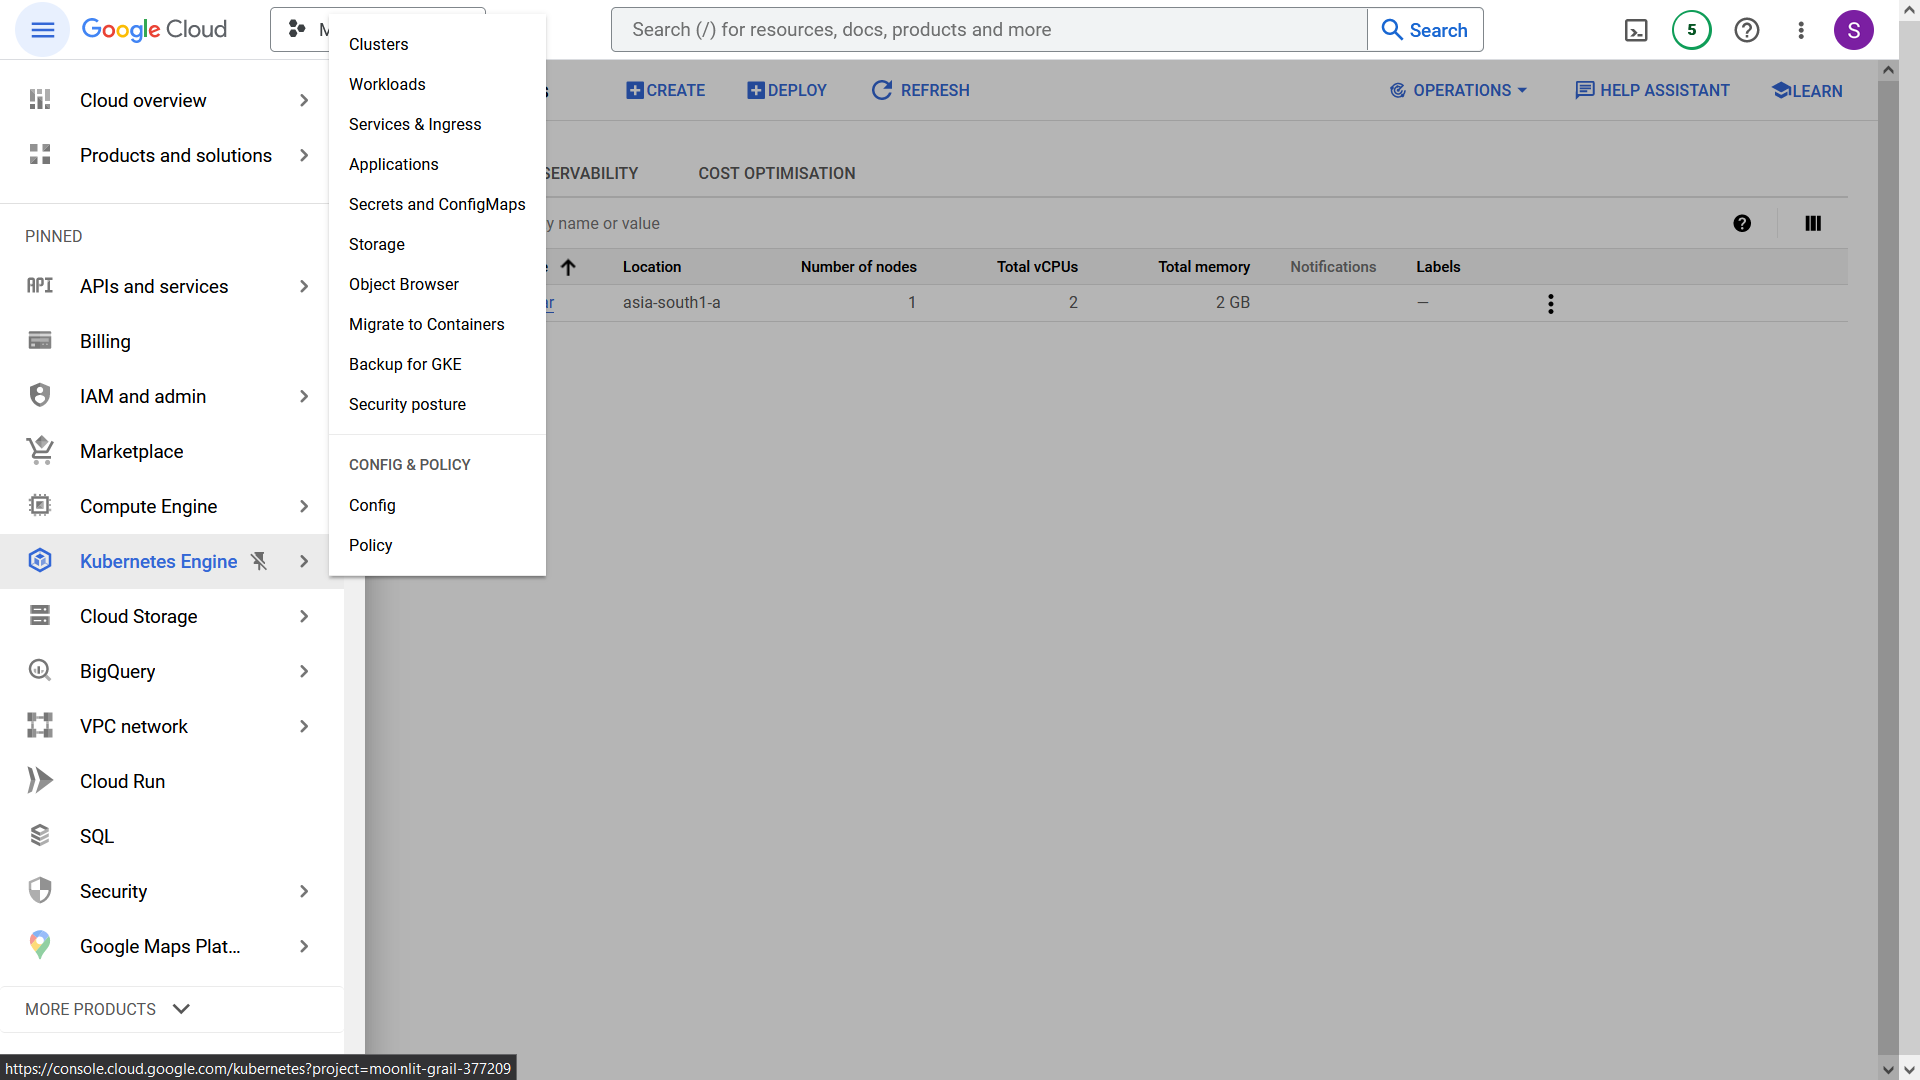
- In the sidebar, click on the "Kubernetes Engine" button.
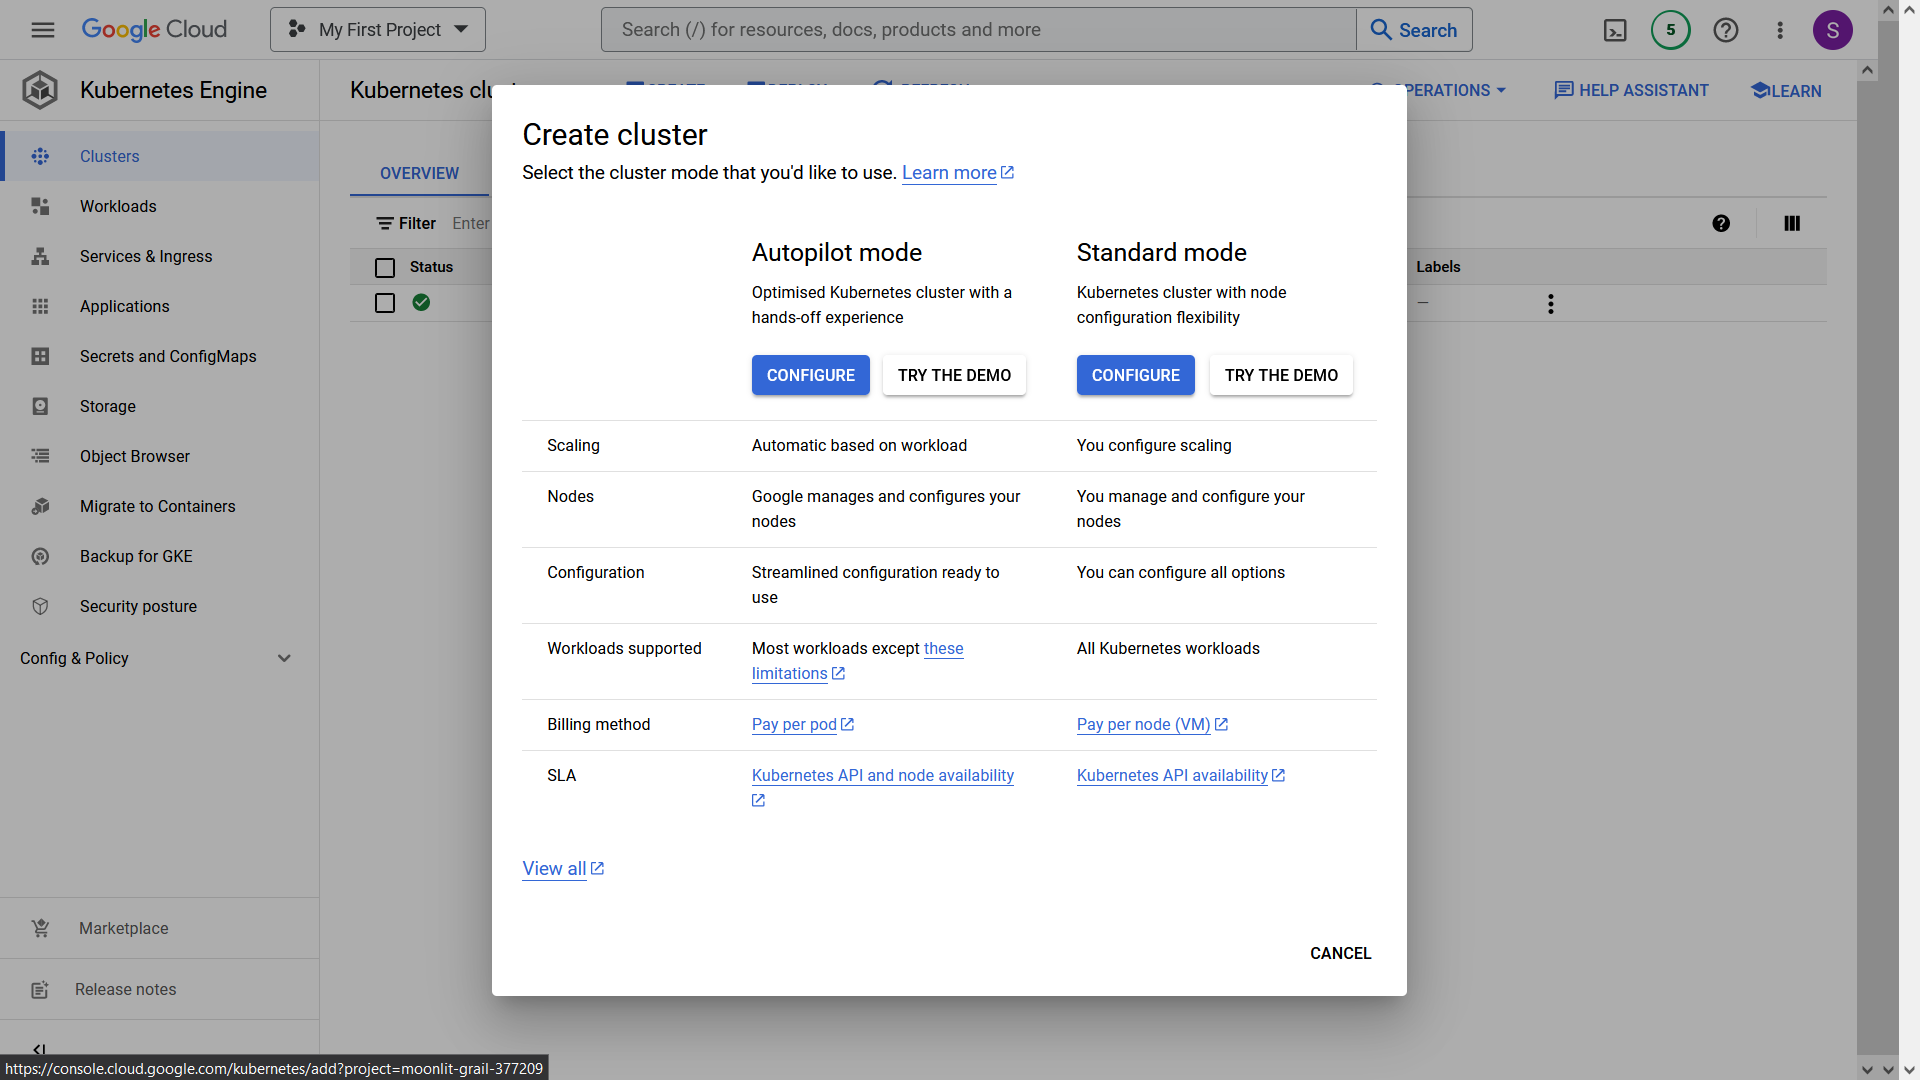
- Click on the "Create" button to create a new cluster. Configure the "Standard Mode" Cluster, as it is more cost-effective.
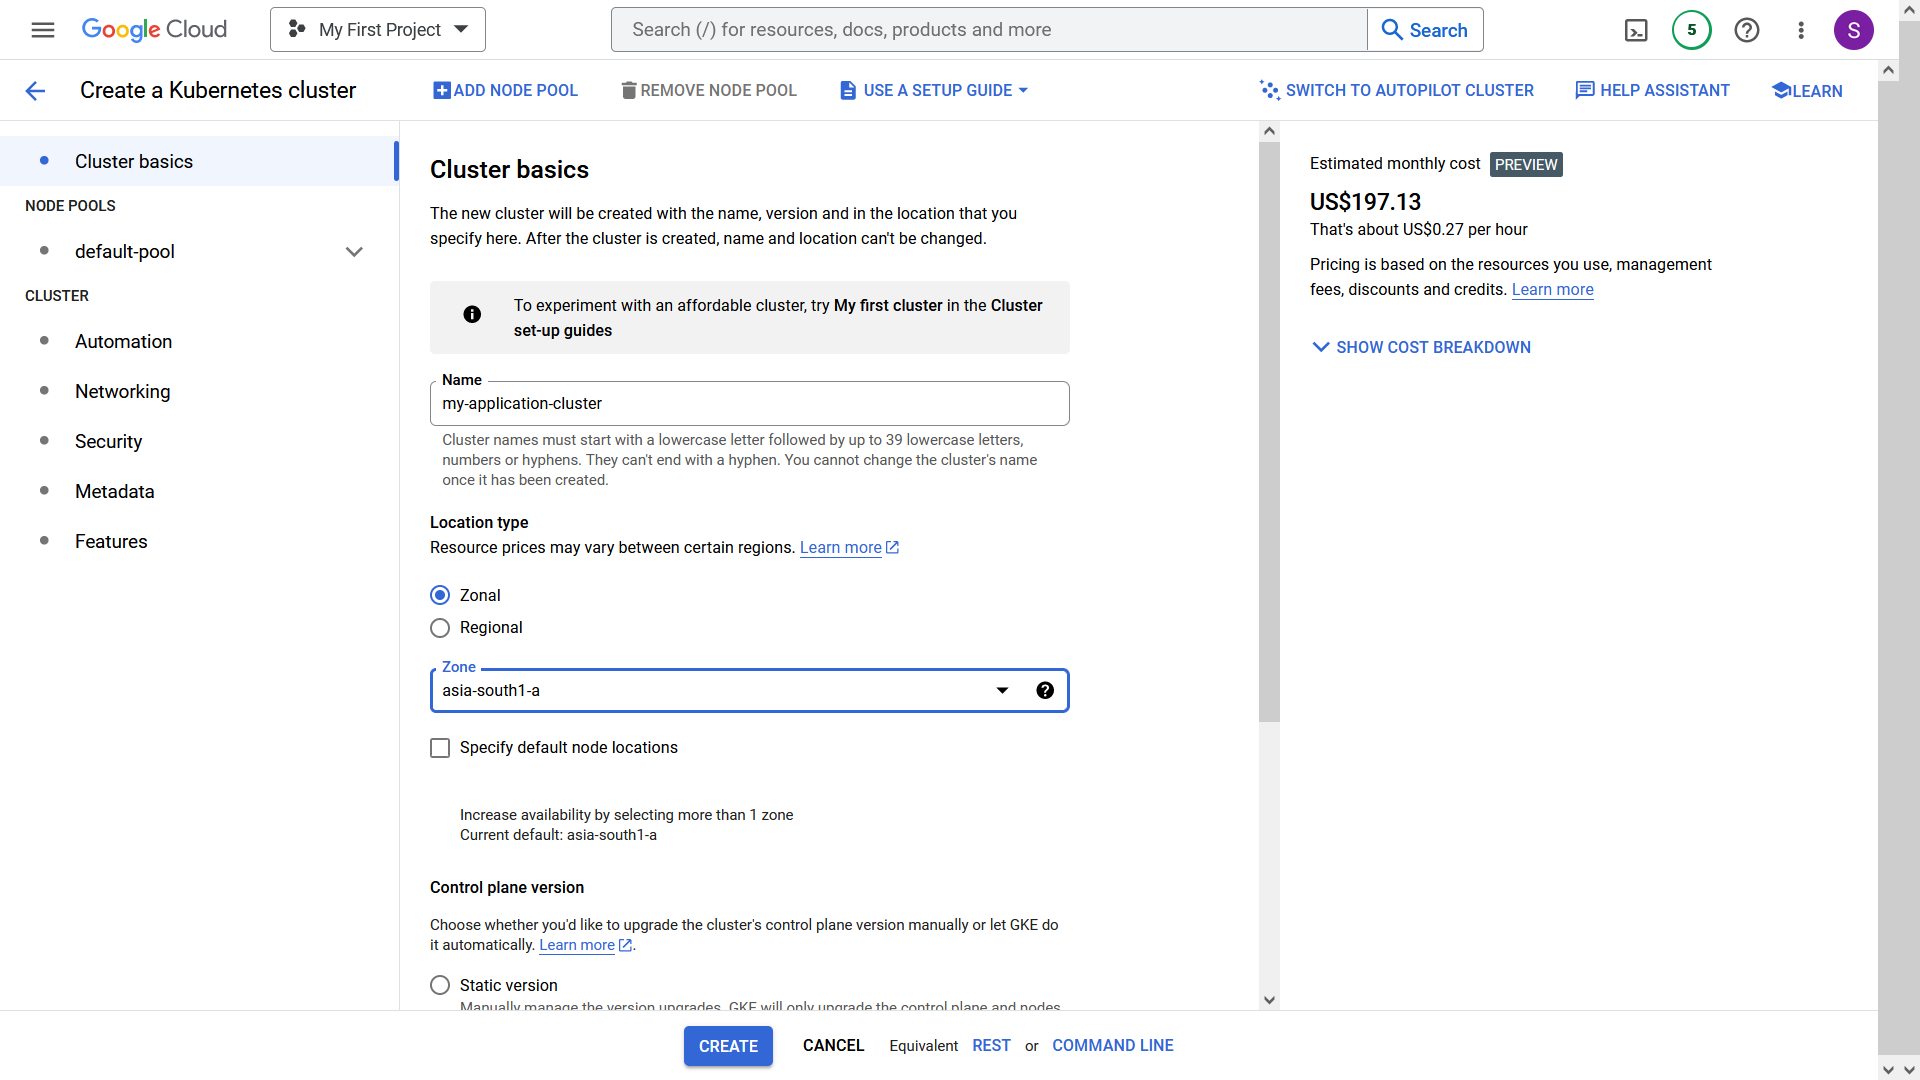
- Provide the following details for the cluster:
Cluster Name: my-application-cluster
Location Type: zonal
Zone: asia-south1-a
- In the sidebar, select "default-pool" and change the number of nodes to 1 instead of 3 to save costs.
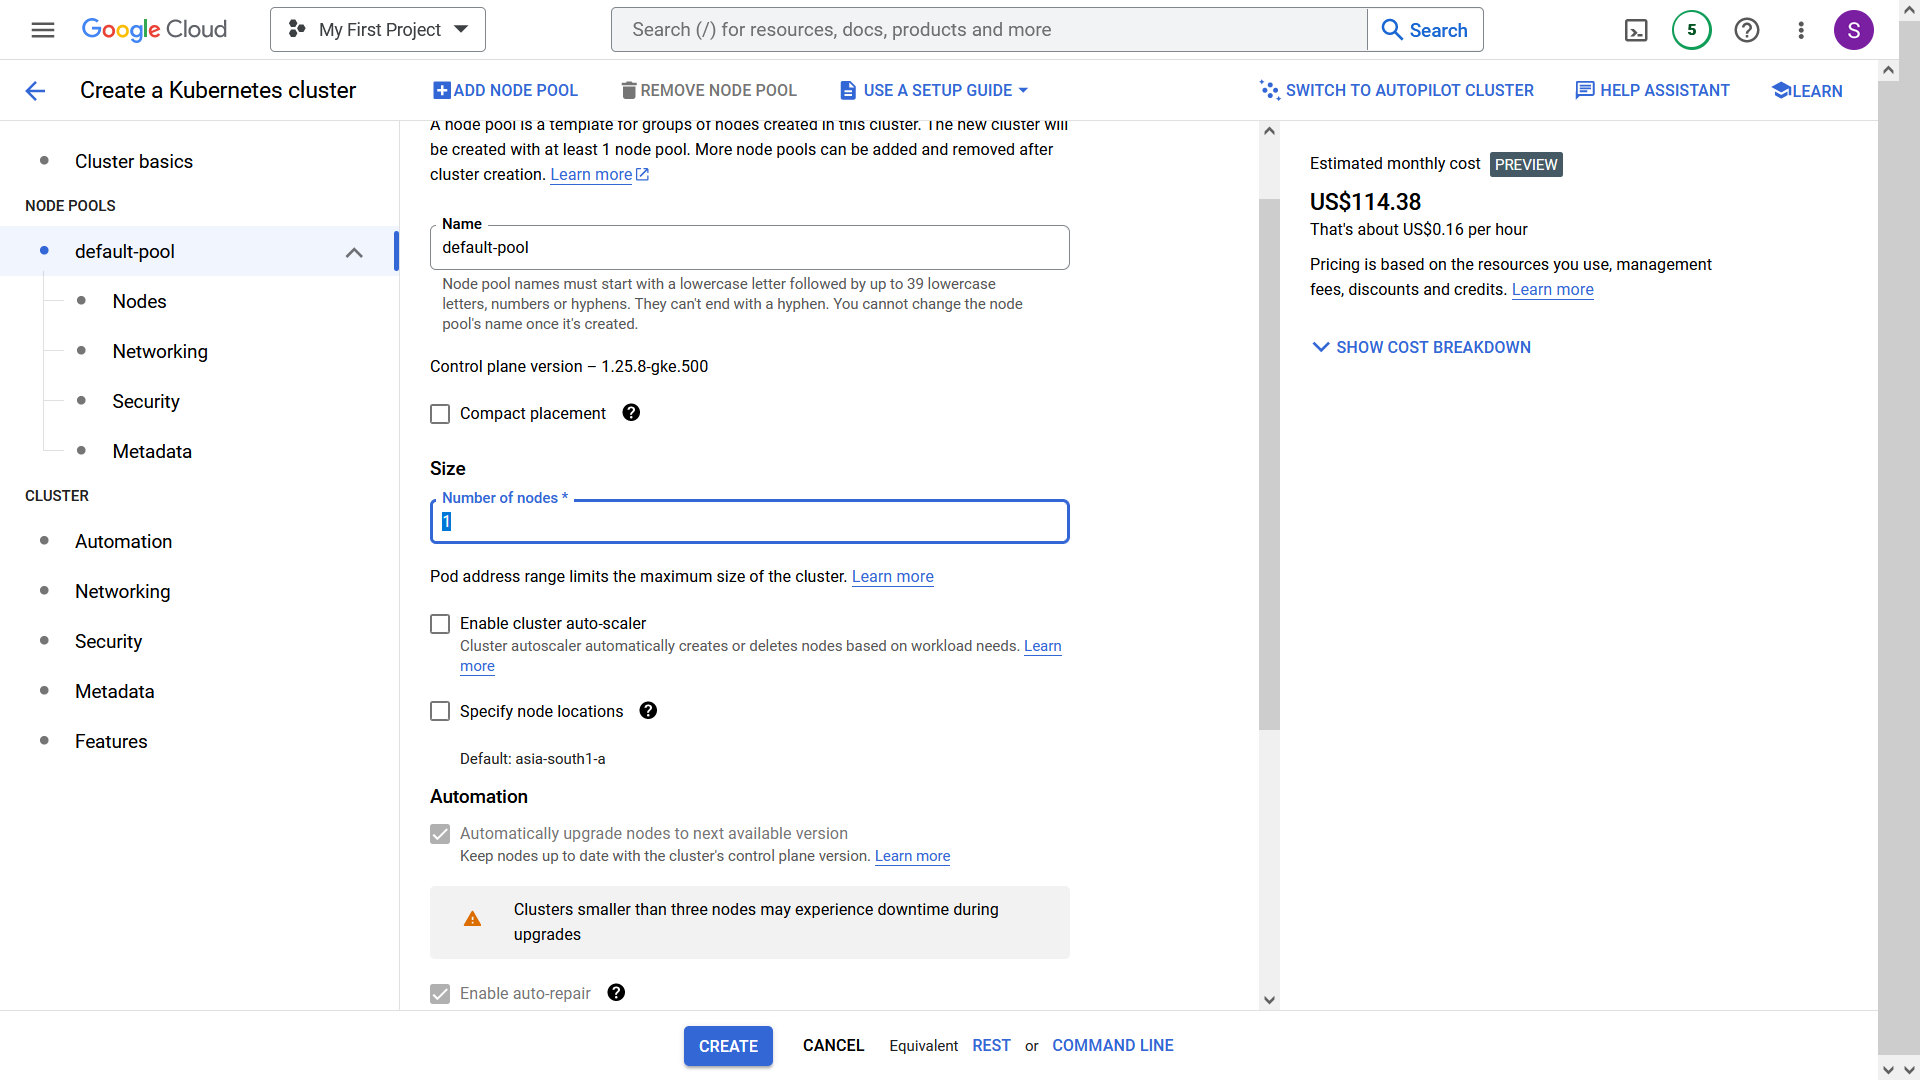
- In the sidebar, select "Nodes" and use the following settings to save costs:
Machine Type: e2-small
Boot Disk Size: 20 GB
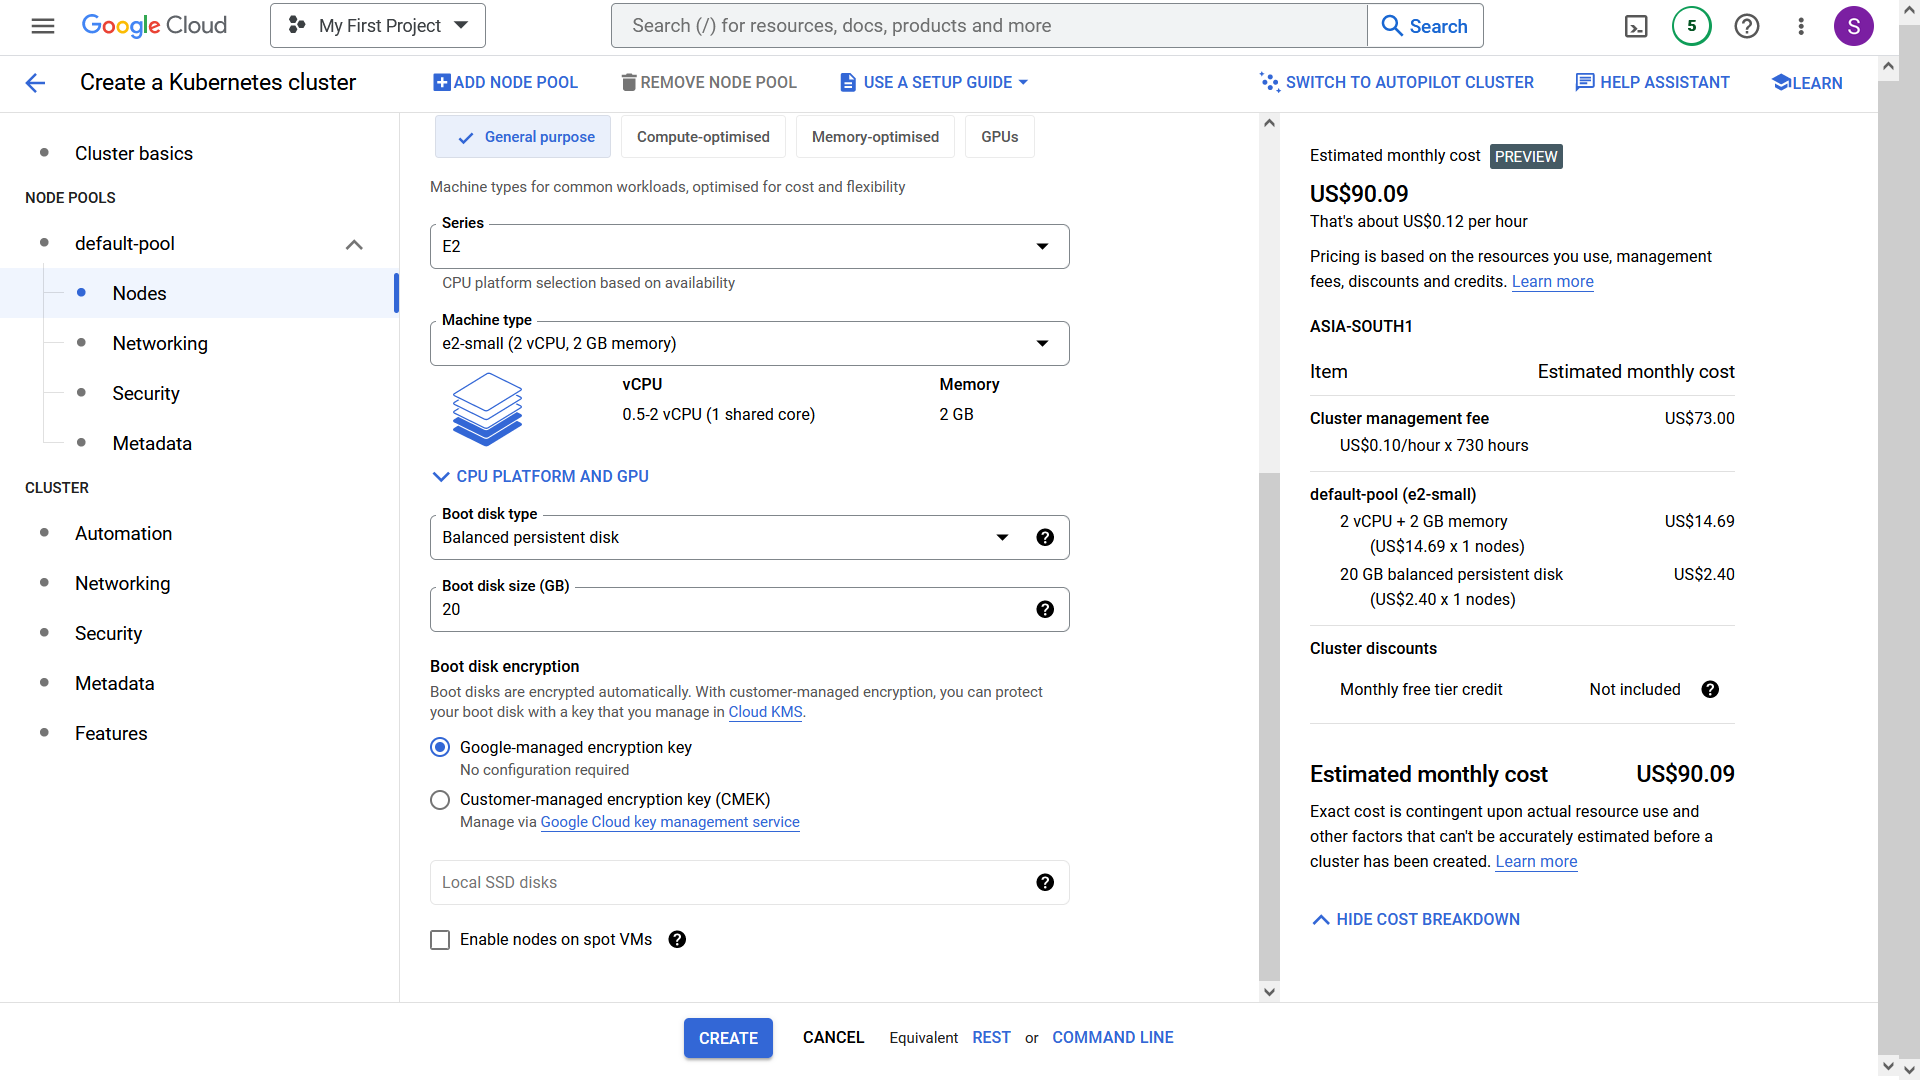
The estimated cost should be around \$90. If this is your first cluster in GCP, the cost will be charged around \$27 after 1 Month discounting \$73 discount for the first cluster.
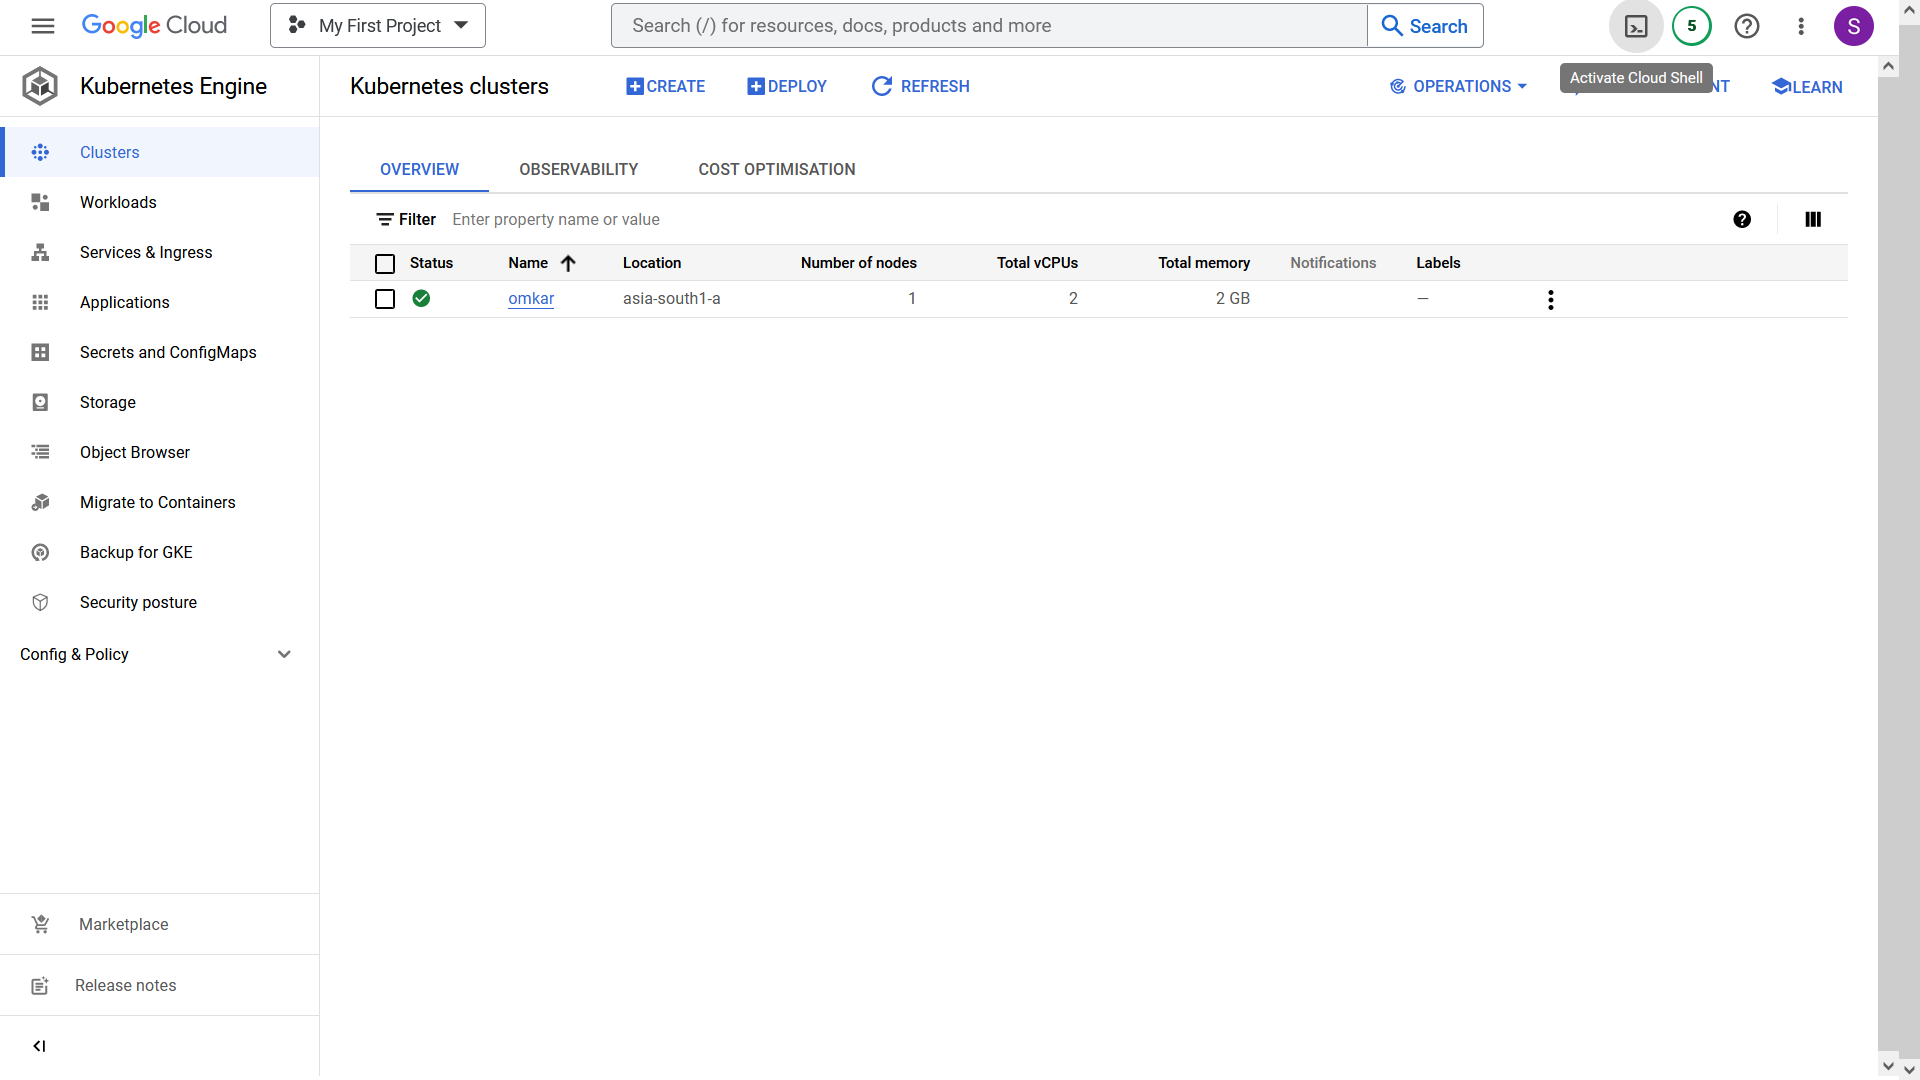
Click the "Create" button, and the cluster will be created in approximately 5-6 minutes.
Open the GCP Shell by clicking the shell icon in the top-right corner.
- Authenticate in your cluster by running the following command. Replace "clear-world-31478" with your GCP project name.
gcloud container clusters get-credentials my-application-cluster --zone asia-south1-a --project clear-world-31478
- Create an IP address by running the following command:
gcloud compute addresses create my-application-cluster-ip --region asia-south1
- Note the created IP address by running the command:
gcloud compute addresses describe my-application-cluster-ip --region asia-south1
- In your Domain Name Service (DNS) provider, such as Namecheap, add the following records. Replace "31.91.11.253" with the IP address obtained in the previous step.
A @ 31.91.11.253
A www 31.91.11.253
Ensure that the TTL (Time to Live) is set to the lowest possible value, such as 1 minute, to allow for fast DNS propagation.
If you are using Namecheap, select the 1-minute TTL option, which will take 1 minute to propogate DNS Changes.
- Execute the following commands to install
ingress-nginxandcert-managerwhich are needed do load balancing get the SSL certificate. In the following commands, replace 31.91.11.253 with the IP address you created earlier.
helm repo add ingress-nginx https://kubernetes.github.io/ingress-nginx
helm upgrade --install ingress-nginx-chart ingress-nginx/ingress-nginx --set controller.service.loadBalancerIP=31.91.11.253 --set controller.service.externalTrafficPolicy=Local

helm repo add jetstack https://charts.jetstack.io
helm repo update
kubectl apply -f https://github.com/cert-manager/cert-manager/releases/download/v1.8.0/cert-manager.crds.yaml
helm install cert-manager jetstack/cert-manager --namespace cert-manager --create-namespace --version v1.8.0
Create the Google OAuth Client ID by visiting "https://console.cloud.google.com/apis/credentials" and clicking the "CREATE CREDENTIALS" button.
Execute the following commands to create Secrets. In the following command,
- Replace SECRET_ACCESS_TOKEN with a Secret. You can use this tool to generate a Secure Secret.
- Replace SECRET_REFRESH_TOKEN with a Secret. You can use this tool to generate a Secure Secret.
- Replace BACKEND_SECRET with a Secret. You can use this tool to generate a Secure Secret.
- Replace OAUTH_CLIENT_ID with OAUTH Key Generated in previous Step.
- Replace BREVO_API_KEY with Brevo Api Key Generated in previous "Generate Brevo Api Key" Section.
kubectl create secret generic secrets --from-literal=SECRET_ACCESS_TOKEN='SECRET_ACCESS_TOKEN' --from-literal=SECRET_REFRESH_TOKEN='SECRET_REFRESH_TOKEN' --from-literal=BACKEND_SECRET='BACKEND_SECRET' --from-literal=OAUTH_CLIENT_ID='OAUTH_CLIENT_ID' --from-literal=BREVO_API_KEY='BREVO_API_KEY'
As, an example once you have made the changes the command will look like code shown below:
kubectl create secret generic secrets --from-literal=SECRET_ACCESS_TOKEN='apu&!ve2)^&y1ds7eleofdofp%p*ofdtnijs-9nr(!be_=ny@z' --from-literal=SECRET_REFRESH_TOKEN='kwkniv#a1p+yo#2b@(%_t=obuyoatid6s(!(j5z1ki5*qocsz2' --from-literal=BACKEND_SECRET='_)mg(h7w1yia9sm7el$ayogjz_)099eayu^l5$nmx7d7*@3kw-' --from-literal=OAUTH_CLIENT_ID='9cvp82hf02b4t3frk-tj4n30rb45e37u4k1c9o8.apps.googleusercontent.com' --from-literal=BREVO_API_KEY='xkeysib-6c2d291b6c9c72baa3a6a04c6dbda545229dd7b7cb9c2e2885c5a4a61acb7c21e1b0-Gac9W5cXdX6141lTSkK2'
Github Setup
This is the final step where we will configure GitHub Secrets for our deployment workflow and push the code.
Create a Github Repository
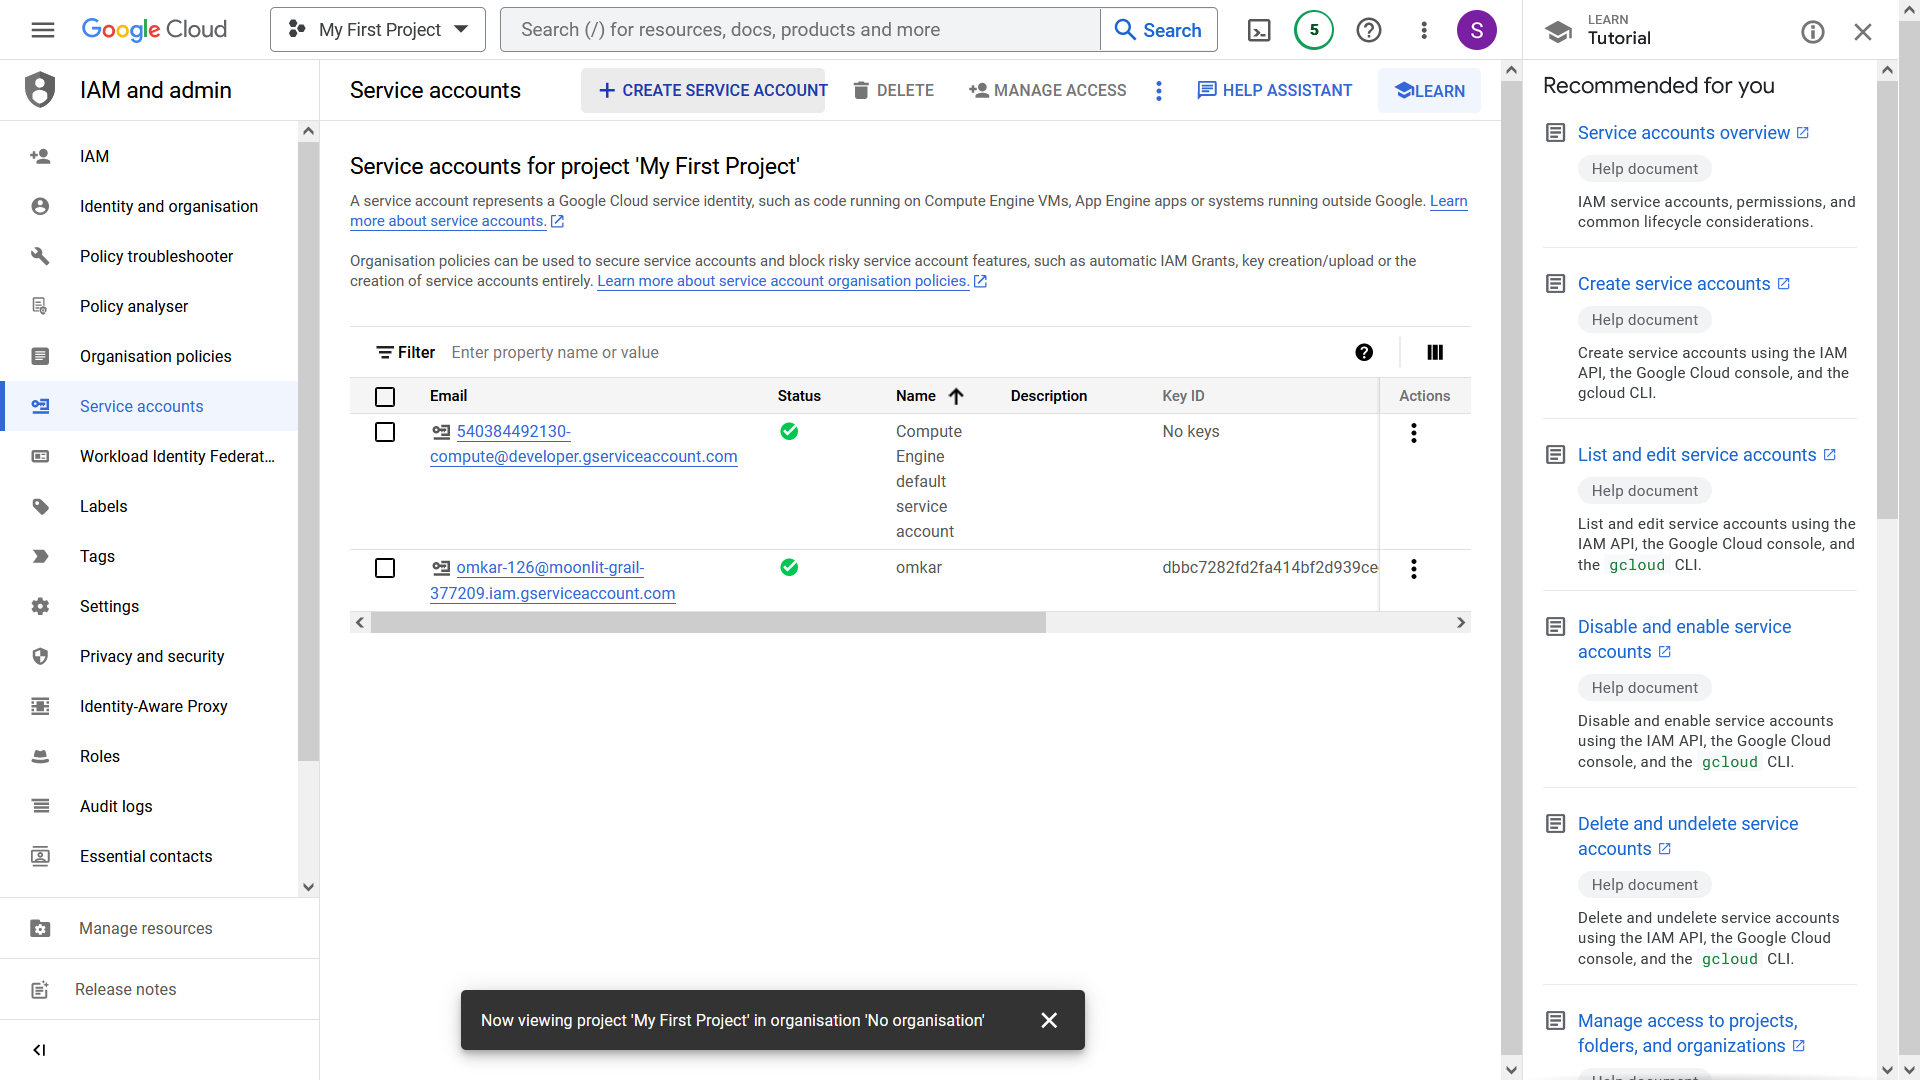
Create a service account JSON file by visiting https://console.cloud.google.com/iam-admin/serviceaccounts. The service account will have full access to all resources (Owner) in Google Cloud (GCP). Keep the JSON file secure, as it will be required for deploying to Google Kubernetes Engine (GKE). Save the file as account.json.
- Create Github secrets which are used in Workflow by going to your Repository GitHub Settings > Secrets > Actions and creating three secrets with the following names and values:
GKE_PROJECT="clear-world-31478"
GKE_EMAIL="owner-709@project.iam.gserviceaccount.com"
GKE_KEY="JodHRWCzov...L3D3dy5n"
Here,
GKE_PROJECTis your project name.GKE_EMAILis email located in theaccount.jsonfile.GKE_KEYis your service account encoded as base64. You can obtain it by runningcat account.json | base64.
- Now, push the code to the repository. Once pushed, the site will be ready 4-5 minutes after the GitHub Action is completed. It takes 4-5 minutes as it will obtain SSL certificates etc.
You can view status of your actions by visiting Action Tabs of your Github Repository.
After Action is Completed, you can access the website at your domain.
Delete Resources
Google Cloud has access to your card details, allowing them to automatically charge your debit card.
Google Cloud know your Card Details hence Google could automatically charge your Debit Card. Many people carelessly forgot to delete Resources thinking they have $300 in GCP Credit only to see an unexpected charge 3 Months Later once their GCP Credits are exhausted.
So please exercise caution and delete any GCP resources that are not in use by following these steps:
- Delete the created IP address by running the following command. In this command, replace "clear-world-31478" with your GCP project name.
gcloud compute addresses delete my-application-cluster-ip --region asia-south1 --project clear-world-31478
- Use the GKE Dashboard to delete the cluster using the graphical user interface.